Master Broderie perse by machine in just a few simple steps. Contemporary fusing methods and machine stitching make a modern interpretation of Broderie perse much easier than you think.
It’s possible you’re already using the technique, without even realising it!
Broderie perse allows you to take a traditional or contemporary angle on an ancient appliqué technique.
[Disclosure: Please expect that some (not all) hyperlinks are affiliate links, which means I may receive a small commission (at no further expense to you) if you click through and purchase the product. This is one of the ways I support myself and continue to bring you free content and information. The decision about whether to buy a product or not is completely up to you.]
How to Master Broderie Perse by Machine
[Note: This article and video is the 2020 updated edition of the original from 2013.]
Although the technique of Broderie perse reaches back several centuries, its origins in embroidery and appliqué go much deeper.
People have embellished cloth with stitch for thousands of years, with each generation exploring innovative approaches to their designs. You only need to look around at all the creative textile art being made in the 21st century and you’ll realize these methods continue to thrive.
Regardless of your interpretation—traditional or contemporary—Broderie perse has a place in your machine quilting, appliqué, and embroidery knowledge base.
To master Broderie perse by machine, it’s interesting to know a little of the story behind it.
The story behind Broderie perse
Trade on the Silk Road and the rise of embroidery
As early as the 30 BC, produce, pottery, leather, fabric, and precious jewels were being carried and traded along what is now known as the ‘Silk Road’.
With business across China, India, Persia (modern-day Iran), and Italy increasing over the centuries, silk became a popular and highly-valued item.

During his explorations in the 13th century, Marco Polo collected intricate embroideries from India, Persia, and China, helping to spread interest in both fabric and embellishment techniques.
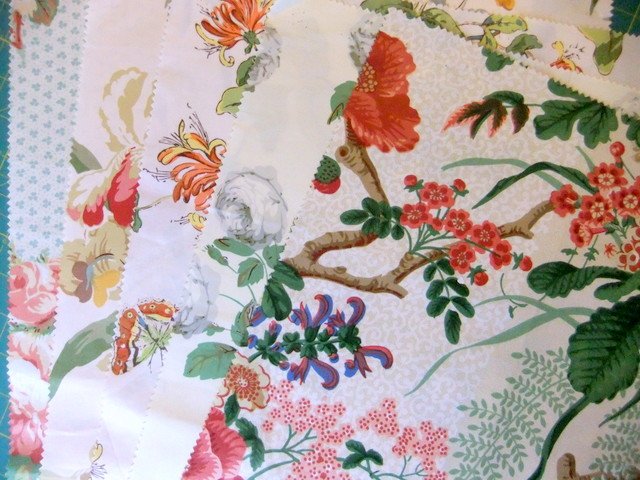
This 17th-century fragment of Gujarati embroidery (below), highlights the similarities with contemporary designs, so it’s easy to see how the concept was used to design printed fabric.
These fabrics, often with stylised or oriental designs, became very popular. However, they were expensive, and the high cost eventually led to the development of the technique we call Broderie perse.
![Gujarati 17th century Bed Cover or Wall Hanging–fragment detail [Met Museum – Public domain]](https://threadsketchinginaction.com/wp-content/uploads/2020/09/Gujarati-17th-century-Bed-Cover-or-Wall-Hanging–fragment-detail-Met-Museum-–-Public-domain.jpg)
Is Broderie perse embroidery or appliqué?
Broderie perse, or Persian embroidery, is not actually embroidery but appliqué that emulates designs found on embroidered fabric traded centuries earlier.
British drawing rooms during the 1700s and 1800s were buzzing with excitement! Women were captivated by the exotic range of chintz fabrics arriving by sea and land from India and China, but the cost was prohibitive for many.
![Chintz dress (robe_à_l'anglaise)-c.1770-1790 [Public Domain]](https://threadsketchinginaction.com/wp-content/uploads/2020/09/Chintz-dress-robe_a_langlaise-c.1770-1790-Public-Domain.jpg)
Only people of high status could afford clothing made from this beautiful, glazed fabric known as chintz.
Although chintz was expensive, these creative women devised clever ways to use the fabric to make or embellish larger works—quilts, bed covers, cushions, and other household items.
No doubt, they also sought to impress their friends and acquaintances! Position and status in society were important to the British middle and upper classes, so they took advantage of beautifying their homes and showing off their needlework skills.
Who was to know when an eligible bachelor would be captivated by a refined young lady’s stitching or musical skills?
However, it wasn’t only the middle and upper classes who took up this pastime—it’s a technique that anyone, of any social status, could employ.
Although appliqué techniques have evolved in myriad ways over the centuries, the fundamentals of the technique have changed little.
New fabric ranges develop—perfect for Broderie perse
English and French fabric manufacturers, recognizing the popularity of the exotic ‘Persian’ fabrics and eager to build their personal fortunes, secured a ban on the imports and began creating their own fabric ranges.
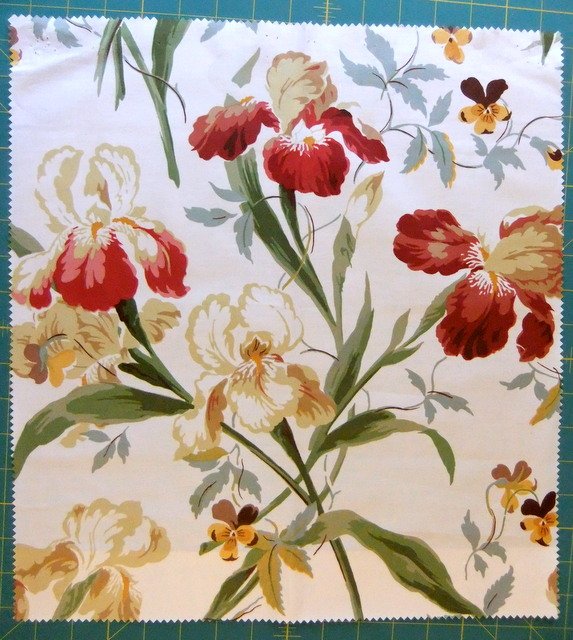
The trade war inevitably affected prices, pushing them higher, serving only to encourage needleworkers to use the fabrics wisely by cutting select motifs from the chintz to stitch to a cotton background.
In this way, stunningly beautiful works were produced, without going to great expense.
Rather than working intricate embroidery, motifs were carefully cut from the chintz and stitched to matching background fabric.
The women then used needle turn appliqué to secure the motifs, turning the edges under before stitching with invisible slip stitching.
Occasionally, they worked tiny, hand-worked blanket stitches, which eliminated the need to needle turn the fabric. This work was the forerunner of today’s raw-edge appliqué.
In the 18th and 19th centuries, Broderie perse appliqué spread to the Americas, where it developed rapidly, and became hugely popular.
In the 21st century, it is just as popular. The range of fabrics available has burgeoned, giving quilters and patchworkers an immense choice from which to select.
Broderie perse develops a medallion style
There are many early examples of Broderie perse from America, often in the form of whole-cloth medallion quilts, and sometimes with a pieced border.
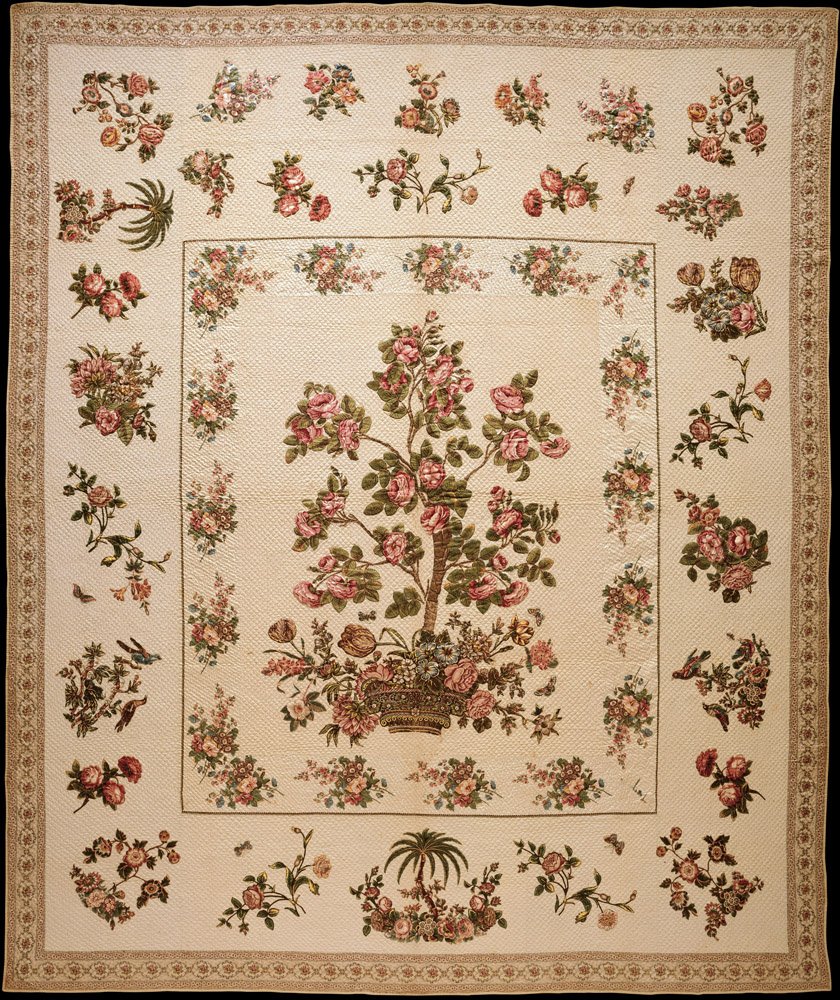
This mid-1800s southern American chintz appliquéd quilt—The Tree of Life—made by Mary Malvina Cook Taft (above) emulates designs found on earlier Indian bed hangings.
How to master Broderie perse
Work by hand or machine
Traditional Broderie perse was, as I mentioned, worked by hand, carefully turning the edges of the appliqué and stitching in position with tiny, invisible slip stitching.
Hand stitching is a relaxing and satisfying pastime. However, the reality is that many contemporary quilters and appliqué artists (for want of a better term) want to recreate the traditional look, but simply don’t have the time!
And you needn’t feel restricted to traditional designs, for this technique applies just as well to contemporary designs as traditional.
Master Broderie perse by machine—the video
A quick and effective way to master Broderie perse by machine is to use your machine and a raw-edge appliqué technique.
Indeed, the finished product will have a slightly different appearance to hand-worked designs, yet it is just as effective—and much, much faster!
Whether you choose to use traditional motifs, e.g. flowers such as roses, or more contemporary fabric designs, the raw-edge appliqué technique is quick, easy, and effective.
Master Broderie perse by machine—7 simple steps
What you need — Tools and Supplies
- Appliqué fabric—for a traditional look, use cotton chintz featuring clear motifs. Larger motifs are more manageable than small, particularly if you’ve not tried it before. Chintz is the traditional choice for Broderie perse.
- Background fabric on which to arrange your design. Select a colour that closely matches the original background colour of the fabric, or alternatively, a contrasting piece enhancing the shades of your applqiué.
- Lightweight fusible web or fabric glue, if you prefer. My favourites include:
- Vliesofix paper-backed fusible web.
- HeatnBond Lite fusible web.
- Wonder Under paper-backed fusible web.
- MistyFuse fusible web (not paper-backed).
- Roxanne’s Glue Baste-it fabric glue.
- Light or medium weight, tear-away stabilizer.
- Thread that blends with the different colors of your motifs.
- A sewing machine fitted with the regular zigzag (embroidery) foot. This technique does not require free motion stitching.
- Micro-tip spring-loaded scissors, or sharp embroidery scissors for fussy cutting the motifs.
- General sewing supplies.
1 – Choosing the top and background fabric
Traditionally, motifs were appliquéd directly onto background fabric which matched the colour of the original chintz. By doing this, the appliquéd motifs appear to merge with the background once stitched in position.
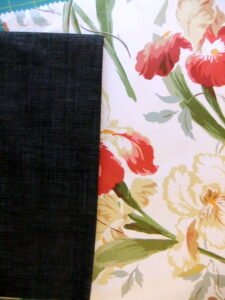
The motifs were, I speculate, held in place either with the stitcher’s spare hand, pins, or perhaps a few tacking stitches. At other times some form of paste was used to fuse the pieces to a stretched background, allowed to dry, then stitched.
Today, of course, we have a wonderful array of fusible web and fabric glues at our disposal.
Working on matching background fabric allows great freedom in your motif selection and results in a finished work that looks, from a distance, like a whole-cloth piece.
However, you can also select a contrasting background on which to display the motifs, giving the work a contemporary feel.
2 – Selecting motifs for Broderie perse
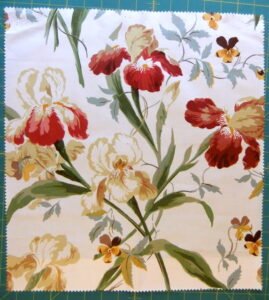
Begin by studying your fabric and selecting the motifs you want to use.
This piece of chintz has bold, timeless motifs, perfect for my design. Although it’s an off-cut from an upholstery supply, and therefore not large, it has enough usable images for my project.
3 – Applying the fusible web
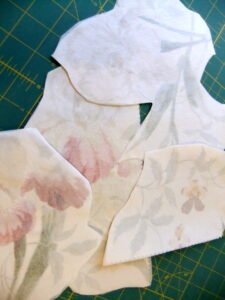
Apply fusible web to the back of the appliqué fabric, making sure you include all the motifs you think you may want to use.
This is best done before cutting into the fabric. The paper backing helps stabilize the fabric, making accurate cutting a much easier task.
After applying the fusible web, cut loosely around each motif, at least a 1/4″ away from the edge of the motifs, if possible.
4 – Fussy cutting the Broderie perse motifs
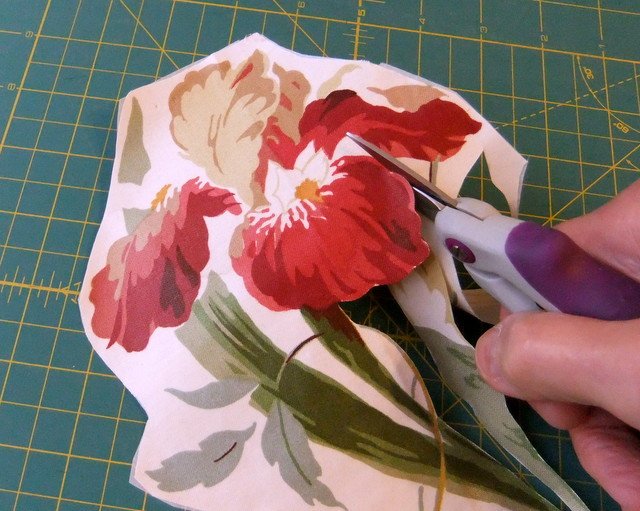
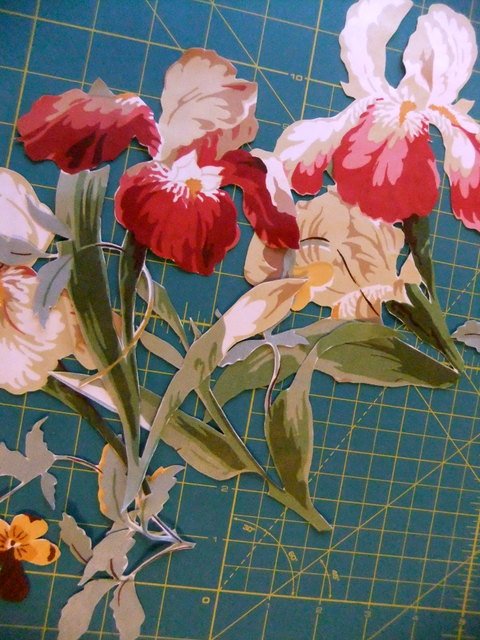
Using a pair of sharp scissors, carefully cut around the outside edge of each motif. Spring-loaded, micro-tip scissors or small, sharp embroidery scissors are both excellent for fussy cutting.
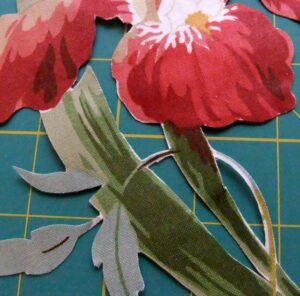
Cut as many motifs as you can from the fabric. The more you have, the easier it will be to create a fabulous design. It doesn’t matter if you don’t end up using them all—they can always be put aside for another project.
If you’re placing the motifs on a dark background fabric, cut away any sections that are not part of the motif.
5 – Arranging your design on the background fabric
While the paper backing of the fusible web is still attached, plan your design by arranging (and rearranging) your motifs until you have a pleasing layout.
Leave the fusible web paper backing attached during this process as it protects delicate pieces from damage during handling.
6 – Fusing the motifs in position
When you’re happy with your design, remove the paper backing from the fusible web and make any final adjustments.
Making sure everything is just right, fuse the motifs in place using a medium-hot, dry iron.
To prevent the motifs from moving, I like to push pins vertically into the surface, later removing them as I press.
Use a thick, heat-resistant pad of fabric underneath to keep your design flat and allow for inserting the pins. Small projects can be assembled on an ironing board, and for larger projects, I use cotton bed sheets, folded to create a thick, flat pad.
7 – Stitching the Broderie perse design
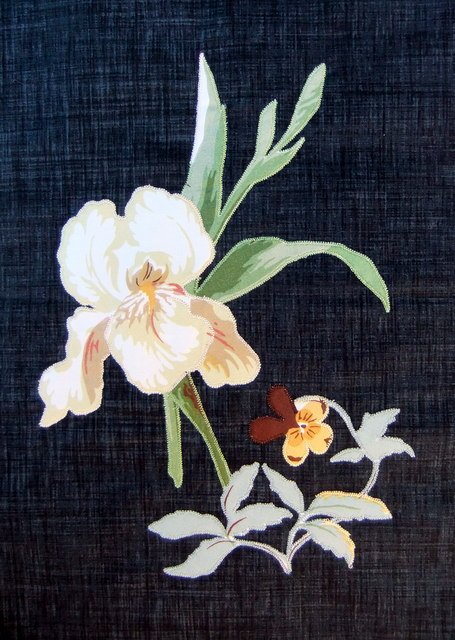
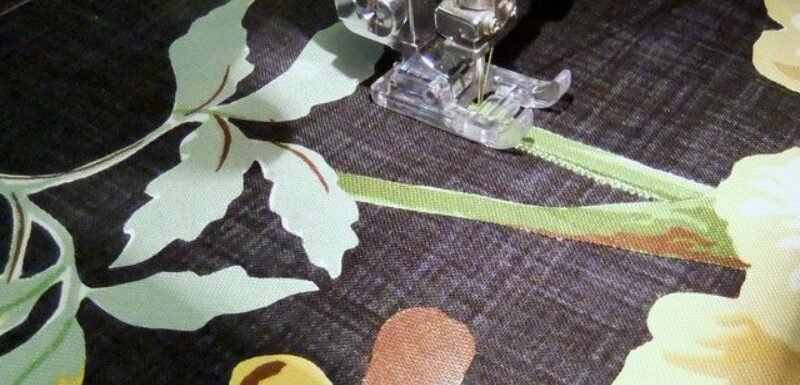
Blanket stitch, zigzag stitch, satin stitch, or even decorative stitching are suitable for securing your design on your background fabric. In these samples, I’m using a tiny blanket stitch.
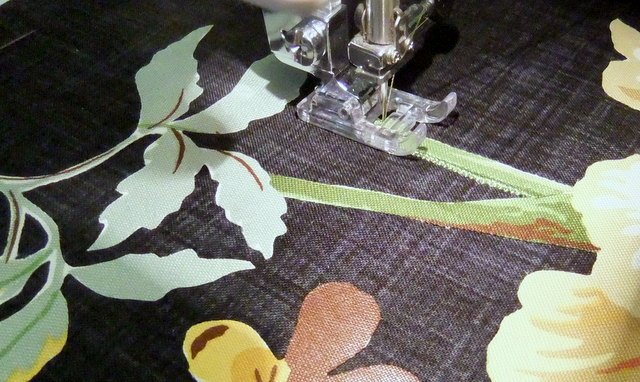
Before you begin stitching, test your stitch length and width on a spare motif to determine the most appropriate choice. Generally, a tiny blanket stitch works well.
Making a note of the machine settings—stitch length and width—allows you to keep a record of your favourites.
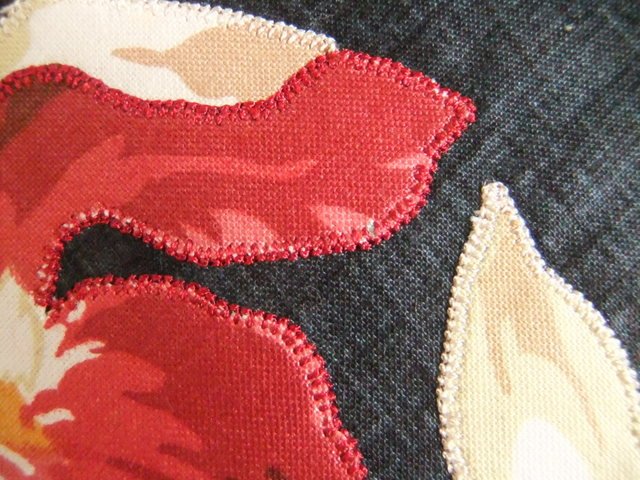
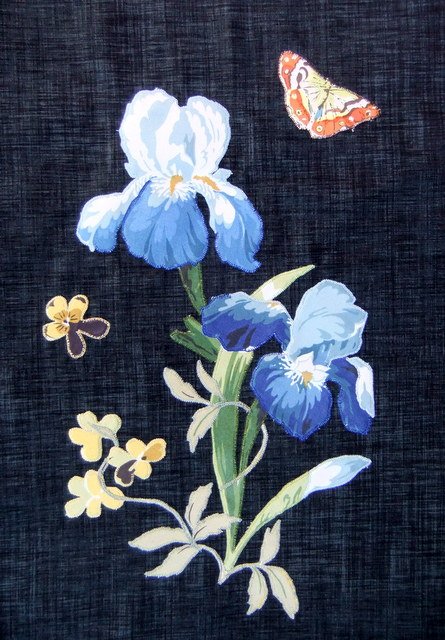
The finished Broderie perse design
As you can see, there really is no difference between this machine-stitched Broderie perse technique and the ‘contemporary’ raw-edge appliqué we all regularly use.
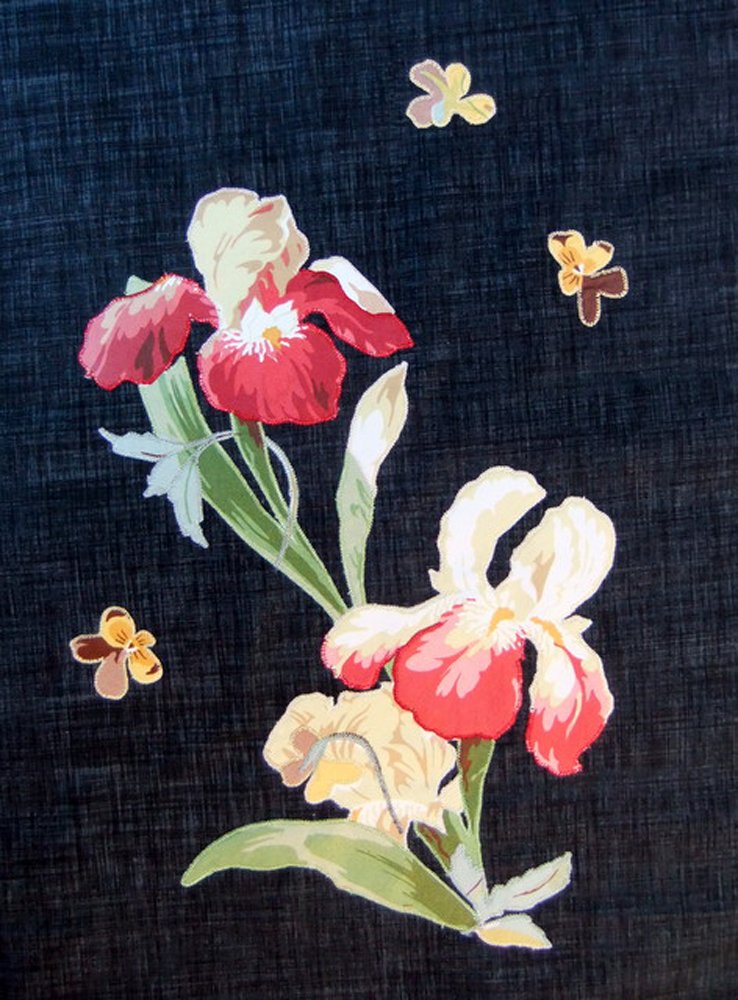
What sets Broderie perse apart?
What sets Broderie perse apart is the use of specific motifs that have been fussy cut from a larger piece of fabric, rather than creating appliqué with merely a selection of coloured fabrics.
Make the best use of your chintz by creating a series of designs from a small amount of fabric.

Master Broderie perse by machine today!
Put your creative mind to work and you’ll quickly realise the potential of this approach for both traditional and contemporary designs.
![Gujarati 17th century Bed Cover or Wall Hanging – fragment [Met Museum / Public domain]](https://threadsketchinginaction.com/wp-content/uploads/2020/09/unnamed-file.jpg)