Essential appliqué stitch techniques for raw edge appliqué
Anyone who loves appliqué must decide whether to work their appliqué by hand or by machine, and this article explores the essential appliqué stitch techniques for raw edge appliqué by machine.
In this series, the focus in on machine stitching, rather than hand stitching.
Stitching your appliqué by machine allows you to complete your work more quickly than if you were hand stitching, and results in a very different ‘finish’ than hand stitching.
Each has its place and uses.
Nevertheless, there may be occasions when I take a peek at how you can vitalise your work with a few hand-stitched touches.
What we covered in Parts One and Two
Over the past two articles, we’ve explored the basics, and where to start with Artful Appliqué.
But we haven’t – yet – done much that is particularly ‘artful’!
Nevertheless, my approach is to create building blocks for newcomers and an opportunity to break away from the conventional.
Part One of Artful Appliqué covered what appliqué actually is, and the necessary tools and supplies to get started.
Part Two covered the fundamentals of preparing raw-edge, fused appliqé.
Today, we’re going to move on to looking at how to attach your fused appliqué to your fabric permanently.
After all, it’s got to stay in place, so some stitching is necessary!
Warning! This is quite a long article, so grab a cup of tea and settle down …
Disclosure: Some of the links below are affiliate links, which means I may receive a small commission (at no further expense to you) if you click through and make a purchase. As an Amazon Associate I earn from qualifying purchases from Amazon websites.
Part Three: Essential appliqué stitch techniques for raw edge appliqué
Commonly-used stitches
Just about every home sewing machine has two stitches built into its functions, these being:
- Straight stitch
- Zigzag stitch
They may seem so fundamental, but believe me, there are many, many ways to bring them to life!
You’re going to learn to love these two stitches, as they’ll likely be the ones you will use the most.
The added bonus is that none of this is difficult!
Yay!
[I suspect I am fundamentally lazy at heart, as I always seem to be looking for easier ways to do things!]
But my philosophy is:
Why make it difficult if you don’t have to?
Let’s begin by looking at the fundamental stitches.
How to Stitch Appliqué Using Straight Stitch
Good ‘ole straight stitch. Where would be without it? Hmm?
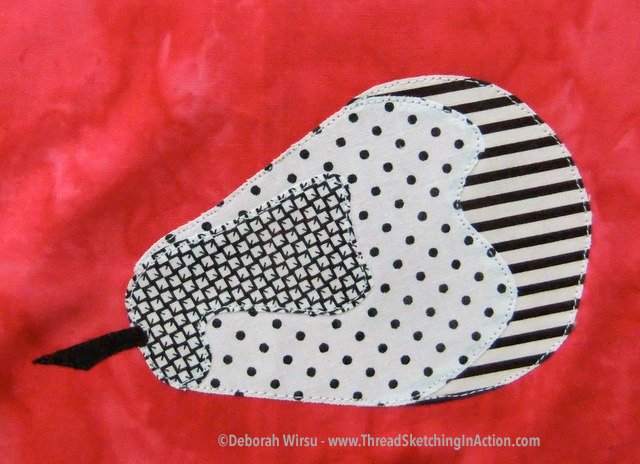
Working regular straight stitch for appliqué is something many of you already use in your work.
No unusual machine settings – just regular stitching with the feed dogs engaged.
The little pear shown here is worked just this way, by stitching carefully around the edge of each piece. Regular straight stitch (i.e. feed dogs engaged) was used, negotiating the curves as I progressed.
Done!
However, keep in mind that this ‘regular’ stitch, is easy to work on larger appliqué shapes with few tight curves or corners. But if your appliqué is tiny, then it helps to step it up a bit and use ‘free motion’ stitching.
Fit a free motion foot
Free motion stitching involves fitting a free motion foot (sometimes called a darning foot or a hopping foot), dropping the feed dogs on your machine and choosing the ‘free motion’ setting with either the touchpad on your computerised machine or a switch on a non-computerised machine.
Learn more about the free motion foot and setting up your machine in my book Creative Thread Sketching: A beginner’s guide. [2nd Edition]
If you’ve never tried free motion stitching before, it can be a little more tricky to master but is ‘do-able’, none-the-less. It just takes a little practice.
And please, please – if you are a newcomer to free motion, take my advice and keep your first attempts simple.
Some of you may have heard my story of when I tried free motion stitching for the first time… (if not, here it is…):
While doing some research on how to work free motion, someone helpfully suggested starting out by trying to stitch my name in cursive script.
Bad move!
Disaster!
… fabric slipping and sliding everywhere under the needle, clenched teeth, much frustration, and a representation of my name that a toddler could have written better with a crayon!
Don’t try this if it’s your first go.
My free motion stitching career was nearly over before it had even begun.
But I have a stubborn streak, so what do you think I did?
Yep, looked for an easier way to get started.
But I digress …
How to stitch appliqué using regular (not free motion) straight stitch:
- Using the regular foot on your machine, thread the machine with toning or contrasting thread. Set to medium stitch length (the default length or a notch shorter is usually OK).
- Keep the feed dogs UP.
- Position your appliqué, right side up, on the right side of your background fabric, then fuse, pin or tack into place.
- Carefully stitch close to the edges of each appliqué piece, turning and pivoting the fabric where necessary. Note: Pivoting at curves and corners is easier if you stop in the ‘needle down’ position.
How to stitch appliqué using free motion straight stitch:
- Using the free motion foot on your machine, set the machine to ‘free motion, using the touchpad or switch on your machine. Generally, it’s best to set the stitch length to zero, but I know some people prefer not to do this. Personally, I find the process more successful with the stitch length at zero.
- Drop the feed dogs.
- Thread the machine with toning or contrasting thread.
- Position your appliqué, right side up, on the right side of your background fabric, then fuse, pin or tack into place.
- Carefully stitch close to the edges of each appliqué piece, maneuvering the fabric as you work, in order to negotiate the curves and corners. Note: As before, pausing to readjust the fabric position is best done when stopped in the ‘needle down’ position.
So … I’ve worked my little appliquéd pear (above) … and it’s:
- ✔ Simple?
- ✔ Distinctive?
- ✔ Useful for traditional or cottage-style applique?
- ❓ Artful? … Not really!
How to make your appliqué stitching more “artful”
So how can you make straight stitch (particularly free motion) more interesting?
Simple! (Remember, we like simple.)
By not changing a thing!
Huh?
The stitching process remains precisely the same. One stitch after another, in a line.
Of course, working
The way to make your work ‘artful’ is to change what you’re using the stitch for.
In other words, create an artful design and use the stitches you already know.
Now, I’ll be going into how to jazz up your designs in a future article, but I need to cover the basic stitches today.
Here are some examples of how I’ve used simple, free motion straight stitch to create artful appliqué designs.
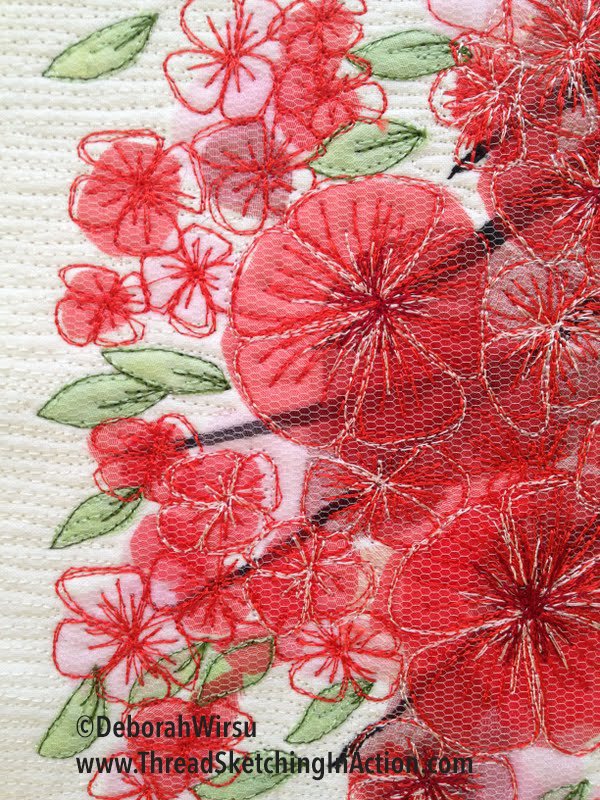
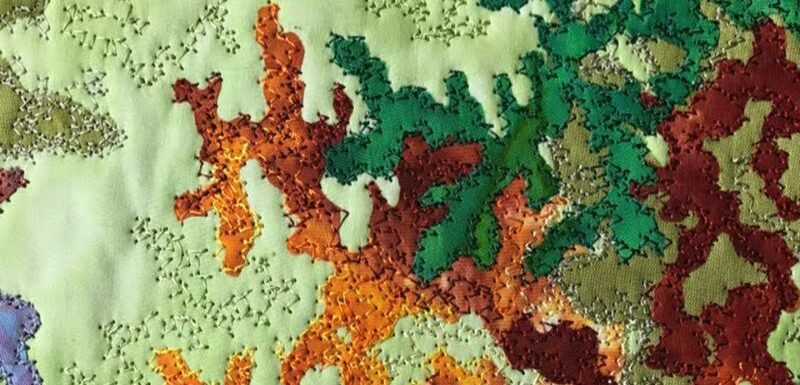
Above is a detail from TSIA Video demo series – No 71 – ‘Blossom, the harbinger of spring’, incorporating free-form design and layered appliqué, all stitched with free motion straight stitch.
The panel (below) formed my contribution to a much larger, group quilt made by several people, for an exhibition. The design is based on a photograph selected by the committee – I was given one section of the picture to work on.
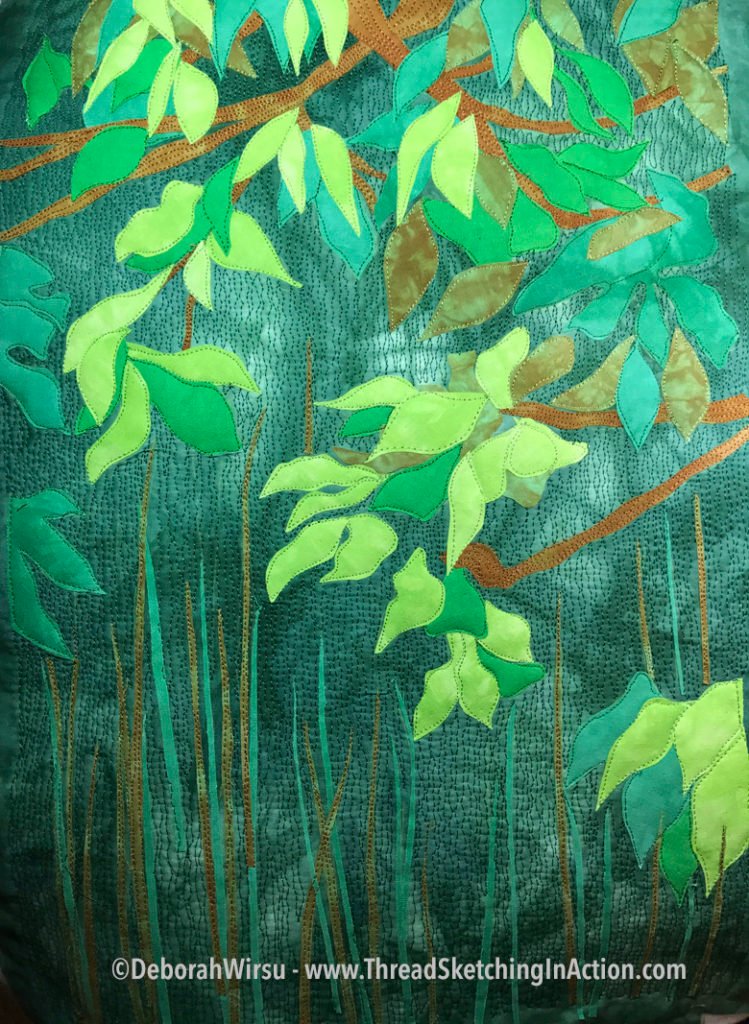
Once again, there are layers of appliqué, all of which have been secured with free motion straight stitch.
How to Stitch Appliqué Using Zigzag Stitch
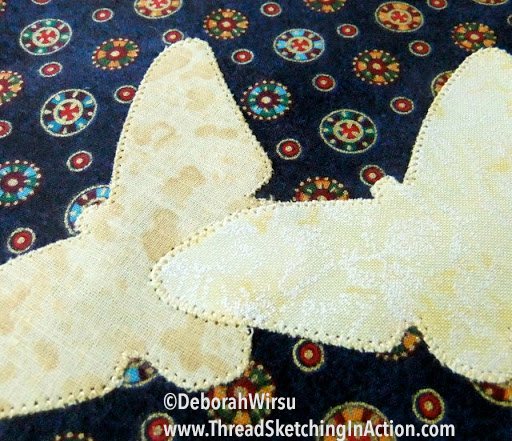
My very early years working with a sewing machine involved learning dressmaking.
I had an aunt was a professional dressmaker and a hard taskmaster when it came to ‘doing things correctly’.
But my rebellious little childhood soul didn’t much care for her somewhat dictatorial approach. However, with the benefit of age and (hopefully) a little wisdom, I can now see the advantages of the very thorough grounding she gave me in handling fabric, pattern making and design, and stitching.
[You know, after all these years, I still cannot allow myself to backstitch the ends of a seam when dressmaking. I have to tie the ends off by hand!].
And my aunt would never let me neaten the edges of seams using zigzag stitch – Quelle
Use zigzag stitch to create different effects
Zigzag stitch can be used to create different effects, depending on the stitch length you choose for your zigzag, and your chosen method – i.e. with the feed dogs up, or free motion, with the feed dogs down.
For a rustic or country-style look, a medium-to-large stitch length and width works well, but if you want the stitches to become almost invisible, you can reduce the stitch length and width to very small.
By narrowing the width of the stitches, they will almost disappear.
- Position your appliqué, right side up, on the right side of your background fabric, then fuse, pin or tack into place.
- Using the zigzag foot on your machine, thread the machine with toning or contrasting thread.
- Keep the feed dogs UP.
- Set your preferred stitch length and carefully stitch close to the edges of your appliqué.
How you handle curves and corners is important when working zigzag stitch, to make your work look professional. See my video for tips on how to do this.
Satin stitch – a variation of Zigzag stitch

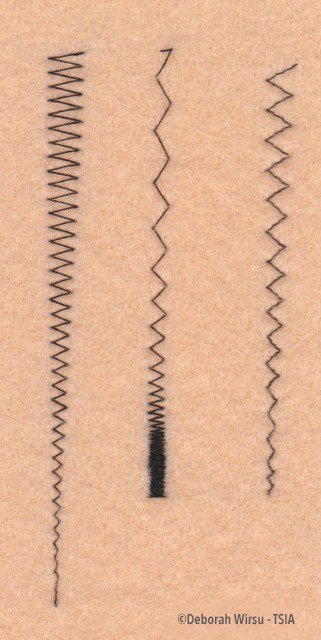
This stitch is the same as zigzag but set to a short stitch length. It gives a lovely, solid outline to your appliqué and can be used as a decorative feature.
- Position your appliqué, right side up, on the right side of your background fabric, then pin or tack into place.
- Keep the feed dogs UP.
- Using the zigzag foot on your machine, thread the machine with toning or contrasting thread. Set to a very short stitch length, and medium width, carefully stitch close to the edges of your appliqué.
This image (below) shows the difference between ‘normal’ zigzag and satin stitch, along with the stitch width and length settings I used at the time.

How you handle curves and corners is important when using satin stitch, to make your work look professional. Check out my videos on Turning Right Angle Corners with Satin Stitch, and Turning Triangular Corners with Satin Stitch. (These are among my older videos, but the info still stands.)
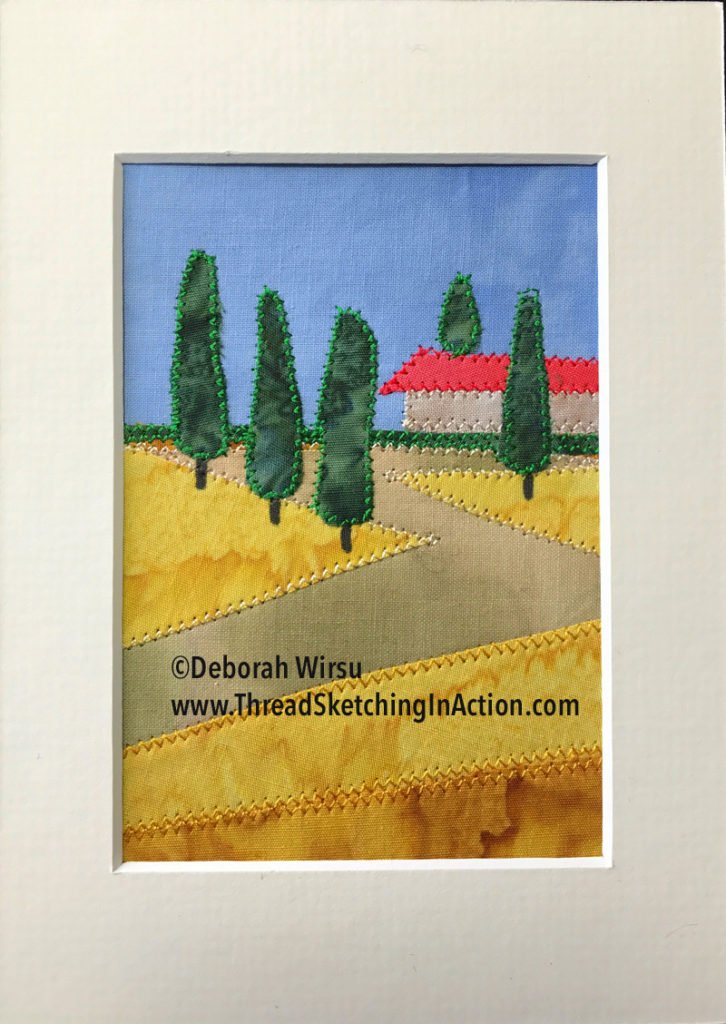
If you think that artful appliqué is not possible with
Cute little pictures like this are just the beginning.
Free motion zigzag stitch
Now, this is when I start getting excited because I love free motion zigzag stitch.
Yes, indeed, it can take a little getting used to, to avoid broken thread and broken needles (I’ve done both many times!), but once you have the ‘knack’ a vast world of artful possibilities opens up.
Combining fused appliqué and free motion zigzag allows you to take your artful appliqué creations to another level.
Let’s take a look at some examples of using free motion zigzag with appliqué:


How to Stitch Appliqué Using Blanket Stitch
Another basic stitch I want to briefly cover today is Blanket stitch.
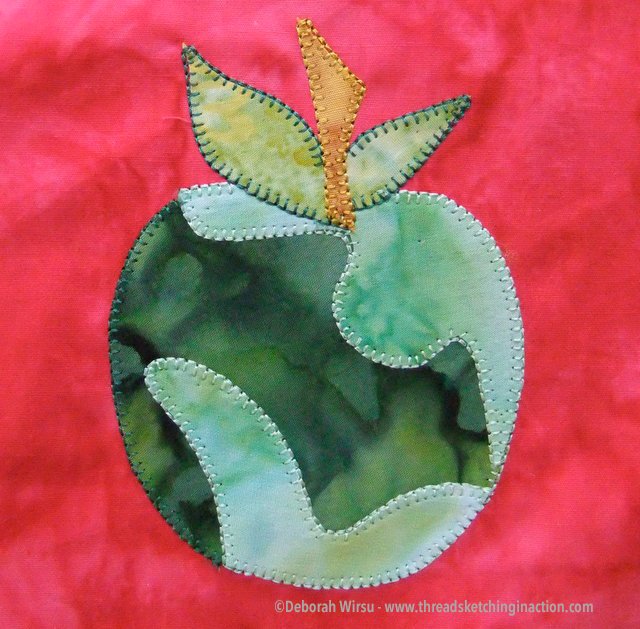
This is, essentially, another type of zigzag stitch, however, this time the machine is programmed to stitch in a more complex order than merely side to side.
It’s a stitch I rarely use in my artful appliqué, but that is merely a personal preference … or perhaps I just haven’t explored the possibilities yet!
Blanket stitch is fabulous for quick and easy attachment of your appliqué pieces. It is often used for country or cottage-style applique.
Medium to large stitches give a folk art look to your work, and small blanket stitches can be used for a neat, solid, secure edge treatment.
Blanket stitch appliqué: Step by Step
- Position your appliqué, right side up, on the right side of your background fabric, then fuse, pin or tack into place.
- Using the appropriate foot on your machine (check your machine manual), thread the machine with toning or contrasting thread.
- Keep the feed dogs UP.
- Set a short stitch length, and medium width. It’s worth experimenting on a scrap sample first, to determine the best length and width settings for the piece you are working on.
- Carefully stitch close to the edges of your appliqué.
- To maintain smooth curves around your appliqué, make frequent small pivots at the beginning of a stitch sequence. See my video demonstration of working irregular shapes with
blanket stitch.
Explore the Possibilities of Decorative Stitches
Most modern sewing machines also feature a range of decorative stitches. Entry-level machines may have just a few, while more expensive machines and embroidery machines have many!
These decorative stitches can also be used to good effect with appliqué.
Experiment with the stitches you have available!
The Best Thread for Appliqué
[For more detailed information about thread selection see my related article: 16 Reasons Why Thread Shreds When Thread Painting (and what to do about it).
With a wide variety of different types of thread available, how do you decide which one to use?
Although you can use any thread you like, each will produce different results.
This is determined by:
- Weight – is the thread fine or heavy?
- Composition – is the thread made from cotton, silk, polyester, rayon, etc?
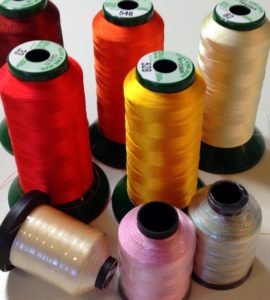
Having already covered so much today, there are just a few factors I want you to keep in mind when choosing thread:
- Thick thread provides quick cover. However, it can easily build up to become too bulky.
- Fine thread provides less cover. You may need to work more stitching or select a different stitch setting.
- Your choice of thread colour affects how your work will look when complete.
- Use any thread composition you prefer. My personal preference is to use rayon or polyester 40-gauge thread. Occasionally, I will use 30-gauge (which is slightly thicker) in rayon, polyester or cotton. Learn more about different types of thread in my book: Creative Thread Sketching – a beginner’s guide.
Related posts
If you missed the previous Artful Appliqué posts, use the links below:

Thank you for sharing all your experience!
Hi Beverley – I’m so happy to share … thank you for your kind words. 🙂
This seems very clear indeed! Dying to get going and try these out. Thankyou so much.
Carol
Yes, Carol … start experimenting and don’t let anything hold you back!
Thank you so much Deborah! The information is always presented so clearly, and in a ‘down to earth’ manner. You’re always my go to reference on thread stitching & applique. Thanks again for your wonderful generosity – & your always just a click away!
Hi Cath – It’s great that you find my little contributions useful … makes it all worthwhile! 🙂 Deborah
Thank you! You’ve takrn some of the scary out of fiber art making!
Oh! Christine! Don’t ever be scared of creating art … remember, it’s YOUR creativity and there are no rules about what YOU want to make. Approach it with energy and enthusiasm! 🙂
Thank you very much Deborah! Your information is always clear and very much appreciated. I would definitely like to buy your books. I noticed that you have published them in Kindle format on Amazon. Is theee any chance you can also publish these books on Apple iBooks? I would love to read them in iBooks format on my iPad, MacBook and my iPhone. Thanks again.
Hi! and thank you for your lovely message. Regarding the books, I will be releasing them with iBooks soon-ish. I also have Mac computers, phone, etc, and use the free Kindle app to read Kindle books. The app is downloadable (free) from Amazon. But in answer to your question … the iBooks editions are coming.
Deborah, this is a brilliant set of instructions – so clear and easy to follow. Thank you for your generosity in preparing and sharing these lessons. I’m really looking forward to the rest of the series. It’s a really hot summer here, so I won’t be using these lessons until autumn comes around – will I still be able to access them or should I save them in some way? Enjoy your time away – I guess fulfilling your music passion?
HI Barbara – I’m so pleased you’re finding my articles useful – there will be another next week, after I return home.
I’m actually minus-viola this time (!) and on a short holiday that was a gift – I’m very fortunate! I’m in Vietnam … will post some images to Facebook in the next day or so and for those who don’t use Facebook I will try to make a relevant blog post or article about them.