Shredding thread when free motion stitching is frustrating, so in this comprehensive guide we explore 16 reasons why thread shreds when thread painting, and the steps you can take to prevent it.
Help! My thread is shredding and breaking when I do free motion thread painting!
A few days ago, I received a question from a student experiencing problems with thread shredding as she stitched.
This is a problem that plagues everyone from time to time, so I thought I’d offer a few ideas on how to overcome this annoying situation.
What happens?
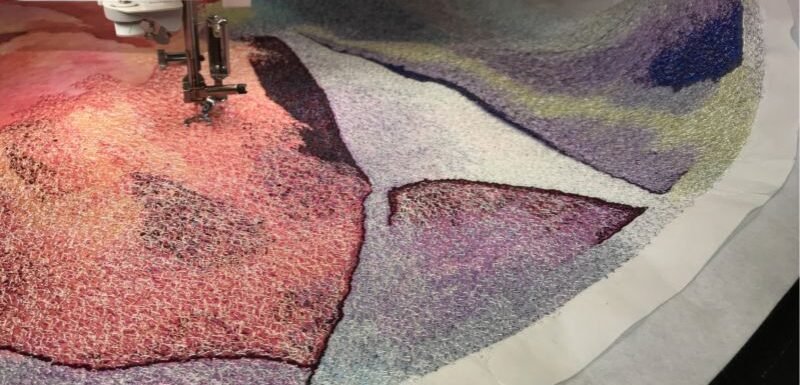
One moment you’re happily working away at your thread painting or thread sketch, and then you notice something that might just make you mutter a few words under your breath!
![16 reasons why your thread may shred with thread painting [and what to do about it] - Deborah Wirsu - Thread Sketching in Action](https://threadsketchinginaction.com/wp-content/uploads/2020/01/Thread-shredding-breakage-290x300.jpg)
The thread is getting thinner and thinner, and the broken strands are bunching up in an ugly, wiggly tangle just above the eye of the needle.
This is so frustrating! Believe me, I know, because it’s happened to me on occasions, too.
Finding the exact cause is sometimes a process of elimination of potential causes. Today, I’d like to share with you some of the culprits!
- 16 Reasons Why Thread Shreds
- 1. The quality of your thread
- 2. Is your needle in good condition?
- 3. What size needle?
- 4. Is your needle fitted correctly on the machine?
- 5. What type of needle should you use?
- 6. Is the machine threaded correctly?
- 7. Check the top thread tension.
- 8. Consider adjusting the bobbin thread tension.
- 9. Does your top thread roll easily from the spool?
- 10. How fast do you stitch?
- 11. Are you stitching too much in one spot?
- 12. What type of stabiliser are you using?
- 13. Are you using spray adhesives?
- 14. How old is your thread?
- 15. Are you collecting fluff?
- 16. When was your machine last checked in for maintenance?
- Recommended Reading
Affiliate Disclosure: Some of the links on this site are affiliate links. This means I may receive a small commission (at no further expense to you) if you click through and make a purchase. ThreadSketchingInAction.com is a participant in the Amazon Services LLC Associates Program, an affiliate advertising program designed to provide a means for sites to earn commission fees by advertising and linking to Amazon.com.
16 Reasons Why Thread Shreds
1. The quality of your thread
Make sure you’re using good quality thread. This doesn’t necessarily mean ‘expensive’, either.
To help you select the best thread for you, I’ve put together a list of my recommendations from the popular brands for machine thread sketching and thread painting:
Gütermann

I have used Gütermann thread for more years than I care to remember, and use it to this day, in combination with other ‘favourite’ threads! Gütermann 40-gauge rayon thread has the high quality and superb sheen required for free machine embroidery and quilting.
Over the years I have built up a large stash of Gütermann thread and find that its weight and texture mixes beautifully with my regular thread – King Star (which I buy on large spools, due to the amount of thread I get though).
And whenever I’m travelling or using a smaller sewing machine (i.e. a standard, domestic machine), the regular-size spools offered by Gütermann are perfect to slip into my suitcase.
Isacord

Isacord is another quality 40-gauge thread, perfect for quilting, thread sketching and machine embroidery.
An advantage of these 1000 metre cones is that they are ‘mini cones’. If your machine is not able to handle larger cones, these make a great choice.
King Tut Cotton Quilting Thread by Superior Threads

If you prefer working with cotton rather than polyester or rayon, then Superior Thread’s King Tut range of 40-gauge cotton thread is perfect for quilting. This low-lint thread is made from long-staple, Egyptian cotton suits both domestic and long-arm machines and comes in a wide range of colours.
Aurifil

This is another beautiful, Egyptian cotton thread (made in Italy), available in a range of weights and colours with a reputation for quality. I love (and have a small supply of) Aurifil Mako Cotton Embroidery Thread, which, with its 50-gauge weight, is perfect for machine embroidery. The spools are larger than domestic spools, containing over 1400 yards of thread.
Sulky

If large cones of thread aren’t for you, then Sulky offers a wonderful range of 40-gauge, rayon, machine embroidery thread on standard 250-yard spools – perfect for the domestic sewing machine. This thread is available in collections of colours, or choose your own individual spools.
Mettler

Mettler also offers a wide range of quality, yet economical thread with their range of Mettler Polysheen Polyester Machine Embroidery Thread that is durable and strong. They also have a lovely range of ‘silk-finish’ cotton threads suitable for both quilting and sewing.
Fujix King Star
The Japanese brand, Fujix King Star machine embroidery thread is my favourite! It comes in economical, large 2000–5000-metre cones of thread. This is an absolutely beautiful 40-gauge thread that meets all my thread sketching, thread painting and quilting needs. This is my favourite thread, used on nearly all my work.
2. Is your needle in good condition?
Machine needles get a real workout when thread painting! In and out, in and out, thousands and thousands of times – often through dense layers of fabric, or sometimes even plastic or metal embellishments.
Thread painting not only causes the point of a needle to become dull, but the needle may also develop nicks or burrs on the point or the shaft. If in any doubt about the condition of your needle, fit a new one.
3. What size needle?
When thread painting, we tend to use quite fine thread (e.g. 40-gauge or even finer), so try using a smaller needle size. If the eye of the needle is too large for the thread, friction occurs as you stitch, leading to shredding.
Conversely, (and somewhat annoyingly), if the needle is too small for the thread, abrasion will occur. Sometimes it seems like you can’t win!
With 40-gauge thread, I use a 75/11 or 80/12 embroidery needle. But if I’m working with heavier thread (e.g. 30-gauge cotton), then I err towards a 90/14 needle.
Unfortunately, there is no hard-and-fast rule about needle size, type (e.g. embroidery needle, quilting needle, topstitch needle, etc.) or brand. Some high thread-count fabrics require a size larger needle so that the thread moves through the fabric without shredding or breaking.
Sometimes, you just need to experiment!
4. Is your needle fitted correctly on the machine?
Check that the needle is inserted correctly in the shaft. The flat side of the needle shank should be towards the back. Even when I’m convinced it’s sitting straight and true, I usually take the needle out and refit it, just to be sure!
5. What type of needle should you use?
While I recommend using machine embroidery needles for thread sketching and thread painting, this is also not a hard-and-fast rule. Everyone has their personal likes and dislikes.
Ask any thread painter, and they’re likely to offer a different recommendation!
Embroidery needles work for me. When I started out, I tried using quilting needles, topstitch needles, and universal needles, none of which offered me a perfect solution. So I turned to embroidery needles.
![16 reasons why your thread may shred with thread painting [and what to do about it] - Deborah Wirsu - Thread Sketching in Action](https://threadsketchinginaction.com/wp-content/uploads/2020/01/Machine-needles.jpg)
Then, after purchasing a new sewing machine, I had to change the brand of needle I was using. It seems my machine has a preference for Schmetz needles and no other!
6. Is the machine threaded correctly?
If you’re experiencing problems, check that your machine is threaded correctly. This is such an easy thing to miss, especially when working with rayon or metallic thread.
Rayon and metallic threads have a tendency to twist and be a bit ‘springy’. It’s surprising how easily they can jump out of position in the threading mechanism.
Rethreading my machine is something I always do if I’m having problems.
7. Check the top thread tension.
In most situations, the default tension setting on your machine should lead to great results. But if problems do occur, then test the tension on a sample constructed with the same fabrics and layers as your project.
Experiment by adjusting the thread (top) tension first. If your thread is breaking rather than shredding, loosening the top tension a little may help.
However, if shredding is the issue, then this may not work! It’s worth a try, though. Keeping your machine in good order minimises the need to make adjustments.
8. Consider adjusting the bobbin thread tension.
I rarely change the bobbin tension for regular thread sketching and thread painting. Before making any adjustments to bobbin tension, check that your bobbin is evenly wound and the thread pulls away smoothly.
Also make sure there a no nicks or irregularities in the bobbin itself, or the bobbin case.
9. Does your top thread roll easily from the spool?
Using the correct spindle on your machine is important. Entry-level machines often give you just one option, but if you’re using the larger cones of thread, be sure to use a vertical spool stand.
The thread should pull off the top of a cone, while smaller, more conventional thread spools are designed (in most cases) to pull out horizontally.
And don’t forget to check that the spool is the right way around on the spindle!
10. How fast do you stitch?
When I’m thread painting, I tend to sew very fast. Sometimes I get a little over-excited and move too quickly, pulling the fabric faster than the needle can cope with.
What happens? Of course, the needle may strike the stitching plate or the internal mechanism of your machine. This doesn’t do either the needle or the machine any good!
Be sure to check the internal components (the bobbin case and surrounding machinery) from time to time, to check they’re in tip-top condition.
11. Are you stitching too much in one spot?
Working over and over and over the same area in a thread painting eventually leads to a buildup of thread that, eventually, the thread either shreds or breaks, or both.
Try to plan your thread painting to avoid having to work over the same area too many times.
12. What type of stabiliser are you using?
Thread sketching and thread painting generally involve using stabiliser. Some synthetic stabilisers, or those with a coating or adhesive can make one side of the stabiliser either rough or sticky.
I prefer uncoated and non-adhesive stabiliser, after experiencing a problem with thread shredding and breakage a while back. Abandoning coated and adhesive stabiliser gave me a workable solution.
13. Are you using spray adhesives?
Many people like to use a variety of spray adhesives and fabric glues to secure layers or small appliqué pieces. These products certainly have a valuable place in your supplies.
Nevertheless, be aware that there are times when the glue can also have an abrasive effect on the thread.
14. How old is your thread?
Has your thread been in your draw for 20 or 30 years? Keep in mind that old thread is more likely to shred or break.
Many years ago, manufacturing techniques and dyes were not as well-developed as they are now, so any ‘old’ threads in your possession may have deteriorated. Nevertheless, there’s nothing wrong with giving them a go if they are a perfect fit for your project.
Is any of your older thread wound on wooden spools? If you took a peek in my thread supply, you’d notice several of these very old spools that I inherited from my mother. I don’t use them often, but like to keep them. They may come in handy one day.
15. Are you collecting fluff?
Get in the habit of regularly checking that your machine is clean – especially the bobbin case and surrounding area under the stitching plate. It’s so easy to ignore a build-up of fluff down there, conveniently out of sight!
Get out that little screwdriver in your sewing machine tool kit, remove the stitching plate and get to work! It’s surprising how much fluff can accumulate, and what a devastating effect fluff and dust can have on the smooth running of your machine.
16. When was your machine last checked in for maintenance?
Finally, it’s a good idea to have your machine regularly serviced by an experienced sewing machine technician. It’s worth the cost and will keep your sewing machine happy for many years to come.
I know this list seems very long! Rest assured, I could add more (less common) reasons, too (but I’ll spare you that)!
Encountering problems when thread sketching is very frustrating.
Finding the best solution is a matter of trying each point until you find a solution.
Recommended Reading
These two books offer comprehensive information about stabilising and preventing puckering in your thread painting work.


Very informative! I really appreciate the way you simplify and explain the thread shedding problem.
That’s great, Cheryl. It’s a frustrating problem with so many potential causes! I’m glad you found my article helpful. Here’s to ‘shred-free’ stitching!
Really helpful tips Deborah. My build up of thread is usually on the back which clogs up the bobbin. It could be that I am going over the stich too many times as your tip suggests. I will try not to be so enthusiastic! !!!!!
Hi Alison. Yes, repeated stitching in one area could be the problem – I’m rather prone to doing that, too! And be sure to check for fluff in the bobbin case if you’re having bobbin trouble.
I hang on your every word!…and have a little tiny tid bit to add.
When adjusting top tension be sure to raise the foot first: when pressor foot is down the tension plates are engaged at the level on the dial. To edit tension on the plates set the plates into that resting position then edit the dial….then drop the foot and off you go. (On my machine it takes a few stitches before I notice the re set)
And as you suggest…every thread painter has a needle preference….I like Schmetz microtex, when thread builds up….it cuts through the bulk.
Deborah, I get great solace from your wisdom…thank you…..wish you were here!!
Thanks for your very useful contribution to this discussion, Judy. You are quite correct … when adjusting tension, changing thread, etc. it’s always best to work the foot raised. In my experience, every machine behaves a little differently, so it’s useful to get to know the individual quirks of one’s own machine.
I appreciate your generous comments 🙂
I really appreciate the way you explained thank you very much
You’re most welcome, Rajee. I hope it helps you when (if) you encounter this problem at any time.
Deborah
I love reading your suggestions! I, too, have one other suggestion that I’ve found when working with gnarly, uncooperative thread: the thread lubricant, Sewers Aid. A tiny little bead spread down the spool from top to bottom will help so much if all the other strategies fail, particularly helpful with metallics to minimize breakage. It will darken the thread slightly when you put it on, but it is not permanent, and it won’t show in your stitching. It’s awesome stuff!
Thanks for your useful tip, Lugene – I love the way people are contributing to this conversation.
I’ve never tried Sewers Aid (I have an aversion to buying things, I think 🙂 ) but it certainly sounds as though it could be helpful when working with that pesky metallic thread, which can twist and curl at the blink of an eye.
Hi. Thank Ive been experiencing thread shredding. I’ll work through your suggestions. As you say it’s so frustrating and the frustration gets in the way of creativity
Hi Pat – yes, it’s extremely frustrating, I agree. One point I omitted to add was to consider how many layers you are stitching through, and the composition of those layers. This can affect how much chafing the thread is subjected to. You will find the solution if you keep trying!
Thanks so much for a great rundown on why thread may shred. Your explanations are very clear & easy “to get”. There are so many things that may be causing shredding- great to have this comprehensive list to help identify the cause!!
Hi Penny. Yes, I wish there was just one solution, but sadly, it can be a matter of elimination. However, I’ve also found that, as one’s skills develop, anticipating the problem actually does become easier as we learn what works or does not work in different situations.