Discover the 10 best art quilting tools for beginners — those essential supplies you need when just getting started in art quilting, thread sketching or thread painting.
It’s easy to be overwhelmed by the vast array of products available and deciding what you really need, and what you can manage without.
To help you out, I’ve put together a list of what I consider the essentials for beginning art quilting, thread sketching, and thread painting (a.k.a. free motion machine embroidery) — the 10 best art quilting tools for beginners.
[Disclosure: Please expect that some (not all) hyperlinks are affiliate links, which means I may receive a small commission (at no further expense to you) if you click through and purchase the product. This is one of the ways I support myself and continue to bring you free content and information. The decision about whether to buy a product or not is completely up to you.]
10 best art quilting tools for beginners
Don’t be alarmed at the length of this list of the top 10 best tools for starting out in art quilting! It’s quite likely you already own some of the items, or can ‘make do’ with a similar item you already have.
It’s best not to rush out at first, and buy every gadget and gizmo on the market until you see what you really need!
Let’s begin exploring the 10 best art quilting tools and supplies for beginners.
1. Sewing Machine
I’m guessing that if you’re reading this, then you either already own a sewing machine, or are planning on getting one.
Art quilting, thread sketching and thread painting are generally done by machine, although many people combine machine stitching with hand-stitched embellishments.
What kind of machine do you need for art quilting and free-motion stitching?
These days we are in the happy position that almost any domestic sewing machine (except some very basic ‘entry-level’ machines) are able to work ‘free motion’.
The two most important things to look for on your machine are:
- The ability to drop the feed dogs and have a free motion foot fitted. Feed dogs are the little saw-toothed feet located under the stitching plate and needle. See below for information about the free motion foot.
- The ability to work both regular straight stitch and zigzag stitch. All standard domestic sewing machines (to the best of my knowledge) can work both these stitches.
My top picks of domestic sewing machines for free motion stitching.
I may be biased, but there are two brands of sewing machine that I highly recommend: Janome and Brother.
While there are sewing machines to suit any budget, if you’re looking for a great all-purpose domestic sewing machine that will serve your needs for quilting, thread sketching, thread painting, as well as dressmaking, I don’t think you need to look beyond these two brands.
No doubt, everyone you speak to will have their personal favourites, so I am simply offering my recommendation, based on positive experiences in the past.
Janome
Over the many years I’ve been sewing, I used just two Janome domestic machines, and they never gave me a moment of trouble. The Janome (my first ‘free motion’ machine) is still going strong after more than 10 years.
The downside of some budget-priced Janome machines is that the open-toe free motion foot and flat-bed extension tables are not always included in the standard accessories.
If you can afford to pay a little more, the Janome 4300QDC offers all the bells and whistles (including an open-toe foot and flat-bed extension table) you need for free-motion quilting and thread sketching.
A flat-bed extension table makes art quilting (or traditional quilting) a breeze as the larger flat surface surrounding the stitching plate prevents the quilt from dragging down and pulling out of position.

While it’s certainly not the cheapest machine in the Janome range, I think it’s worth paying just a little extra for a machine that will meet your needs for a very long time.
2. Free Motion Foot
If your machine doesn’t have a free motion foot included in the standard accessories, I suggest getting hold of an Open-toe Hopping (or darning) foot.
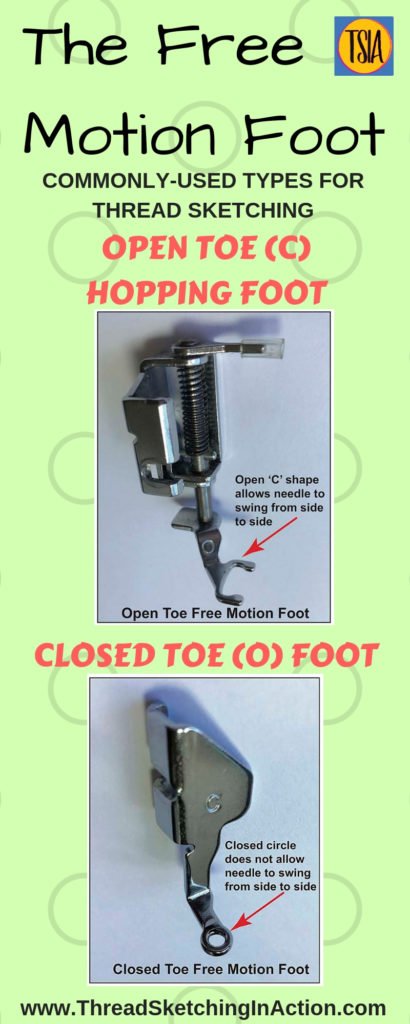
If you’re just starting out, I would avoid using the Closed-toe free motion foot for the time being.
For more information about the Free Motion Foot, see my blog post on this topic.
Walking foot: As a quilter, whether you’re making art quilts or traditional quilts, there will be times when a walking foot will make your life easier. If you’re buying a new sewing machine, check that a walking foot is included in the attachments, or ask the supplier to provide one for you.
3. Self-healing Cutting mat, Rotary cutter, and Quilter’s ruler
Self-healing cutting mat
If you’re planning on using a rotary cutter (which most quilters and thread sketchers do, at some stage), then you’ll need a self-healing cutting mat to protect your table surface.
These are available in a range of sizes – from very small to very large – and will last for years if treated with care. I have 2 mats, both of which I bought many years ago. Avoid using a rotary cutter at an angle (the blade digs into the mat’s surface), and your cutting mat will last well.

My large Olfa cutting mat is, at 24″ x 36″ is ideal for using at home in the sewing room. It fits perfectly on the tabletop and is large enough to cut all the materials I use for thread painting and quilting.
I also have a smaller Olfa cutting mat – a convenient 12″ x 18″ for taking out and about with me to quilting classes or meetings. This is also a great choice if you’re on a limited budget. I’m all too aware of how costs can mount up when you become obsessed with fibre art!
Rotary cutter
Once again, rotary cutters are available in myriad styles and a range of prices. I’ve always used a very basic Olfa rotary cutter that has served me well for a very long time.

However, if you’re looking for something with more up-to-date ergonomic design, consider one of the many other styles available, such as the Olfa Deluxe Rotary Cutter.

Quilter’s ruler

A rectangular or square quilter’s ruler is useful for cutting straight edges and accurate shapes of fabric.
What size should you get? Quilter’s rulers are readily available in a range of sizes, and if you’re going to start with just one, I recommend one that measures approximately 6″ x 24″, such as the Olfa Essential Quilting Ruler.
This size is perfect for a wide range of cutting needs.
Learn more about rotary cutting technique in my blog post Rotary cutting skills for fabric collage and quilting.
4. Scissors for Fabric and Paper
Scissors may seem like a standard item to have in your house and sewing room, but there are scissors and scissors!
For thread sketching and quilting purposes, I like to have a small, but useful set of scissors that will meet my every need.
Absolutely essential for anyone working ‘artistically’ with fabric and thread are:
- All-purpose sewing scissors or dressmaker’s shears.
- My Top Pick: Fiskar’s Razor-edge Softgrip scissors.
- Spring-loaded micro-tip scissors. These are so useful! They’re the one pair of scissors I would struggle to live without. They are seriously that good!
- My Top Pick: Fiskars Titanium Micro-tip Scissors.
- Small Embroidery scissors – optional but useful. Very handy for taking in your handbag or sewing bag when you go to classes.
- My Top Pick: Gingher Stork Embroidery Scissors.
- It’s also a good idea to have a pair of household or office scissors for cutting paper. You wouldn’t want to ruin your fabric scissors by cutting paper!
For a full run-down on the scissors I recommend, see my blog post Best Scissors for Sewing and Quilting in 2023
5. Pins and Sewing Machine Needles
Pins
The two types of pins I like to use for thread sketching, thread painting, and art quilting are:
- Flat-head quilting Pins. These are useful for holding layers of fabric together as you stitch for the simple reason that you can stitch right up to, and around them (and even over, provided you don’t stitch through the plastic head! I admit, I’ve done that once or twice!).
- Ball head quilting pins. Both these and the Flat-head pins have quite long shanks – perfect for securing layers of your quilt or stitching project.
Machine Needles
Choosing the right needle for your machine when thread sketching or thread painting is something that occasionally causes difficulty for beginners.
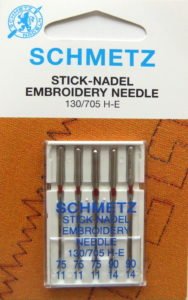
I always recommend beginning with Machine Embroidery needles in the size range 75/11 – 90/14.
Schmetz needles are great quality needles, but be aware that some machines ‘prefer’ other brands. Machines can be finicky, too! If you’re in any doubt, check the recommendations of your sewing machine manufacturer.
6. Fabric, Batting, and Thread

Fabric
Ahh! Fabric. Every textile artist and quilter has fabric – often vast stores of it! But where do you start when choosing fabric for thread sketching and thread painting?
The easiest to use is good-quality quilter’s cotton as it is stable and predictable in its behaviour – unlike some ‘speciality’ fabrics, such as silk, satin, polyesters, and velvet.
If free machined thread sketching or thread painting is your aim, then you’ll need a solid foundation fabric to work on, which can be either patterned or a solid colour.
When starting out, I suggest getting a small range of solid colours, batiks, or prints. Purchasing cuts such as fat quarters allows you a choice of background colour and appliqué fabrics, without having to buy yards and yards of fabric.
Fabric is easy to buy – either in-store or online – as there are many, many outlets and suppliers of quality fabric. Or plan a visit to your local quilt fabric store to browse what they have available.
Purchase the best quality you can afford, opting where possible for ‘high thread count’ fabric. Thread count is the total number of threads (counting both horizontal and vertical threads) per square inch. High thread count fabrics make a very stable backing for thread sketching, thread painting and art quilting.
Brands such as Kaffe Fassett and Robert Kaufman Kona cotton always deliver on quality. But of course, there are many other wonderful brands.
Batting
Most art quilting projects include a layer of batting between the backing fabric and the decorative or pictorial top, and this layer usually consists of low-loft batting.
Low-loft batting improves the look and feel of an art quilt, giving a firm (but not puffy) base to stitch on.
I love Warm & Natural batting, which is easy to stitch and very durable. An added bonus is that it doesn’t stretch, ensuring your art quilts will hang straight when displayed on the wall. Be aware that this is not 100% cotton, having a small percentage (around 10%) polyester content.

This batting can be cut to the size you require, and can be used for bed quilts, too, unless you are particularly wanting a thick and puffy quilt. Personally, I like low-bulk quilts as they are so easy to wash and care for.
Thread
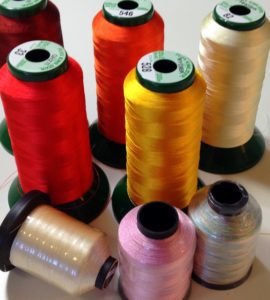
As with fabric, there are so many excellent brands of thread available to purchase in-store or online.
Choosing thread designed for machine embroidery is your best choice. Please avoid using standard dressmaking threads for thread sketching and thread painting – they will not deliver the results you desire!
If you’re working on a standard-size domestic sewing machine, I recommend the following brands:
Begin with 40-gauge thread – you’ll find this easy to purchase and easy to use!
7. Stabiliser
Embarking on any thread sketched or thread painted project is, in most cases, going to require some sort of stabiliser to prevent puckering and pull-up as you stitch.
But, with the vast range available, how do you know where to start? Getting to know the different types of stabilisers is, to a large extent, a matter of experimentation and practice. Over time, you’ll get to know what suits the type of work you do.
I always suggest by first considering the type of stitching you plan doing. In cases where only light thread sketching – e.g. an outline design – is required, you can usually get away with using a medium-weight stabiliser.
But when dense thread painting is planned, you need to bring in the tough guys – very firm stabiliser! And if you’re in any doubt, or just wanting to practice, begin with quite a firm stabilizer, e.g. from the Pellon range.
A firm stabiliser, such as Pellon Peltex, is wonderful when you need strong support for thread painting or items such as placemats.
Sometimes a lighter-weight or tear-away stabiliser will suffice, for example, Pellon Tear-away Embroidery Stabiliser.
Find out more in my book Complete Guide to Stabilising.
8. Fusible web

While fusible web will not be necessary for all projects, it’s useful to keep some on hand for any project that includes fused appliqué, or when you want to fuse two layers of your work together.
As with stabilizers, there are many types, weights, and brands of fusible web on the market.
Paper-backed fusible web is versatile and perfect for many appliqué and art quilting projects.
Some of the more readily-available brands of paper-backed fusible web are:
If you’re after an extra-fine fusible web that is not paper-backed, then I highly recommend the Mistyfuse range. This fusible adds no bulk to your work and is perfect for use in a wide range of art quilting and fibre art projects.

9. Quilt Marking Pens
I have simple tastes when it comes to marking my quilts and always err on the side of caution when choosing which to use. Why? No doubt, you’ve heard tales of woe from people who have marked out their designs with the so-called erasable, or washable quilt markers, only to find that they leave a permanent stain on the quilt.
My recommendation is that you use either chalk markers or simple, heat-erasable pens:
Pilot FriXion Erasable Pens are used by so many fibre artists to mark their quilts and other textile work as they are inexpensive (very!) and any drawn marks simply disappear when pressed with a warm iron. Although these pens are not specifically manufactured for use on fabric, they do indeed work!
A cautionary note about using any quilt marking pen: Always test on a piece of scrap fabric first, just to be sure!

Clover Chaco White Marker lives up to the Clover reputation, and, being chalk, is easily removed from the quilt surface.

10. Iron and Ironing Board
I’m sure most people already have an iron and ironing board in their homes, but sometimes I get asked, Do I need a special iron for quilting?
The answer to that question is a resounding No!
Any quilting project, whether art quilt or traditional, will find you frequently at the ironing board. But there’s no need to go out and purchase an expensive iron – as long as it has both steam and dry settings, and a good range of temperature options, you’ll be just fine!
Any regular, sturdy ironing board will suffice. If you’re planning on making very large quilts, then a board with a larger surface area may be useful. The ironing board I use is a standard, domestic board.
Just a few weeks ago I was in the market for a new iron when my old faithful finally gave up on me after many years of hard service. Once again, I went back to a brand I’ve trusted all my life – Sunbeam – and the Sunbeam Steam Iron is a wonderful iron, with an economical price tag. What more could you want?

FAQ
What is an art quilt?
An art quilt is an exploration of ideas, feelings, or moods, or it can be the artist’s interpretation of a scene, landscape, still life, or person.
Art quilts often involve employing different or unusual colours, textures, and materials.
Do I need to follow a pattern to make an art quilt?
No! Indeed, art quilters usually either create their own ‘patterns’ as a basis for their design, or work entirely freestyle. This is often the case with abstract works, where the artist is inspired by a thought, image, colour, or mood to interpret the concept with fabric.
Can I follow a pattern if I want to?
Of course you can! Many art quilters start out this way as it offers an opportunity to explore the techniques without feeling you need to come up with your own design.
However, I don’t think it will be long before you begin to make small alterations to the pattern or design, eventually ending up with your own unique art quilt!
Can I use my photos to make art quilts?
Yes, you most definitely can use photos. There are several ways to do this:
- Print your photo on fabric and stitch over it.
- Modify your photo in photo editing software (e.g. Photoshop Elements) and create a design from the modified picture.
- Use your photo as inspiration for a design such as a mosaic quilt or confetti quilt.
Learn all about Thread Sketching and Art Quilting
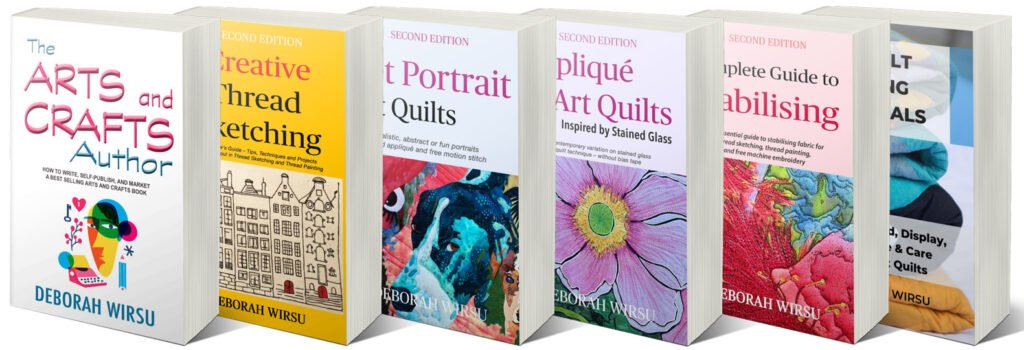
I have a range of books available – check them out today!
- Buy a book about art quilting.
The best way to learn is to get started.
Overview
Starting out in any new hobby usually necessitates investing in a few tools and supplies to get you started. While this list of the best art quilting tools for beginners may seem long, you’ll find that most of the items are a ‘once only’ purchase.
Only get what you need when starting out, look after your treasured equipment, and it will serve you well for many, many years!
As you gain experience, you’ll discover the tools, fabrics and threads that best suit your style of working. Armed with that knowledge, you can then invest with confidence in the products you know you’ll use.
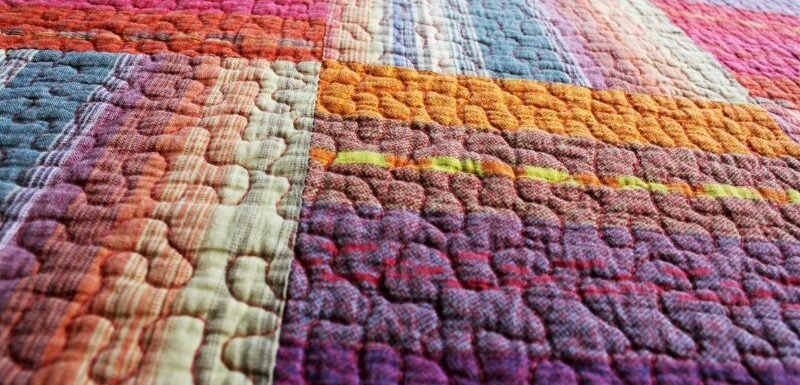




Hi Deborah. Great list – thank you. As I progress with quilting, would you recommend a template set? If yes, are they easy to use and I presume there is an endless choice so would like some guidance before wasting my money! Keep safe. Angela
Hi Angela – Thanks for your question, and I’m glad you find the list useful. My niche is really more in art quilting than traditional, so I don’t use templates at all (even on the odd occasion I make a more traditional quilt). As far as free motion quilting backgrounds are concerned, I prefer to work free motion to my own ideas … and I encourage my students to do the same. I like the ‘what will happen will happen’ approach, I guess! Nevertheless, I know there are many traditional quilters who could give more detailed advice on templates, if that is what you are looking for. Templates offer a viable option for quilters seeking precision. I’m sorry I can’t be of more assistance with templates!
Deborah