Fused Appliqué Fundamentals
Welcome to Part 2 in this series of Artful Appliqué: How to use creative appliqué in textile art and quilting.
Creating textile art that incorporates appliqué and stitch techniques brings a world of exciting adventures to your door, should you choose to explore.
In this series, I hope to open the door to that world, just a chink.
I want you to step into the new, with your eyes open and your minds fresh – just like Lucy entering the magic wardrobe in C.S. Lewis’ classic book, The Lion, the Witch and the Wardrobe.
Explore the unknown. Discover the unexpected!
And, in all likelihood, you already have the techniques you need under control.
Now it comes down to letting go and loosening up!
Interestingly, the techniques with which most of us are, perhaps, already familiar, are transferrable to creating new and exciting stitched art.
It’s simply a matter of letting go of conventions and trying something different.
Affiliate Disclosure: Some of the links on this site are affiliate links. This means I may receive a small commission (at no further expense to you) if you click through and make a purchase. ThreadSketchingInAction.com is a participant in the Amazon Services LLC Associates Program, an affiliate advertising program designed to provide a means for sites to earn commission fees by advertising and linking to Amazon.com.
The Fundamentals of Raw-edged Fused Appliqué
First, I want to ensure that nobody is left behind. Newcomers to creative stitch and thread sketching stumble across this website every day.
Catering to everyone – all levels of experience – is challenging, so first I must ensure that the fundamentals are covered.
What we covered in Part One
In Part One, I introduced the concept of using appliqué as an art technique rather than in the traditional manner, offering a broad overview of ‘appliqué’, in general:
- What is Appliqué?
- Add a touch of ‘Art’ to your stitched appliqué projects.
- The fundamentals of appliqué.
- Tools – what you need to get started with appliqué.
- Preparing your appliqué design (the basics).
- Choosing your fabric.
- Methods of stitching appliqué (an overview).
As we progress through this series, I’ll begin to dive into some of these points – and more – in greater detail.
The focus will be on taking you beyond current concepts to how to make your projects more artful, unusual … more ‘you’.
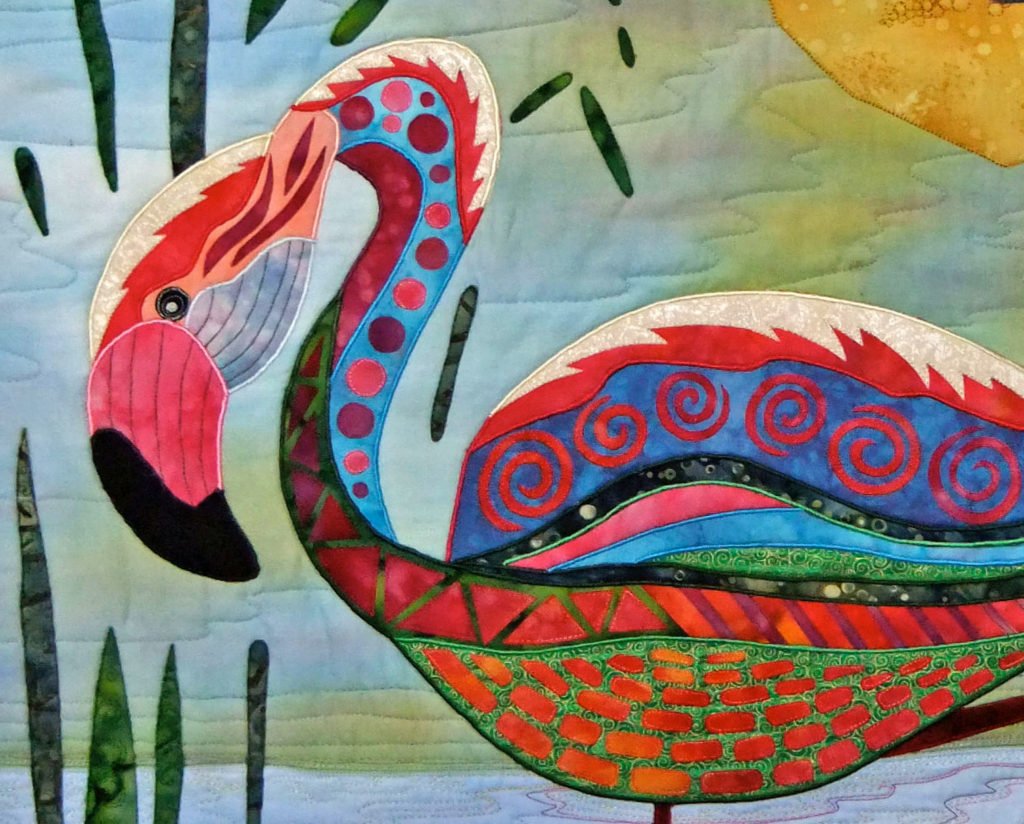
Too many of us, myself included, follow traditional paths, whether it be in appliqué or any other technique. I want to help you ‘spread your wings’.
It’s so easy to keep falling into line with the familiar.
Now, don’t get me wrong – I have nothing against traditional appliqué. But there are many, many articles and tutorials available to guide you through creating traditional designs.
The exciting thing is that artful appliqué can still have a traditional ‘flavour’, and some of the examples I present will reflect that.
Others will be a step away from the conventional, exploring areas that may be new territory for you.
What I especially love is that, in the main, you can use the same traditional techniques for all styles of appliqué.
Part Two: Fused Appliqué Fundamentals
Raw edge fused appliqué
Let’s begin by learning how to prepare one of the most accessible types of appliqué – Raw edge, fused appliqué using paper-backed fusible web.
Many of you will already be very familiar with this. Please bear with me so that any newcomers to the world of artful appliqué are not left behind.
Raw edge appliqué using paper-backed fusible web
Note: Paper-backed fusible web is also known as heat bonding web.
Bonded, raw edge appliqué is a simple, versatile technique, offering a variety of methods of use and edge treatments.
Several different types of fusible web are available on the market.
- Some are paper-backed; some are not.
- Some are quite firm in feel, while others are filmy and light.
- Some dissolve or break down in water; some do not!
Today, we are going to look at what I consider one of the easiest to work with – paper-backed fusible web.
The brand I generally use is called Vliesofix. However, there are many brands which all serve much the same purpose.
You may find that, in your country or region, you need to purchase a different brand. And sometimes, the same brand is sold under a different name in different countries!
Some of the more commonly available brands of fusible web are:
Lightweight Fusible Web (paper backed)
Pellon Wonder Under
Heat n Bond
Of course, there are more! Many of the larger manufacturers also offer a range of weights and composition from which to choose.
I suggest you experiment with one or two different brands over your upcoming projects, as you’ll find that each of them handles slightly differently.
The resulting ‘stiffness’ of the fabric also varies from brand to brand.
Eventually, you will find one that best suits your style and the majority of your projects.
What you need:
- Foundation fabric – the background to your appliquéd design.
- Appliqué fabric – select fabrics that suit your design.
- Paper-backed fusible web.
- An appliqué pressing mat or sheet of kitchen baking paper.
- Pencil.
- Erasable fabric marker or quilter’s chalk pencil.
- All the usual sewing supplies, as outlined in Artful Appliqué Part One.
Bonding or fusing appliqué
Bonded or fused appliqué is a fast and effective way to construct your design.
Paper-backed fusible web is a heat-sensitive, sticky product that adheres two fabrics together. It’s quick, efficient, and leaves no mess!
One side of the paper-backed fusible web is, unsurprisingly, paper! The other side feels a little rough and slightly sticky to the touch when dry.
Placing the sticky side on a piece of fabric, the ‘paper side’ is pressed with a warm to hot, dry iron, which softens the glue and fuses the web to the fabric.
Once it’s cooled down and cut to shape, the paper is carefully peeled off, and the segment is ready for fusing to another piece of fabric.
Let’s quickly run through this, step-by-step.
Quick Guide to Using Paper-backed Fusible Web
1. Begin with a sheet of paper-backed fusible web!
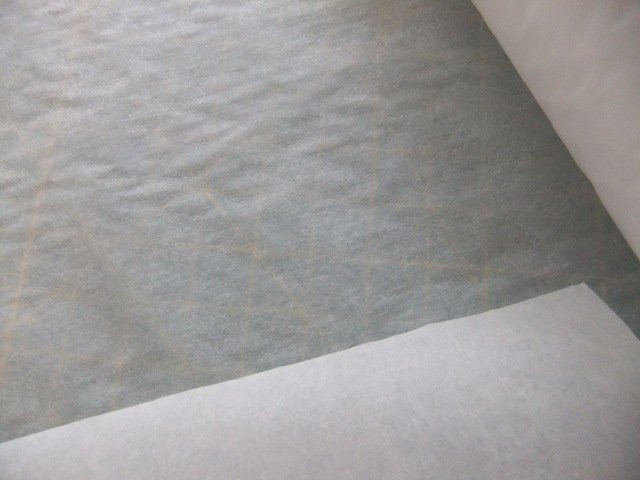
Appliqué shapes of all sizes can be prepared using paper-backed fusible web.
Most brands are available in various widths, on rolls or in packs.
2. Draw or trace a REVERSE image of your shape onto the paper side of the fusible web.
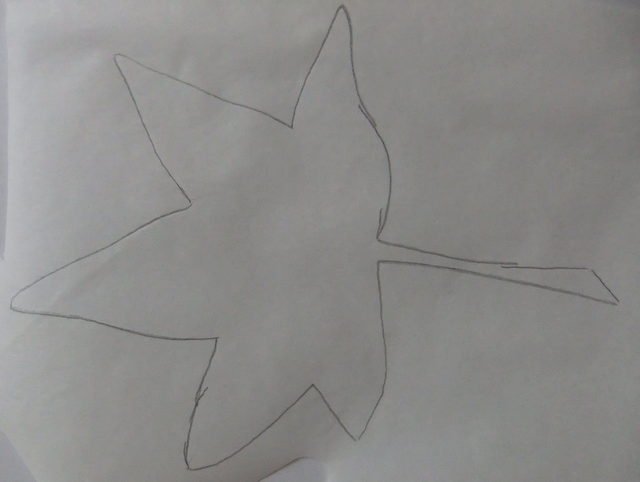
Why the reverse side?
You’ll be fusing your web to the back of your appliqué fabric.
After removing the paper backing and placing the segment on the foundation fabric for your design, the resulting segment will then be the right way up.
3. Cut out the traced shapes from the fusible web.

I recommend cutting a little outside the drawn line for this step. (You will cut on the line in Step 7).
4. Preparing the appliqué for fusing.
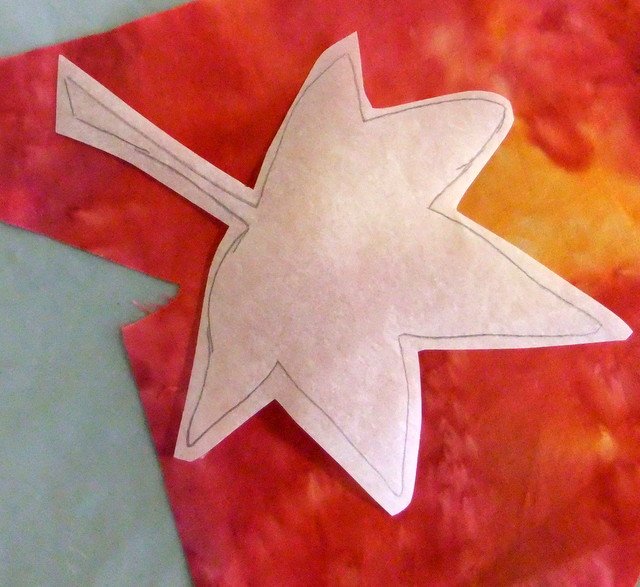
Using a piece of your appliqué fabric, position the fusible web on the back of the fabric.
It’s worth selecting appropriate sections of the fabric to best use any colours or motifs in the patterning.
Place the fusible web ‘glue’ side down on the back of the appliqué fabric.
Remember! It will be the used the other way up when the backing is removed and it’s positioned on your foundation fabric.
5. Cover with an appliqué mat or kitchen baking paper.
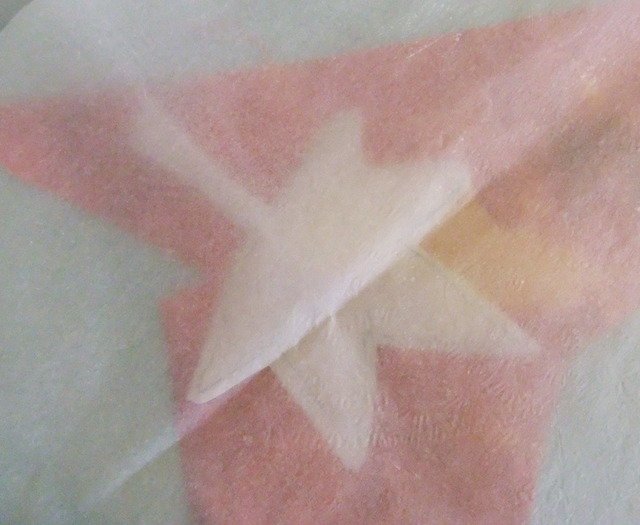
Why?
It’s important to protect your iron and ironing board. There’s nothing worse than finding you’ve accidentally fused your appliqué shape to your iron and not the fabric.
Believe me, it happens!
6. Fuse the appliqué fabric to the fusible web.
Press with a warm-hot, dry iron to fuse the web and fabric together.
Let it cool.
7. Cut out the motif.
This time, cut on the drawn lines.
If you’re creating a design where shapes overlap, remember to make allowance for pieces that need to tuck under another.
You will need about ⅛ to a
8. Preview the position of your appliqué.
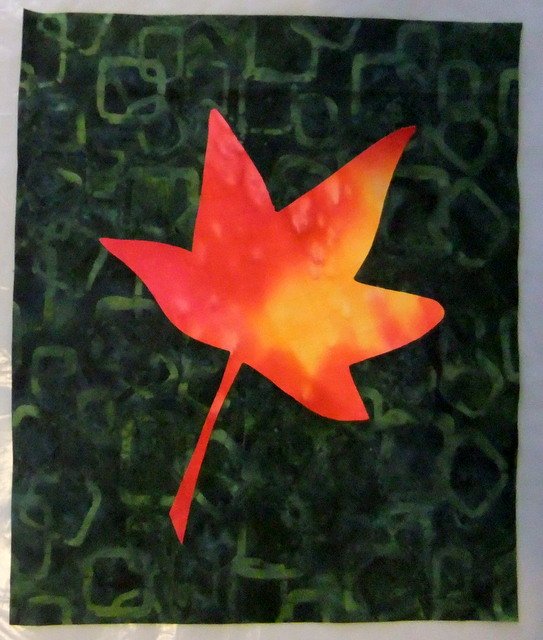
Your motif is now ready for fusing to the foundation fabric.
Pre-mark the outline of your design, if necessary, by tracing the design onto the foundation fabric, using a quilter’s chalk pencil or erasable fabric marker.
Place your foundation fabric, right side up, on an ironing board or pressing mat (for larger works).
It’s a good idea to preview the placement, to make sure everything will be perfect when permanently fused.
If anything is wrong, now is the time to cut a new shape!
9. Remove the paper backing.
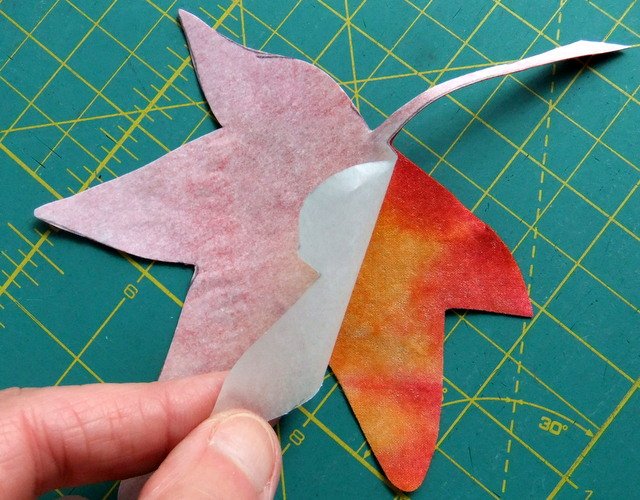
When you’re happy with the positioning, remove the paper backing from the fusible web and carefully position the shape again.
Position your motif (appliqué segment), glue side down, on the right side of your foundation fabric.
Pin it vertically, if necessary, to stop it shifting. Do this by pressing in the pins so that they stand up on their point.
This makes them easy to manoeuvre around with the tip of your iron, removing the pins as you go.
10. Fuse the motif to your foundation fabric.
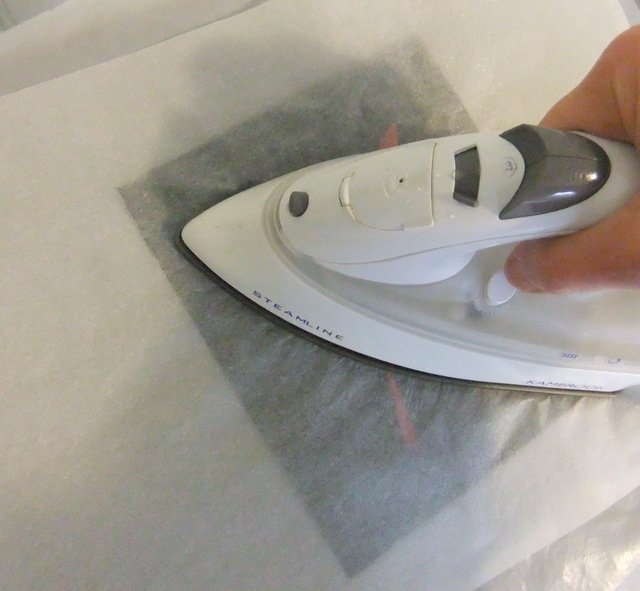
Cover again with an appliqué mat or baking paper.
Note: It’s obviously not possible to cover with an appliqué mat if you have vertical pins in position. Either manage without pins, taking great care that the segments don’t move around under the cover, or pin through disposable baking paper (not your precious appliqué mat!).
Fuse the motifs to your foundation fabric, using a warm-hot, dry iron.
Be sure to check that overlapping (or ‘underlapping) pieces are positioned correctly.
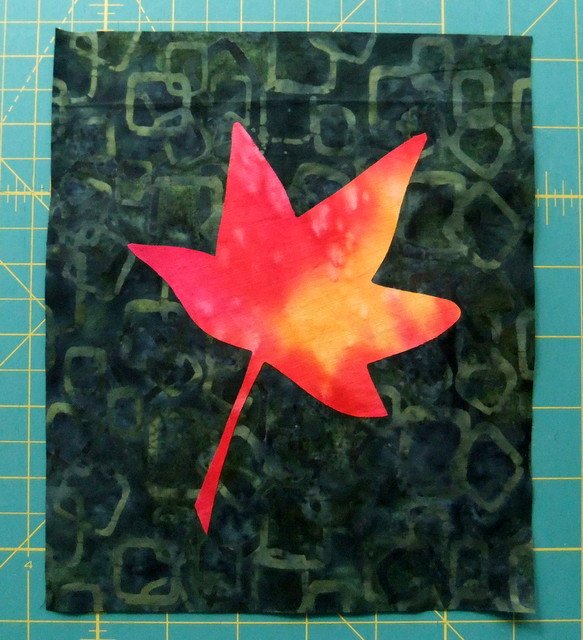
Your appliqué motif is now successfully fused to the foundation fabric and you’re ready to continue!
Now that we have everyone in the same ‘place’, we can move on.
In coming articles, we’ll begin to explore Artful design and stitching techniques.


Absolutely the best How to Appliqué I have ever read! Bravo!
Hi Kim – How generous of you to say so! I do my best 🙂 Of course, there’s more to come … I hope you continue to enjoy the articles.
Many thanks, Deborah
Thank you Deborah a very good easy to follow instruction on appliqué, very generous in your knowledge.
You’re most welcome, Carole. I’m pleased you find my tutorials accessible. And thank you so much for taking the time to let me know.
Deborah
Thank you so much for all the understandable information, looking forward to next weeks. So nice of you to do this,Thank you again!
Hi Elizabeth – I’m so pleased you have enjoyed the articles so far. I appreciate you letting me know. 🙂 Deborah
Thanks so much.
Hi Jan – You’re welcome. 🙂 I enjoy sharing this information.
Yes! Thank you for your delightful and engaging tutorials. I look forward to more…
Thank you Amy, I’m so pleased you’re enjoying the tutorials – and thank you for following my work!
muito obrigado por isso.
You’re welcome!