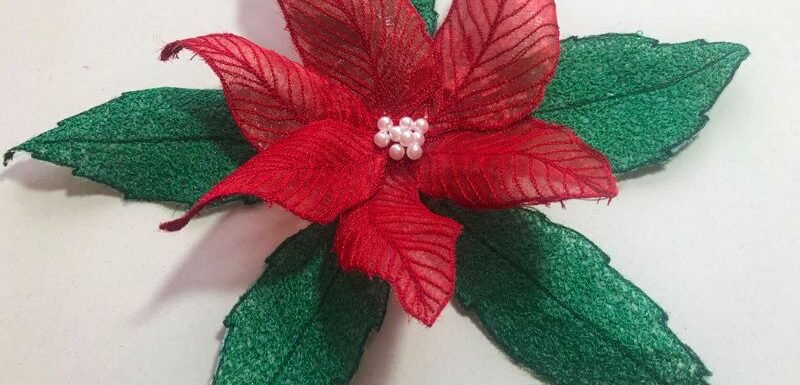
Discover an easy method for how to make 3d thread sketched flowers using organza fabric, soluble stabiliser, and free motion thread sketching techniques.
The Thread Sketching in Action video demonstration series continues this week with TSIA #94 – 3D Organza Flowers.
Learn how to create stunning 3D organza flowers using sheer organza, soluble stabiliser, and free machine embroidery and give your projects a glittering extra dimension!
Poinsettias are often used in festive and Christmas displays, but why not make them any time of year?
This 3D poinsettia plant embellishment is quick and easy to make for beginners or advanced thread sketchers. If another flower shape appeals to you, simply adapt the technique by changing the leaf and petal design.
Disclosure: Some of the links below are affiliate links, which means I may receive a small commission (at no further expense to you) if you click through and make a purchase. As an Amazon Associate I earn from qualifying purchases from Amazon websites.
How to make 3D Organza Thread Sketched Flowers
Step-by-step guidance for any level of experience
Regardless of whether you’re an ‘old hand’ at free machine embroidery or a complete novice, these flowers are not difficult to make and, like most of my designs, very ‘forgiving’.
The odd little wobble or wonky stitch is not going to spoil your work. There is absolutely no need for you to be concerned that this project might be too difficult!
My philosophy is to use a simple technique to create something that looks as though it was difficult!
That’s the beauty of this textile art style—you are free to do whatever you like.
Adapt the leaf and petal design to suit your needs
This design is adaptable to many situations and uses:
- Create a freestanding 3D table decoration.
- Or use the design for regular appliqué.
- If you enjoy the tradition of decorating with poinsettia plants at Christmas, use these instead (they don’t require watering!).
- Alter the shapes to make any type of flower you like.
- The pattern can be resized to suit your requirements.
The benefits of using soluble stabiliser
I talk a lot about using stabilisers in my work. Truth be told, I’m always going on about it! But it’s been quite a while since I discussed the option of using soluble stabilisers. Water-soluble stabilisers offer the creative fabric artists many irresistible ways to be innovative.
With water-soluble stabilisers, you can create lacy or filigree embellishments, three-dimensional leaves, flowers, or abstract shapes, create freestanding vessels or bowls, or even use them to create new fabric.
Like all stabilisers, water-soluble stabilisers vary considerably in weight. However, most are light to medium weight, while some are translucent and others like clear plastic!
The lightest are plasticized products resembling kitchen cling-film. Others are synthetic materials that look and feel more like tissue paper.
In this 3D organza flower project, I use Sulky Ultra Solvy or any other reputable brand , which feel like a thickish, yet flexible plastic wrap.
Water-soluble stabilisers are useful for a range of projects when you want to remove all traces of the stabiliser. However, keep in mind that the project you’re working on must be able to withstand being dunked in water!
Water-soluble stabilisers are remarkably robust. They can be fitted in a hoop, stitched on, and drawn on with a marking pen. Working lettering or other line designs becomes easy, and there is no need to mark your fabric.
What you need to make 3D organza flowers
Many of you will be able to just raid your stash of organza to make this project. The only other thing you may not have on hand is soluble stabiliser, but it’s readily-available.
These 3D organza flowers can be put together in just an hour or so of your time.
Read on to see how this flower took shape, or watch the video below.
How to Make 3D Thread Sketched Flowers
Follow along with this video tutorial to make your own 3D organza flowers.
Feel free to create a different design or use any other lightweight fabric for your flowers.
(Note: The downloadable pattern for this design is no longer available.)
Step-by-step guide to making 3D organza flowers
#1 — Prepare the design
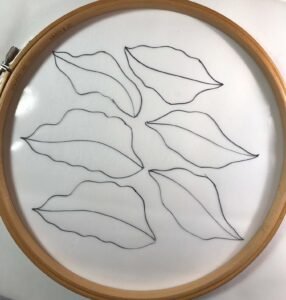
Begin by drawing your leaf and petal shapes onto the soluble stabiliser. Make sure your arrangement will fit in your embroidery hoop.
Be sure to draw enough shapes to suit your needs.
Want to make your flower larger or smaller? Simply resize the PDF design in the pattern or draw your own shapes on paper. If you alter the size and you find you can’t fit enough of them in your embroidery hoop, simply draw some more on another piece of the stabilizer.
#2 – Prepare the red organza and stabiliser sandwich
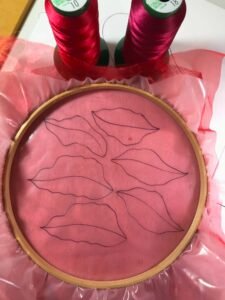
The next step is to layer two pieces of red organza (one in a bright colour, the other darker) and place the soluble stabiliser (with the petal design) on top.
Clamp the three layers into your hoop, ensuring sufficient space around the design to allow you to work the design without bumping into the hoop’s sides (been there, done that!).
I prefer to use embroidery hoops with a screw fastener rather than the spring-loaded sort. I find the screw tighteners are more secure, and reassuring in the knowledge that my fabric will not sag in the hoop!
#3 – Stitch the flower bracts (petals)

Load your machine with red thread, set the machine to free motion stitching, fit a free motion foot, and lower the feed dogs.
There is no hard-and-fast rule about how you should stitch the petals. However, it’s necessary to create some interlocking stitches. Otherwise, the petals will have no inherent strength to hold their shape after the soluble stabilizer has been washed out.
I began by working around the edge of each petal, stitching the central stem, and then working a series of veins radiating out from the centre, making sure the stitching interlocked with the outer edge each time.
The petals are finished off by stitching the perimeter again to give a nice solid edge and added strength.
When you’re done, set the petals aside to make the leaves.
#4 – Prepare the green organza and stabiliser sandwich
Follow the same steps as described in Step Two, but this time use your green organza.
Now, the sharp-eyed among you may notice that I have not used green organza.
Why?
The simple answer is … I didn’t have any!
Remember your colour theory from junior school? Mix yellow and blue together, and the result is green! So I improvised by using a piece of yellow organza as the lower layer, with blue organza on top. Voilá! Green fabric!
By the time these leaves were complete, the yellow and blue organza became indistinguishable. In fact, I think it adds a nice touch of lightness to the few areas where the fabric shows through the stitching.
If you find you haven’t got quite what you need on hand, see if you can improvise!
#5 – Stitch the leaves
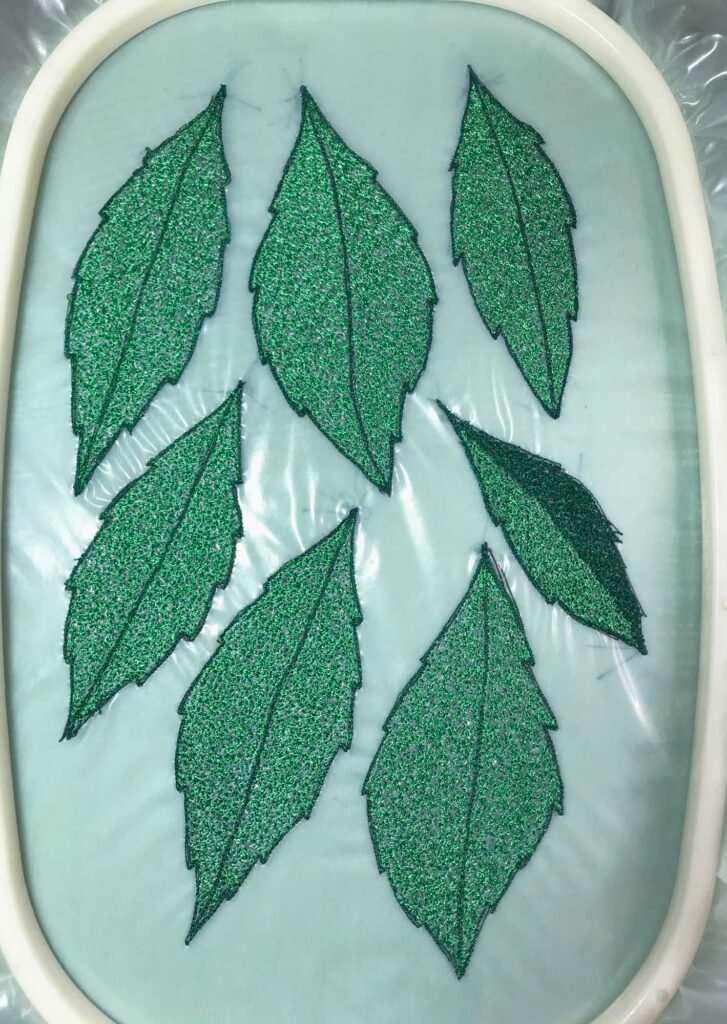
Once again, set the machine to free motion straight stitch, lower the feed dogs, and fit a free motion foot. Using dark green thread, the edges and central stems outline stitch the outer edges and central stem.
Then it’s time to change things up a bit.
You may spot the one ‘rogue’ leaf in my pictures (the one that is half light green and half dark green). That was my ‘test leaf’, used to determine how I wanted to stitch the final pieces.
Change to a lighter green thread, and fill all the empty areas of the leaf with free motion zigzag stitch. Although the stitching is often quite dense, don’t try to completely obliterate the fabric underneath. It’s nice to keep a few chinks of light shining through!
#6 – Cut out, rinse and dry the organza shapes

After carefully cutting each leaf and petal from the surrounding fabric, plunge the whole lot into a bowl of cold tap water.
Swish them around and change the rinse water several times. You’ll notice that the slimy film washes away from the fabric, dissolving in the cold water.
When they are beautifully clean, lay them out on an old towel to dry. I like to allow the shapes to curl naturally as they dry, but if you want them in a particular form or even flat, you may need to encourage them to oblige.
#7 – Construct your 3D organza flower
Putting this 3D organza flower together is simple if you mount it on a firm base fabric.
I used a small piece of felt as the mount. You could also use a firm stabiliser (not soluble!) or even mount it on another fabric project you’re working on.
Arrange the leaves in an attractive layout, with the stem ends meeting in the middle. Then run a few free motion stitches around the points to keep them in place. You could also hand stitch them if you prefer.
To attach the red petals, simply repeat the process, stitching the petals in the centre of the flower, using red thread.
Add a finishing sparkle by hand stitching several white beads into the middle of the flower.
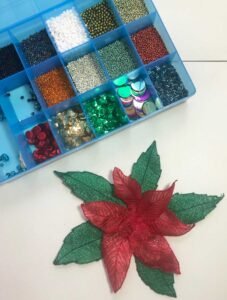
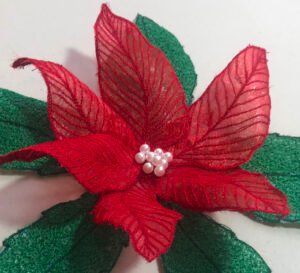
Finally, finger-press the petals at their bases to make them stand proud of the leaves, and you now have a gorgeous 3D organza flower to use as a festive decoration!
Now your 3D organza flower is complete — isn’t it beautiful!

