This complete guide and video tutorial to setting up your machine for free motion stitching explains every step of how to set up your machine for thread sketching, thread painting, free motion quilting and freestyle embroidery.
Preparation is key to the success of just about anything we do in life, and setting up your machine for free motion stitching is no exception.
Free motion stitching, whether it be thread sketching, thread painting, free machine embroidery or traditional free motion quilting will be a trouble-free process if you begin the right way. Not setting up your machine correctly before you begin potentially leads to frustration!
When doing free motion stitching, we know that fabrics, stabilisers, hoops, and so on, are important, yet it is absolutely fundamental that your machine is set up correctly for the work you are planning.
- How to Set Up Your Machine for Free Motion Stitching
- The Step-by-step Guide
- #1 – Your sewing machine and sewing table
- #2 – The Presser Foot
- #3 – The Feed Dogs and Stitching Plate
- #4 – Thread for Free Motion Stitching
- #5 – Needles
- #6 – Threading the Machine
- #7 – Tension
- #8 – Stitch Length and Width
- #9 – Starting and Stopping the Stitching
- #10 – Control Your Stitching Speed
- Learn more — read the book!
- Related posts
- #1 – Your sewing machine and sewing table
Affiliate Disclosure: Some of the links on this site are affiliate links. This means I may receive a small commission (at no further expense to you) if you click through and make a purchase. ThreadSketchingInAction.com is a participant in the Amazon Services LLC Associates Program, an affiliate advertising program designed to provide a means for sites to earn commission fees by advertising and linking to Amazon.com.
How to Set Up Your Machine for Free Motion Stitching
This comprehensive article and video tutorial guides you through every step of how to set up your sewing machine for free motion stitching.
This includes:
- Thread sketching
- Thread painting
- Free motion (or freestyle) machine embroidery
- Free motion quilting
- Free motion embellishments
Although there are dozens of different sewing machines available, all domestic sewing machines tend to function in much the same way. Any minor differences will be explained in your sewing machine manual.
Follow the guidelines in the video below (and the following article), showing how, in 10 easy steps, you can start your journey to enjoying successful, trouble-free free motion stitching.
Video Tutorial
If you’d like to learn more about free motion thread sketching, thread painting and free motion machine embroidery, I can recommend two of my best selling books:
- Creative Thread Sketching: A beginner’s guide – Tips, Techniques, and Projects for Starting Out in Thread Sketching and Thread Painting
- Complete Guide to Stabilising: Your essential guide to stabilising fabric for thread sketching, thread painting, and free machine embroidery.
The Step-by-step Guide
#1 – Your sewing machine and sewing table
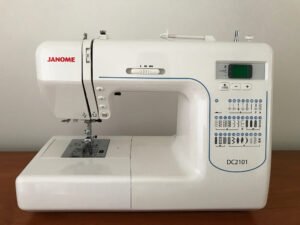
These days, that most new sewing machines, from the very basic to the utterly amazing, have the facility to stitch ‘free motion’.
My machine falls somewhere between these two extremes – it’s a good, solid, mid-range machine that is just a delight to use!
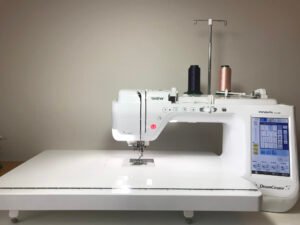
Buying a new machine
If you’re in the market for a new machine, but only have a tiny budget, fear not!
If an ‘entry level’ machine is all you can manage right now, then just remember to check that the machine either has a free motion foot (or darning foot) included with the attachments (or can be purchased separately), and that the feed dogs can be lowered.
Not sure what a free motion foot and feed dogs are?
All will be revealed …
Flat-bed sewing table attachment
Having a large, flat surface on which to place your thread sketch or quilt is a wonderful bonus, but not essential. However, many new machines come with a flatbed extension table as an optional or included ‘extra’.
Stitching a very large quilt may require a larger flat surface, but most smaller pieces will be very manageable using a flatbed sewing table attachment.
Tip! When purchasing a flat-bed extension, make sure to get one designed for your machine, as brands will vary.
Alternatively, a sewing table with a recessed hole for the machine is a great alternative, if you have one.
Once again, not all machines can have a flatbed table fitted, but if you’re working mainly with smaller quilts or artwork, then you can still manage with a regular, domestic machine.
I managed for years with a very small, domestic sewing machine, with no flatbed table, and simply got used to it!
For a list of suggestions about sewing machines and other tools for beginners, see my article 10 Best Art Quilting Tools for Beginners: Essential supplies for starting out.
#2 – The Presser Foot
Many new machines come with a free motion foot included, and some with more than one. These free motion presser feet are variously known as:
- Open toe (C) foot
- Closed toe (O) foot
- Darning foot
- Hopping foot
- Echo quilting foot
The two most common feet for free motion stitching are the Open Toe (or ‘C’) foot, and the Closed Toe (or ‘O’) foot.

In most situations, I use the Open Toe foot as it allows me to easily switch from free motion straight stitch to free motion zigzag stitch, without changing the presser foot.
To fit this to your machine, you will need to remove the standard foot that is on the machine and attach the free motion foot. Refer to your sewing machine manual for instructions on how to do this, as machines do vary.
#3 – The Feed Dogs and Stitching Plate
The feed dogs are the little metal ‘teeth’ located below the stitching plate, underneath the needle.
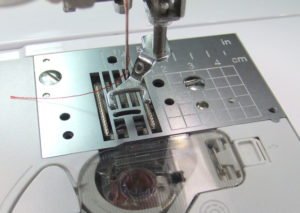
For free motion stitching, the feed dogs should be lowered, so that they no longer rise up and down as you stitch. It is the rising up and down that moves the fabric along when doing regular stitching.
Machines will either have a manual switch to lower the feed dogs, or an electronic button.
My machine has an electronic touchpad, so I simply press the ‘button’ that shows the free motion foot symbol. Once again, check your machine manual for guidance.
#4 – Thread for Free Motion Stitching
Needle thread
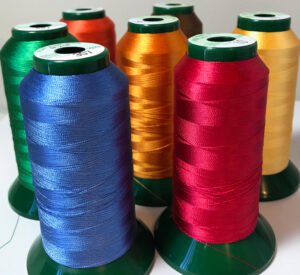
For most thread sketching work I use 40 gauge rayon or polyester embroidery thread in the top of the machine.
Any good quality brand should be appropriate, though some are better than others.
You can use a LOT of thread when thread painting, so if your machine can handle the large spools, they generally work out more economically than buying lots of small spools of thread.
As with most things, you get what you pay for, so purchase the best thread you can that is readily available where you live. There are many great brands available.
What I really love about rayon and polyester thread is the high gloss it adds to the stitching. However, there are times when you might not want that glossy look. In that situation, cotton embroidery thread may be more appropriate.
Bobbin thread
When it comes to Bobbin Thread, you have some options:
- Use the same thread as in the top of the machine. This is a very ‘safe’ option. There will be no problems with the bobbin thread being visible if your tension is not quite perfect, and the exact balance of weights between top and bottom means you will probably not experience any tension issues.
- Use a dedicated bobbin thread. Once again, there are a number of different brands available. These bobbin threads are generally quite a fine gauge – between 40 and 60 weight, or even 90-gauge – making them economical to use. They are also available in a wide range of colours, so it’s easy to select a shade that tones with your top thread.
For more information about machine embroidery thread, see my article Best Machine Embroidery Thread for Free Motion Stitching.
#5 – Needles
Which brand? Needles are, to some extent, a personal preference. However, machines also have preferences, too! Some machines like certain brands more than others.
As with thread, however, always buy good quality needles. It’s just not worth doing anything else.
I generally use machine embroidery needles for most of my thread sketching, thread painting and free motion stitching, and my favourite brand is Schmetz.
Size varies according to what I am working on. Once again, your sewing machine manual should offer some guidelines about needles.
For most free motion work I find that needles ranging from 75/11 to 90/14 are the most appropriate.
Never work with a ‘dull’ needle– this will only lead to tension problems and fraying threads.
#6 – Threading the Machine
Before attempting to thread your machine, make sure the foot is in the raised position.
If the foot is ‘down’ then there will be tension on the thread and it will be difficult to pull the thread through the mechanism. Forcing it could result in damage.
Refer to your sewing machine Manual or User Guide for instructions specific to your machine,
#7 – Tension
Occasionally you may need to change the thread tension, although for most thread sketching and thread painting I find that this is rare.
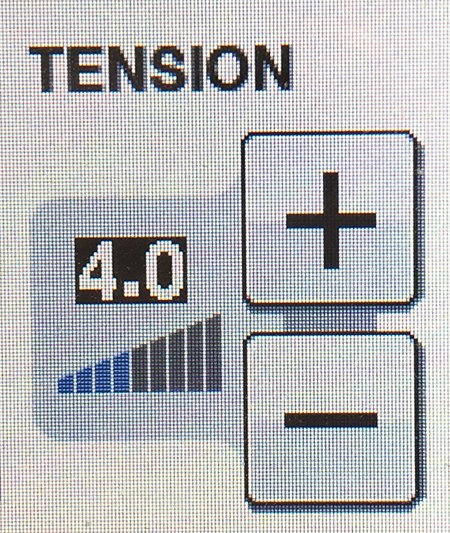
How to tighten or loosen the upper thread
Tension in the upper thread is altered by adjusting the dial or button to a higher or lower number.
To tighten the upper thread– move to a higher number.
If the upper thread is visible from the wrong side of the fabric, the upper thread is too loose – move to a higher number.
To loosen the upper thread– move to a lower number.
If the bobbin thread is visible on the right side of your fabric, the upper thread is too tight – move to a lower number.
Keep your machine well maintained
Keep your machine well maintained, with regular servicing, and it will always behave as you wish!
The occasions when you may need to alter the tension occur when using, for instance, a heavy top thread and light bobbin thread, doing bobbin thread work, or when working on certain types of fabric. But for most free motion work on cotton quilt sandwiches, there should be little need to change.
If you find you are still having problems, then always check that the machine is threaded correctly, and that you are stitching at an even speed – i.e. not moving the fabric too fast or too slowly, in relation to the sewing speed.
While you’re doing that, also check that the bobbin race is not clogged with fluff or lint, which play havoc with tension very quickly!
#8 – Stitch Length and Width
In most instances, set the stitch length to ‘0’, or as close to zero as it will go (my machine will only go down to 0.2 mm).
If your machine is an older, or more basic model, I also suggest setting the stitch width to zero, as well. However, on most mid-range modern machines, this is generally not necessary.
Unless, of course, you are working in free motion zigzag stitch, in which case altering the stitch width to very narrow or very wide can make free motion zigzag easier to do.
#9 – Starting and Stopping the Stitching
When beginning to free motion stitch, set the needle to always stop in the ‘down’ position, if your machine will do this.
Pull up the bobbin thread:
Insert the needle, take one stitch, and pull the bobbin thread through to the top of the fabric. This will prevent ugly thread tangles on the back of your work.
To begin stitching:
Insert the needle again, and work a couple of stitches on the spot, to secure the ends, and then begin stitching.
To stop stitching:
When you reach the end of the area being stitched, once again take a couple of stitches on the spot, before cutting the threads.
By doing these things, your free motion stitching will not unravel later on!
#10 – Control Your Stitching Speed
Controlling the speed of your stitching is vital to achieving a really great finish. But remember – this can take some practice!
Think of this coordination rather like driving a manual car, where you need to coordinate both your feet for the clutch, brake and accelerator and your hands on the steering wheel. And remember back to the time when you were a Learner Driver – it wasn’t easy at first, was it?
Some people like to use Stitch Regulators. These can, indeed, be useful if working on a formal free motion quilting project, however, for thread sketching and thread painting, they are not necessary.
Sometimes the most tedious part of any creative process is the initial setting up, but it IS worth taking the time!
Your work will thank you for it!
Learn more — read the book!
Available in Kindle ebook, Paperback, and Hardcover
Creative Thread Sketching: A beginner’s guide (2nd Ed)
This easy-to-read book is a complete guide for people starting out in thread sketching and thread painting.
- Equipment
- Fabric and Thread
- Tension
- Stabilisers
- Stitching
- Puckering
- as well as six included projects


![Creative Thread Sketching [2nd Ed] - by Deborah Wirsu [paperback]](https://threadsketchinginaction.com/wp-content/uploads/2023/03/CTS-pb.png)
![Creative Thread Sketching [2nd Ed] - by Deborah Wirsu [ebook]](https://threadsketchinginaction.com/wp-content/uploads/2023/03/CTS-ebook-867x1024.png)