Get started on your free motion machine embroidery journey. Learn about the necessary tools and equipment, understand how to use the free motion presser foot, and master basic stitches with this comprehensive guide.
- What is Free Motion Machine Embroidery?
- Essential Tools and Equipment for Free Motion Machine Embroidery
- The Importance of the Free Motion Foot
- Which needle should you use?
- Thread
- Fabric
- Stabilisers
- Understanding Basic Stitches in Free Motion Embroidery
- Best Practices for Free Motion Machine Embroidery
- Maintain a Consistent Speed
- Stitch Direction
- Test on a Scrap Fabric
- Sewing Machine Tension
- Clean and Oil Your Machine Regularly
- FAQ
- Beginner's Guide to Free Motion Machine Embroidery: Just the beginning!
- Related Posts
- Recommended Resources
Note: This article is an updated and improved version of the original “Ten Top Tips for Successful Free Machine Embroidery”.
Affiliate Disclosure: Some of the links on this site are affiliate links. This means I may receive a small commission (at no further expense to you) if you click through and make a purchase. ThreadSketchingInAction.com is a participant in the Amazon Services LLC Associates Program, an affiliate advertising program designed to provide a means for sites to earn commission fees by advertising and linking to Amazon.com.
What is Free Motion Machine Embroidery?
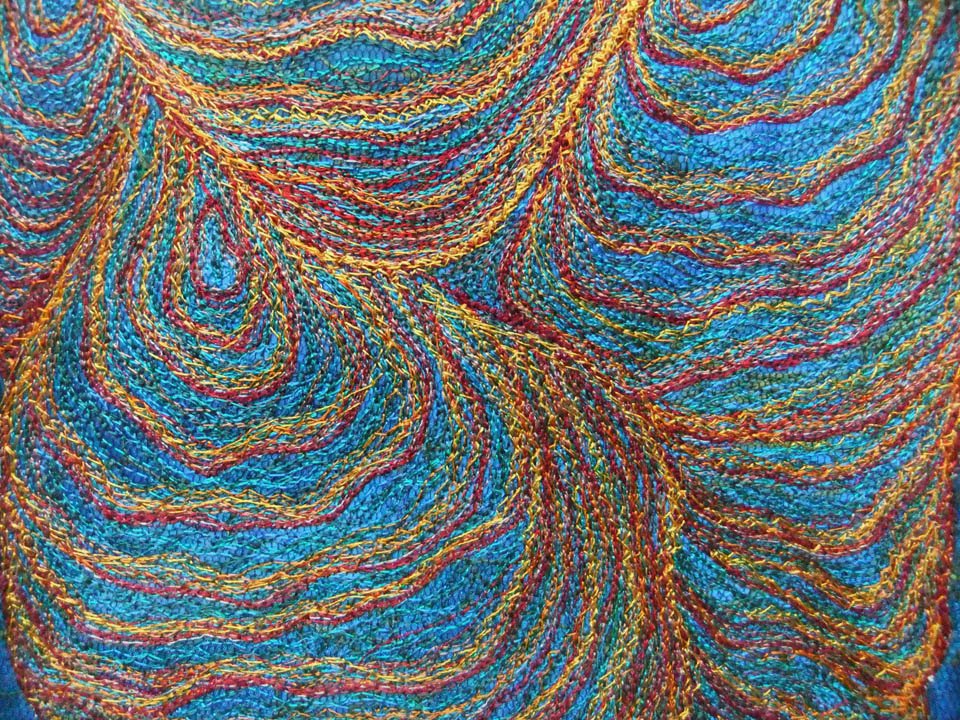
Free motion machine embroidery, often referred to as freestyle embroidery, thread painting, or thread sketching, is an exciting and creative form of textile art that is increasing in popularity.
Unlike traditional or computerised machine embroidery that follows a pre-determined pattern, free-motion machine embroidery allows the artist to freely move the fabric under the needle, creating unique, personalised designs.
The resultant piece is an intricate, textured artwork that adds a personalised touch to any quilt, textile, fabric or garment.
Essential Tools and Equipment for Free Motion Machine Embroidery
Domestic Sewing Machine
The cornerstone of free-motion machine embroidery is a reliable domestic sewing machine. Modern machines are often equipped with features that make them suitable for embroidery, but you don’t necessarily need a high-end model.
What’s important is that the machine has a feature that allows you to lower or cover the feed dogs (the small metal teeth that pull the fabric through the machine), thus enabling free movement of the fabric in any direction.
You’ll also need a free-motion foot to fit onto your machine.
The Importance of the Free Motion Foot
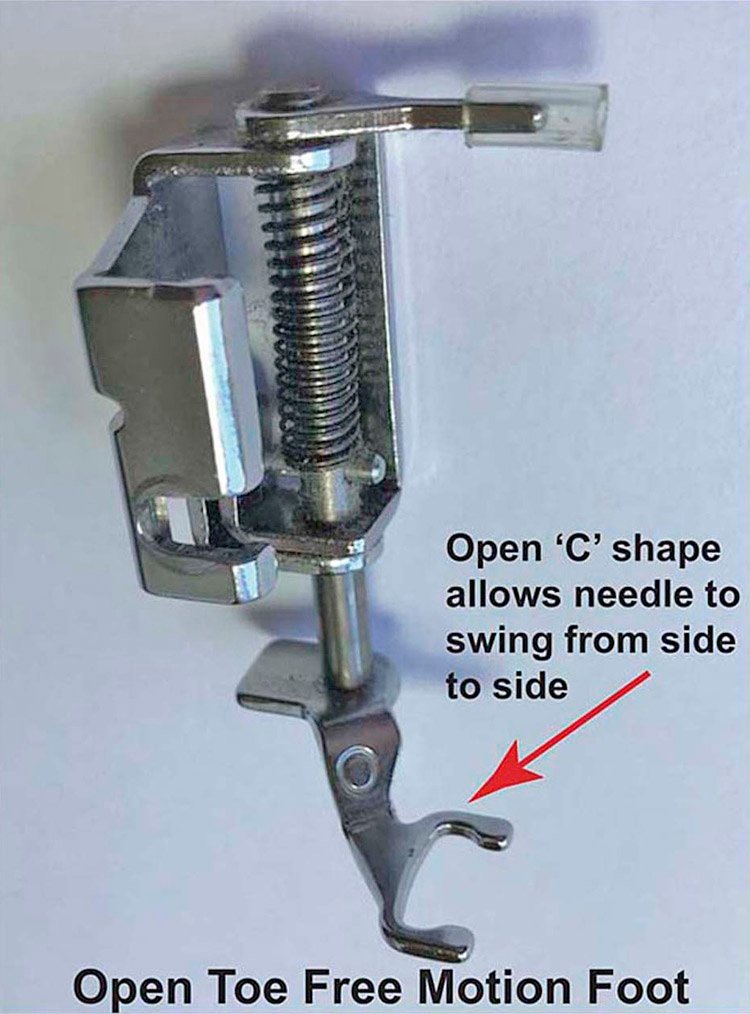
The open-toe free-motion foot, also known as the darning or hopping foot, is a critical tool for free-motion machine embroidery.
It helps maintain an optimal distance between the needle and the fabric, ensuring a consistent stitch length and preventing fabric flagging (the up and down movement of the fabric with the needle).
In addition, the foot allows for clear visibility of the working area and easy manoeuvrability of the fabric, both of which are essential for creating free-motion designs.
Free-motion feet are available in various styles, notably the Open-toe Foot (or C foot) and the Closed-toe foot (or O foot). While both have their uses, an open-toe foot is the most versatile and easiest to use.
Many up-to-date domestic sewing machines include an Open-toe hopping foot among the attachments. However, if you don’t have one, they are inexpensive and available to fit most sewing machines.
Fitting your machine with a free-motion foot and lowering the feed dogs enables free stitching in any direction, at whatever speed you like.
The Feed Dogs
The feed dogs are the little metal ‘teeth’ below the stitching plate (under the needle).
Lowering them prevents them from gripping and advancing the fabric as you’d expect for normal sewing.
Most people are accustomed to using regular, straight stitching, and zigzag, for their everyday sewing needs. Making the move to free-motion stitching may seem challenging at first, but you’ll soon get used to it.
Remember to lower the feed dogs and alter your machine’s stitch length to zero (or as close to zero as possible) when stitching free-motion straight stitch.
For free-motion zigzag stitch, set the stitch length and width as desired. But remember, however, you will still be in control of how large or small your zigzag stitches will be.
Which needle should you use?
Ask a dozen people what their favourite machine needle is, and you’ll likely get a dozen different answers!
However, a safe place to start is by using a machine embroidery needle in the size range of 75/11 to 90/14 (depending on your chosen thread, fabric, and stabiliser) is appropriate.
The sizing numbers indicate the size of the needle, i.e.
- Lower numbered arrows have a smaller eye.
- In contrast, higher numbers have a larger eye.
- When using fine thread, choose a finer needle; for heavier gauge threads, choose a larger one.
Sometimes, you may find that the embroidery needle isn’t delivering the desired results. This could be due to a mismatch with the thread weight, or the composition and number of layers you’re stitching through.
Alternative needles include Top-stitch needles, Quilting needles, or Universal needles.
Always use a sharp needle
Free machine embroidery, thread painting and thread sketching involve a lot of stitching, making your needle become dull over time.
When you sense it’s not as fresh as it should be — resulting in skipped stitches, shredded thread, or is nicked or bent — replace the needle immediately with a new one.
Needle Brands
As with many things in the world of textile art, it pays to invest in quality. Good quality needles are not expensive when you balance their durability and ease of use.
While many reputable brands are available, choose one that suits your machine. This may sound strange!
However, sewing machines can be ‘choosy’ about brands, too. If in doubt, ask your sewing machine manufacturer for their recommendation.
In most instances, you won’t go wrong using Schmetz needles, which are available in all the usual types and sizes.
Thread
Thread plays a vital role in the embroidery process. Use machine embroidery thread for the best results; it’s available in a variety of colours and types, including rayon, polyester, and silk.
Thread weight
If you’re just starting out, 40-gauge machine embroidery thread — either rayon or polyester — is ideal for most free-motion machine embroidery.
Many creative stitchers use 40-gauge thread almost exclusively, reserving other weights and thread types for highlights or special effects.
Consider investing in good-quality thread, as poor-quality thread may lead to frequent breakages and affect the overall outcome of your design.
You can read a more in-depth article on the best machine embroidery thread here.
Fabric
When it comes to fabric selection, go for a material that can withstand constant needle punctures without tearing.
100% Cotton is preferred for beginners due to its durability and ease of handling.
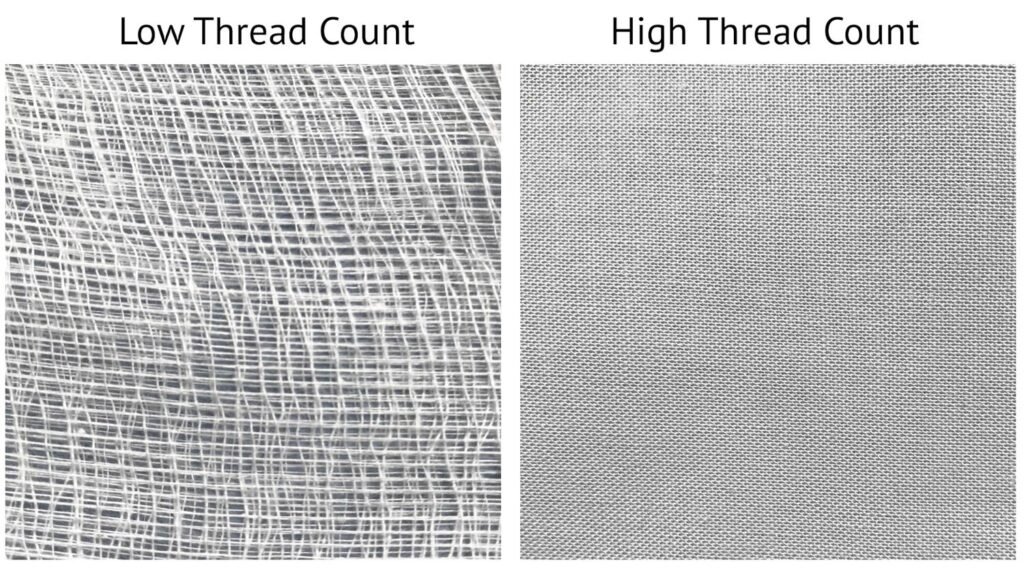
Look for quality fabric with a high thread count. If your fabric’s weave is too loose, avoiding problems with puckering and pull-up may be challenging.
High-thread count cotton fabric has the stability to resist puckering, especially when paired with an appropriate stabiliser.
Stabilisers
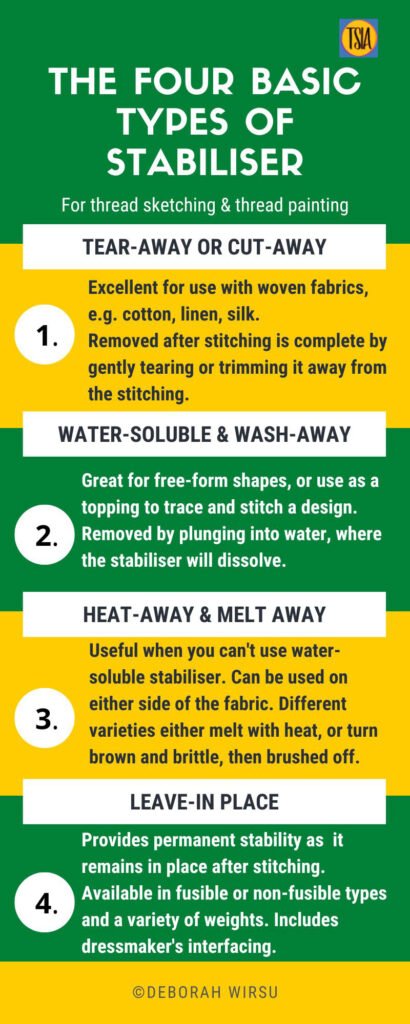
Stabilisers are materials placed underneath the fabric to provide extra support and prevent puckering during stitching.
There are several types of stabilisers, including tear-away or cut-away, water-soluble (wash-away), heat-away and melt-away, and stabilisers that remain permanently in position.
You can choose an appropriate stabiliser based on the nature of your project.
Discover more about stabilisers for free machine embroidery and thread painting in my popular book: Complete Guide to Stabilising. [2nd edition] – fully updated and expanded.
![Complete Guide to Stabilising [2nd Ed] - by Deborah Wirsu [paperback]](https://threadsketchinginaction.com/wp-content/uploads/2023/03/CGTS-pb-134x150.png)
Secure your stabiliser before stitching
When using a stabiliser with fabric, take the time to pin, baste, or fuse the layers together to prevent movement as you stitch.
An alternative method is to use an embroidery hoop. They are available in a range of sizes and shapes.
Understanding Basic Stitches in Free Motion Embroidery
Free motion machine embroidery revolves around a single basic stitch — the straight stitch.
However, the beauty of this technique lies not in the variety of stitches but in the freedom to move the fabric in any direction, thereby creating a diverse array of patterns and designs.
First, practice making simple shapes like loops, waves, or straight lines. Gradually, you can move on to more complex shapes and designs as you gain confidence and control.
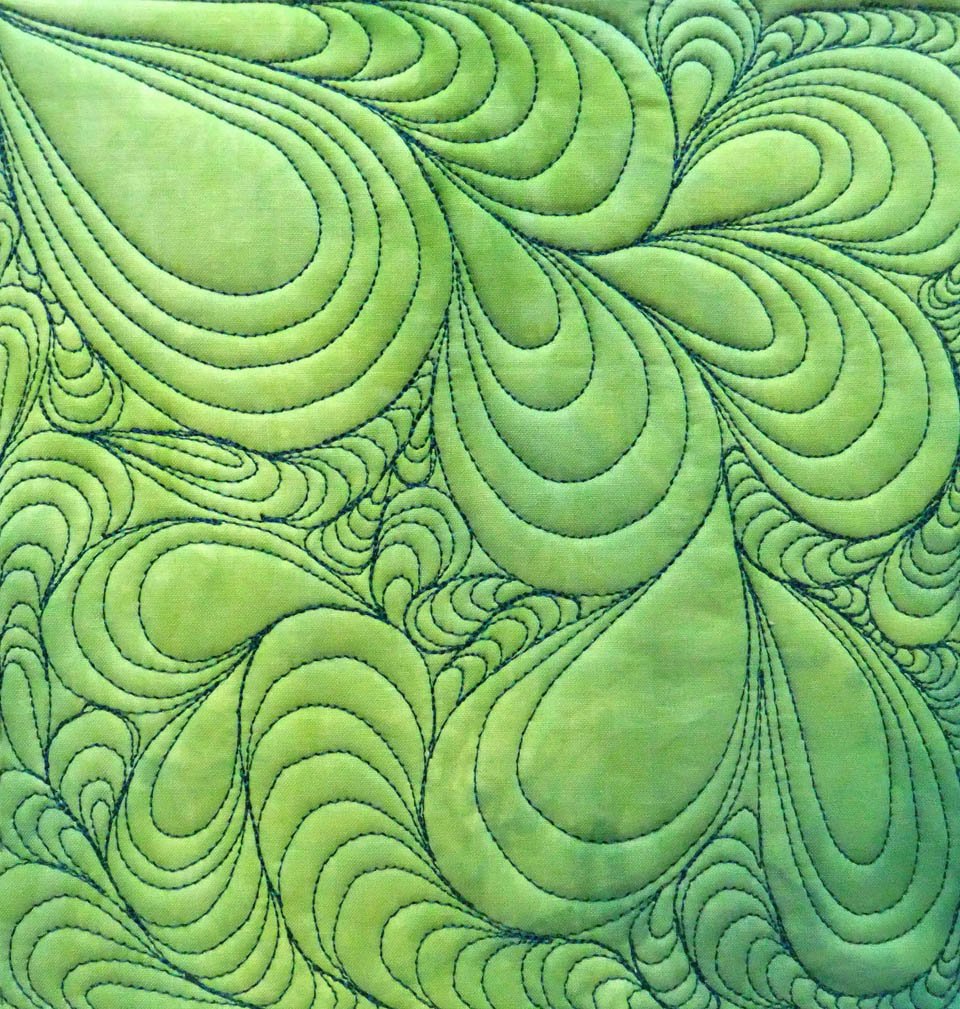
Free-motion zigzag stitch may take a little longer to get used to.
However, it’s a valuable addition to your stitch library, allowing you to complete thread paintings more quickly and create a variety of delightful effects.
Struggling? Expert help is here!
If you’re done with trying to teach yourself how to do thread sketching and thread painting, your knight in shining armour has arrived!
This book offers a detailed guide to everything you need to know to get started — from the initial setup onwards. All the little things you always wanted to know but nobody ever thought to tell you (until now!)
Stitch Length and Width
Free Motion Straight Stitch
Set stitch length to zero. Older machines may also need to have the stitch width set to zero.
Free Motion Zigzag Stitch
Set stitch length and width as you would for regular stitching. However, be aware that, by the very nature of free-motion stitching, the stitches will vary in size. Ultimately, you determine the size of the zigs and zags!
Best Practices for Free Motion Machine Embroidery
Start with a Sketch or Tracing
Before diving into machine embroidering, sketching or tracing your design on the fabric using a fabric-friendly marker can be beneficial.
This approach gives you a roadmap to follow and helps ensure a more accurate rendition of your design.
Appropriate fabric markers include:
Test the marker on a spare scrap of fabric before using it on your project to ensure the marks can be brushed or ironed away after stitching.
Maintain a Consistent Speed
Maintaining a consistent speed between your hands moving the fabric and the machine stitching is critical for even, well-formed stitches. Remember, faster isn’t always better.
Going at a steady pace, and avoiding sudden surges of speed, can yield better results, especially for beginners.
If your stitching is jerky or jagged, focus on maintaining a steady speed.
The trick is increasing the machine speed (more pressure on the foot pedal) while simultaneously slowing your hand movements.
Stitch Direction
One of the delights of working free-motion is that you can stitch in any direction you like. The fabric can also be moved in any direction. Once you get used to this, a world of opportunity appears!
Test on a Scrap Fabric
Before starting your project, always test your design on a scrap piece of fabric. Doing this helps you get a feel of the design and lets you make necessary adjustments before the final execution.
Sewing Machine Tension
You rarely need to adjust the tension with a well-calibrated and maintained machine. However, minor adjustments may be necessary if you use different thread weights in the top and bobbin threads.
If tension problems do arise, check the following before altering the tension:
- The needle is sharp and in good condition (not dull, nicked, or bent). If it’s damaged, fit a new needle.
- Has lint or fluff accumulated in the bobbin case or around the needle shaft? If so, remove it. Lint can play havoc with thread tension!
Clean and Oil Your Machine Regularly
Proper machine maintenance is key for successful machine embroidery.
By the very nature of the technique, you’ll be working a lot of stitches. As a result, your needle will become dull over time, and lint will collect in the bobbin case.
Regular cleaning and oiling keep the machine in good working order, ensuring smooth operation and quality stitches.
FAQ
Q. Can I use a domestic sewing machine for free motion machine embroidery?
A. Yes! These days, most machines allow for lowering the feed dogs and fitting a free-motion foot so that you can work free-motion.
Q. Which free-motion foot is best for machine embroidery?
A. An open-toe (or C) hopping foot is appropriate for most free-motion stitching. Several other types of foot are available. However, I recommend beginning with an open-toe hopping foot.
Q. Can I use an embroidery hoop when free-motion stitching?
A. Yes. However, whether you decide to work with or without a hoop is up to you. Different projects sometimes call for a different approach. As your experience grows, you’ll be able to judge whether hooping or not is best for the project.
Q. Is free-motion stitching difficult?
A. No! While free-motion stitching might seem challenging at first, it won’t take long to get a feel for it and learn to control both the speed and direction of your stitching. The best way to improve is to practice! Work on small sample projects and spend time experimenting.
Beginner’s Guide to Free Motion Machine Embroidery: Just the beginning!
Embarking on your journey with free motion machine embroidery is an exciting endeavour.
Armed with a sturdy domestic sewing machine, quality thread, suitable fabric, an open-toe free-motion foot, and a good understanding of the basic stitches, you are well on your way to creating beautiful, personalised pieces.
Remember to practice regularly, maintain your machine, and, most importantly, enjoy the process!
While free-motion machine embroidery may seem daunting at first, patience, practice, and creativity are all you need to master this rewarding art form.
Related Posts
- Best Quilting Machines for Beginners: A comprehensive guide
- Best Sewing Machines for Quilting in 2025
- Guide to the Different Types of Quilting Fabric
- A Guide to the Best Sewing Notions: What are they and what do I need?
Recommended Resources
![Creative Thread Sketching [2nd Ed] - by Deborah Wirsu [ebook-paperback-hardback]](https://threadsketchinginaction.com/wp-content/uploads/2023/03/TSIA-2nd-ed-books-CTS-300x200.jpg)


![Creative Thread Sketching [2nd Ed] - by Deborah Wirsu [ebook-paperback-hardback]](https://threadsketchinginaction.com/wp-content/uploads/2023/03/TSIA-2nd-ed-books-CTS-1024x683.jpg)

