Deciding whether to add backing fabric to art quilts and thread paintings is a dilemma faced by many textile artists. In this article, we explore some of the reasons for and against backing art quilts and thread paintings.
Sometimes I get asked for tips for backing art quilts and thread paintings, especially when you don’t want the stitching on the back to show, or you generally need your work to be neat and tidy.
So, should the workings of your free motion stitching or thread painting show on the back of your work, or not? Does it matter? And when should you ‘cover up’ or ‘reveal all’?
Affiliate Disclosure: Some of the links on this site are affiliate links. This means I may receive a small commission (at no further expense to you) if you click through and make a purchase. ThreadSketchingInAction.com is a participant in the Amazon Services LLC Associates Program, an affiliate advertising program designed to provide a means for sites to earn commission fees by advertising and linking to Amazon.com.
Tips for backing art quilts and thread paintings
Use these tips and techniques to decide on the most appropriate method for backing your art quilts and thread paintings.
Introduction
Take a look at the back of any large, traditional quilt, such as a bed quilt. Does the free motion quilting show? Of course it does!
Nevertheless, I can hear you saying, ‘A free motion stitched traditional quilt is not the same as a heavily stitched art quilt or thread painting.’.
And I agree.
I won’t deny there have been occasions when I elected to cover the stitching on the back of my work with another piece of backing fabric. Generally, however, this happened more often back in the day when I had less confidence in my ability and work, and did not feel inclined to ‘air my laundry’ in public, so to speak!
Sometimes, the stitching was uneven, or I’d had problems with tension, giving the back a somewhat untidy appearance. And yet, the front looked just fine.
I knew my stitching wasn’t perfect but wasn’t prepared to abandon something I’d put my heart and soul into, just because there were a few minor blemishes!
As my experience grew, these problems became less frequent. I learned from my mistakes!
Thinking back to my childhood and remembering the lessons from my aunt (a professional dressmaker) who warned me to never machine backstitch a seam on a dress in her presence (!), I began to take more care over the details of starting and stopping a row of stitches.
These days, my art quilts and thread paintings – especially those destined for public viewing – are finished with a level of care that ensures the back of the work is neat and tidy.
Why hide the back?
The first question I ask is, ‘Why do you want to hide the back of your work?’.
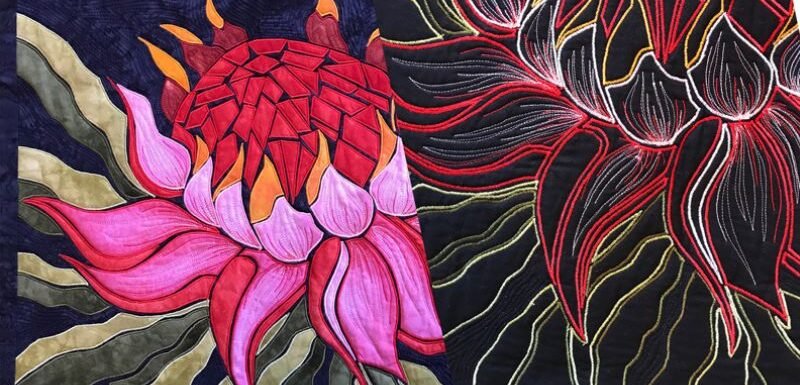
To my mind, the back is an inherent (and often very interesting) component of your textile art, sometimes offering an intriguing perspective of the work.
![Thread Sketching in Action No 92 - Abandoned [reverse] - Deborah Wirsu - ThreadSketchingInAction.com](https://threadsketchinginaction.com/wp-content/uploads/2020/03/Abandoned-6-1-1024x681.jpg)
Of course, there are times, such as preparing a design for an exhibition or competition, when you want your best work on display. And you can be certain that, while the viewing public may not peruse the back of your art, the judges or gallery officials certainly will!
Also, at quilt shows, the public often demands to see the back of a particularly gorgeous quilt. That’s when the ‘white glove’ attendants come to the rescue!
I’m not sure if the visiting public is showing innocent curiosity, or they want to see how neat you are!
Choosing a display method
When deciding on a backing technique for art quilts and thread paintings, major considerations include:
- How will the work be displayed?
- What is its purpose?
Art quilts are generally created to hang on a wall, as a piece of art.
Therefore, as long as the back is neat, it doesn’t really matter (in most instances) what it looks like. The thing is, though…we (the artist) know when our work is untidy! So we do our best to present our work in the best way we can.
Nevertheless, there are times when the appearance of the back is not of prime importance.
Traditional quilt binding and display methods are not your only choice. Both art quilts and thread paintings can also be stretched over an artist’s canvas, hiding the back in the process.
Similarly, small and large works of all kinds can be framed. Even 3D pieces can be mounted in a deep box frame or transparent cabinet.
Ask yourself these questions:
is your project an art quilt or stitched picture that will hang on the wall?
If so, will the quilt be permanently displayed in one place, such as a private collector’s home?
Or are you showing it at a gallery, where it may be moved from one venue to another?
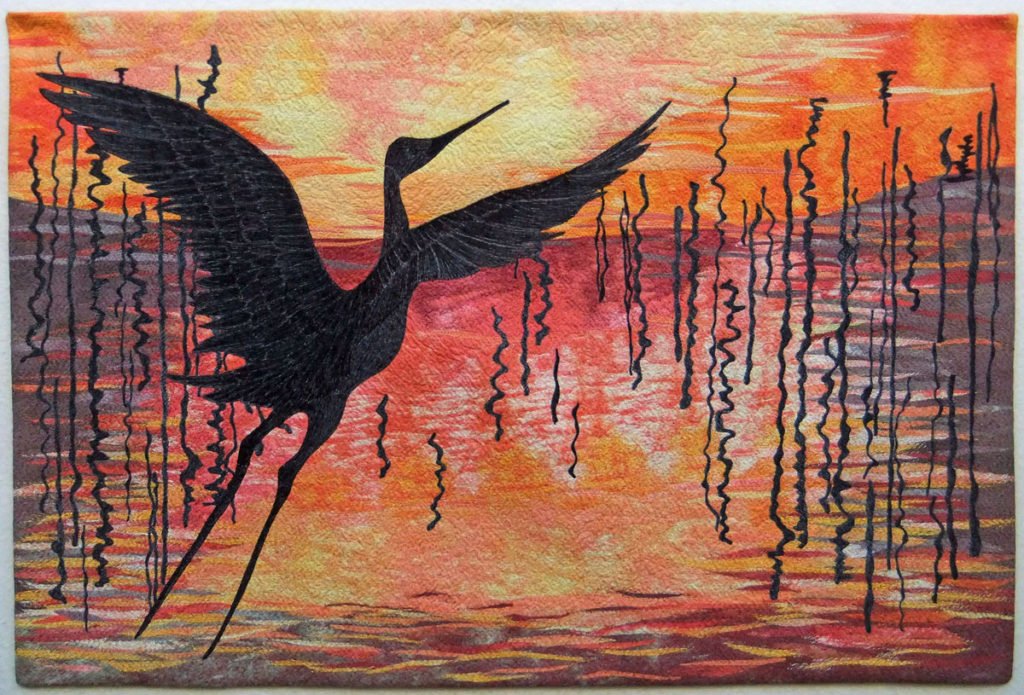
If your art quilt will be stationed in one place, then the most important thing is to ensure that the back is neat and secure.
Textile art that is frequently moved from place to place is subject to the wear and tear of packing and unpacking. Any loose or insecure thread ends, stitched embellishments, etc., are likely to work loose over time, if not well-secured from the outset.
Will your project be framed?
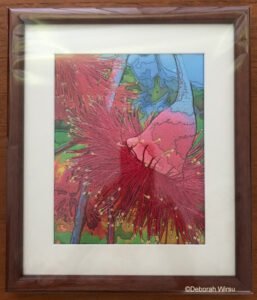
Both small and large works can easily be framed and generally (in my opinion) look wonderful. Framing has the added benefit of protecting the fabric, keeping it clean and secure from fading.
The downside to framing behind glass is that there is some loss of textural sensation (both visual and physical).
Picture frames are readily available online and from art supply stores. If you intend using a commercially-available frame, it’s best to decide on the size before you begin making your quilt. Otherwise you might find yourself having to take your quilt to a framing service.
Will the finished design be incorporated into another piece of work?
For example:
- A thread sketch or thread painting could be used as a side panel for a shoulder bag.
- Or it could be made into a cushion cover.
- What about transforming small pieces into postcard art?
- Placemats, table runners, and other household items.
- Perhaps you’re creating a stitched work to use as upholstery. In this case, does it matter what the back looks like? Nobody will ever see it!
How do you choose a finishing process, and why?
Read on to find out!
Tips for Backing Art Quilts
Take pride in your work
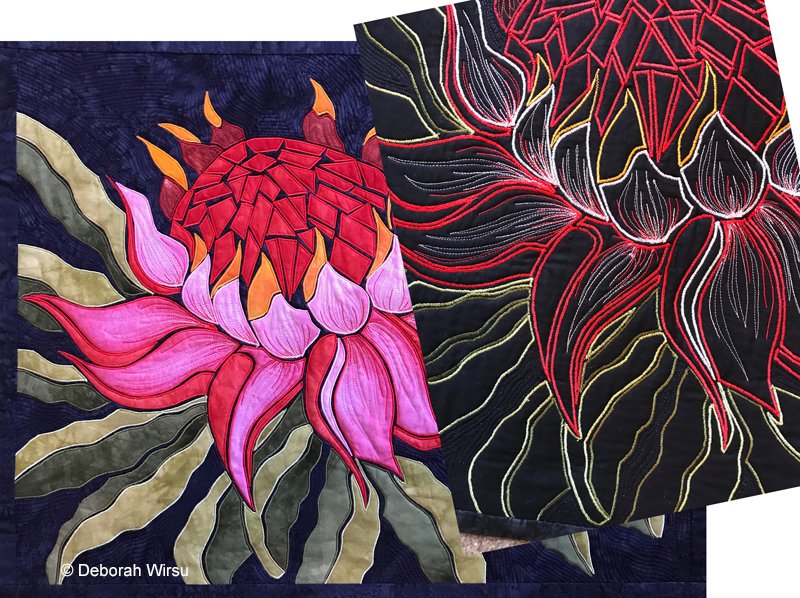
Be proud of your stitching!
Everyone comes to art quilting and creative machine stitching with a different level of experience. I urge you to display your work with a smile, even when things go wrong – which they do, from time to time. Nobody is exempt!
Also, there have been many times when I’ve found the unusual patterns of colour and stitch on the back of a quilt intriguing in their own way.
And this has sometimes led to a burgeoning of ideas for future artworks. Never discount the benefits of exploring different angles!
Backing before stitching – keep it neat.
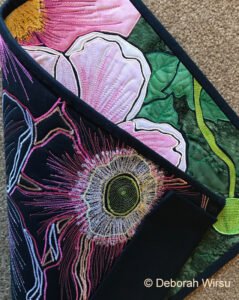
One of the most common methods for stitching art quilts is to stitch through all layers of fabric – the top, batting and backing. This method results in your stitching being visible if someone turns over the quilt to look at the back.
On those occasions when it’s essential that the back of your work is as neat as the front, use the technique of burying the thread ends in the interior of the quilt.
How to neaten your thread ends.
- Before you begin a row of stitching, insert the needle into the fabric and raise the needle again. You should notice the bobbin thread appearing on the top. Gently pull on the threads so that you have about 4″ of length. Hold these threads as you begin stitching, and then keep them out of the way or your work.
- At the end of a section of stitching, pull the quilt a little away from the machine (about 4″ again) and cut both the upper and lower threads. You now have long strands on both top and bottom.
- Using the threads at the end of your stitching: Gently pull on the bobbin thread to bring the top thread to the back.
- Thread both strands through the eye of a hand sewing needle and bury the ends in the quilt batting. Snip off any remainder.
- Using the threads from the start of your stitching: [Note: These threads are on the front of your work.] Thread them through a needle, and carefully choose an unobtrusive spot to take them through to the back. Then bury the ends in the batting and snip off any remainder.
Backing after stitching – when you need to ‘cover up’.
If you really don’t want your stitching to show, then cut a piece of backing fabric, just as you would for any quilt.
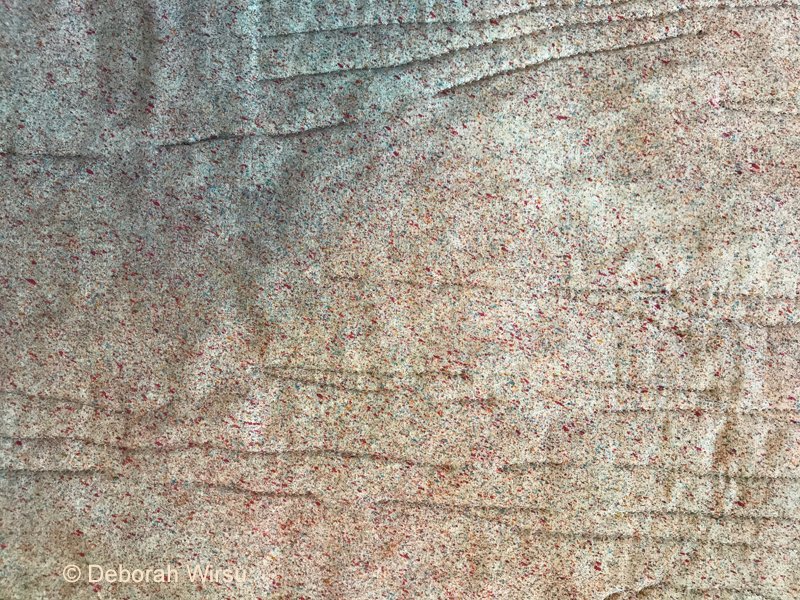
Using this scenario, you will probably have worked your art quilt on a firm base of batting and stabiliser.
Once the thread painting and embellishment process is complete, it’s time to add the backing fabric.
Pin the backing fabric to the base (back) of your work.
Pinning the backing fabric in position before finishing all the free motion quilting, allows you to complete the quilting through all layers, thus securing the layers together. This method offers a neat solution with only minimal stitching showing on the back.
Alternatively, using a hand stitching needle, select a few unobtrusive spots where you can insert a few tiny stitches to secure the backing fabric to the layer underneath. This inner layer could be comprised of stabiliser, batting, or even another backing fabric.
For small art quilts, finishing the edges with a border or binding is usually sufficient. However, a larger quilt may develop bubbles on the back if not secured in some way.
Smooth the new backing out to the edges and pin or tack around the sides. Then bind as usual.
What type of fabric should be used for backing an art quilt?
My suggestion is to stick to the usual – quilter’s cotton or quilt backing fabric.
Select a colour that tones with the front of your work, so that anyone who chooses to surreptitiously lift a corner and peek at the back is not confronted with a startling surprise of colour!
Alternatively, be a rebel and do just that!
Thread painting on a ‘traditional’ quilt
I just thought I’d touch on this situation, which occurs from time to time…
So you’re planning to make a traditional bed quilt (for example) but wish to include some thread painted elements?
How can you approach this to avoid having small areas of dense thread painting showing on the back of what is otherwise an expanse of regular free motion quilting?
Here are a couple of suggestions:
Thread paint directly onto the quilt top
When you have finished piecing your quilt top, take a piece of tear-away or wash-away stabiliser (e.g. Floriani Stitch-n-Wash) and pin or tack it to the back of the quilt top.
Secure it underneath the area you wish to thread paint. Work your stitching, then carefully cut away any stabiliser from around the edges of your design.
Then proceed to finish your quilt as usual, by layering with batting and backing fabric, and working the free motion quilting.
Create your thread embellishment as a separate piece.
Stitch your thread painted or machine embroidered elements as separate pieces. Use an embroidery hoop, or tear-away or wash-away stabiliser for this. Once your embellishment is complete, carefully cut any fabric away from the edges and mount the embellishment on your quilt top, using either hand or machine stitching.
Tips for Backing Thread Paintings and Thread Sketches
Thread sketches and thread paintings may present different challenges when it comes to backing and finishing.
So how do I choose what to do?
Binding
There are times when I elect to bind my thread paintings – both large and small.
To do this, I choose between a traditional binding with a border or an invisible faced binding.
Use regular quilting fabric for the back, cutting to size and pinning around the edges before adding the binding or edging. Choosing a toning or matching fabric colour creates a professional appearance.
Alternatively, simply straighten and trim your work, and use a decorative stitch to finish the edges.
mounting
Both art quilts and thread paintings can be mounted on artist’s canvas. These canvases are readily available.
All you need to do is stretch your work around the sides of the canvas and secure to the back using woodworking staples or upholstery pins.
Mount on card or felt.
Turn your small pieces into postcards using firm cardstock. The card can be either glued or stitched to the back of your design.
Use firm felt in much the same way as you would use cardstock. The felt will result in a more flexible piece.
Finish the edges with a decorative stitch or simple satin stitch.
framing
Many of my smaller thread sketches and thread paintings are worked with the intention that they will be framed on completion.
These designs are stitched on a base of heavy stabiliser to prevent puckering and pullup.
On completion, the edges are trimmed carefully, leaving sufficient fabric around the picture to secure the piece under the frame mat.
I also like some of my larger works to be prepared for framing. A lot of time and effort goes into making these pieces of art, so it’s my wish to see them protected from light, dust, and inquisitive hands!
To frame or not to frame? The dilemma of framing art quilts
My views on framing textile art sometimes cause controversy and disagreement. Everyone is entitled to his or her opinion!
In recent years, I’ve been pleased to observe that the incidence of framing quilts is on the rise. Yes, this is a little passion of mine!
Nobody baulks at seeing the work of painters hanging, framed, in art galleries. Sometimes we see paintings worked directly on mounted canvas. So why shouldn’t we see quilts and other textile pieces displayed the same way?
A few years ago, while visiting my city’s major gallery, the NGV (National Gallery of Victoria), I was absolutely delighted to see a textile work mounted in a frame.
Oh, happy day!
This piece wasn’t a quilt, as such, consisting (I believe) of two layers of fabric embellished with stitch and framed. Oh, yes!
Have you ever sat at home, spending weeks or months stitching a ‘tapestry’ or needlepoint work? How are these usually finished? Framing, of course. So why not quilts?
I do believe we will see more and more instances of people framing their quilts. Not only are they easier to hang on the wall, using just a simple picture hook, but are also easier to care for and protect from the ravages of light and dust.
I confess I do get excited when I spot framed quilts on display at major quilt exhibitions.
What I long for, however, is the day when framed quilts are accepted as entries in quilt competitions.
While I’m well aware that the stitching skills of the artist are being judged in a competition, I take the opinion that if the front – i.e. what is on display – looks good, and there is no evidence of poor finishing, then what does it matter if the back is not visible?
I know there will be many dissenters to my opinion. That is fine!
Which backing technique will you choose?
All this brings me full circle, back to your decision on how to finish your work.
Be guided by:
- Personal preferences.
- How the finished piece will be used or displayed.
- Entry requirements for exhibitions and competitions.
- What you deem essential in the finishing process.
Whichever path you choose, be proud of your work.
Taking the time to finish a project well, regardless of whether the back will be seen or not, will leave you with a warmer glow than knowing you are hiding something!
Thank you so much for this article. I thought I was alone in not knowing the “proper” way to display a wall quilt. I always do a little thread sketching on every quilt I make. Once or twice I have attached a second backing to hide some unhappy stitching.
I really can’t buy your new book Art Quilt Finishing Essentials. The cost of having it shipped to my Canadian address through Amazon is sky high.
Thanks again for sharing your incredible talent.
Marsha
Hi Marsha – I’m glad you found this article useful – wonderful! I believe we should display our work as we feel best. Each circumstance is different.
And yes, postage and currency conversions can be a problem! I understand.
🙂 Deborah
Hello Deborah,
Thank you for sharing. I have a growing collection of thread art and I am happier to have them framed and after all the work that has gone into it, it just finishes it off beautifully. Thread art is so engrossing and yes sometimes, frustrating, but so unique.
Thank for for sharing your tips and experience.
Fiona
Scotland
I agree, Fiona … framing is perfect for many different types of thread art. And it’s definitely increasing in popularity. I agree about the frustration, too! Thread painting is not something to be rushed!
🙂 Deborah
As always an insightful article, Deborah. Thank you for sharing your thoughts and tips on this subject.
Thank you, Gwyneth. It’s one of those topics that we often avoid as the front of our work seems so much more important! I’m glad you enjoyed the article.
🙂 Deborah
Hallelujah Deborah!
I frame, stretch, or apply my ART on canvas as do other medium artists. In my opinion the word “quilt” (our work is not functional) should be removed. Our art should be described as thread on cottons, silk, satin, painted, collaged etc. No one objects to painters who describe their work e.g., oil on board, pastels, watercolor on paper etc.; my art is not a quilt!
When entering a contest I must submit to the “art quilt” category…I’m depending on SAQA to eventually edit this problem….a global movement!
NB: who looks at the back of a painting?
Spot on, Judy! Our work is ‘art’ – no more, no less. Thank you for your support!
When I visited Paris (around 10 years ago), the Paris Museum of Modern Art had in its collection a contemporary painting that was, in effect, depicting a ‘pieced quilt’. I remember writing an article at the time on the topic, along the lines of: ‘If this painting was a quilt, would it be on display in this gallery?’.
This has been a hobby horse of mine for some time!
Let’s hope there is progress soon!
Deborah
Many of my art quilts have silk ribbon embroidery on them. It is impossible to hide these knots on the back of the quilt. When I make a quilt like that, I make a larger quilt to lay behind it. It is usually made with beautiful hand overdyed fabric and quilted in a very simple design. I like the look of the art quilt just sitting on the backing quilt so I start stitching it to the back quilt in the center with small stitches that go through the back quilt and just through the backing of the top quilt. I stop several inches (depending on size of the quilt) from the edges so that the top quilt appears to just be sitting there. This method has been well received by judges at quilt shows. They understand the problem with the silk ribbon knots and they still have a look at a completed back of a quilt to judge.
Hi Barbara – You have devised a great solution to the problem of the silk knots. Thank you for sharing your experience with how you do it, and also how it is received at quilt shows. I would have been disappointed if they had rejected your method!
Deborah