Discover the joys of free-motion embroidery with these 10 Top Tips for Successful Free Machine Embroidery that will get you up and running in no time. They may even solve a problem or two, if you happen to have already encountered any!
Regardless of whether you choose to call this technique Free Machine Embroidery, Thread Sketching, Thread Painting, [or any other name], using this technique allows you to be as creative as you like.
And being creative is what we’re all about!
When you use your sewing machine like a pencil to draw or paint with thread, you are entering a wondrous world where almost any effect is possible.
Be open to ‘going with the flow’ – letting your stitching follow its own path.
In this way you’ll achieve wonderful – and interesting – results!
At Thread Sketching In Action, my goal has always been to help creative people (Yes, you!), embrace your creativity so that your work is uniquely ‘yours’.
I believe it is so much more fun to tread your own path and find a style that you can love and embrace. In this article, you will learn how easy it is to make progress in successful free machine embroidery and take your creative work to a new level.
Sure, you might need a little guidance along the way (that’s where I can help!), and with just a little time and practice, you’ll be creating fibre art you can be truly proud of!
10 Top Tips for Successful Free Machine Embroidery
10 Top Tips for Successful Free Machine Embroidery will give you some great ideas for injecting a little (or a lot!) of your own personality into your work.

- 10 Top Tips for Successful Free Machine Embroidery
- 1. Set up your machine for successful free machine embroidery
- 2. Fabric choice makes a difference
- 3. Embroidery thread: Choose wisely
- 4. Stabilise your fabric for free machine embroidery!
- 5. Draw, paint, or print your design
- 6. Check your sewing machine tension
- 7. Choose an appropriate stitch type
- 8. Stitch direction and regularity
- 9. Are you puckering up?
- 10. The 3 P's: Practise, Practise, Practise!
- FAQ
- Overview
[Disclosure: Please expect that some (not all) hyperlinks are affiliate links, which means I may receive a small commission (at no further expense to you) if you click through and purchase the product. This is one of the ways I support myself and continue to bring you free content and information. The decision about whether to buy a product or not is completely up to you.]
1. Set up your machine for successful free machine embroidery
We all know that preparation is key to the success of just about anything we do in life.
And free motion stitching, whether it be thread sketching, thread painting, free machine embroidery or traditional free motion quilting is no different.
Set up your machine correctly from the start and your machine embroidering experience will be trouble-free!
Your sewing machine

Most domestic sewing machines are capable of free motion stitching!
Even if you’re on a budget, there is no need to feel left out of this wonderful technique.
Just make sure your machine is capable of having the feed dogs lowered, and a free motion foot fitted.
The feed dogs
The feed dogs are the little ‘teeth’ underneath the needle. When they are disengaged (using a switch or electronic touchpad) they will no longer move up and down as you stitch. This allows you to move the fabric in any direction you like.
The free motion foot
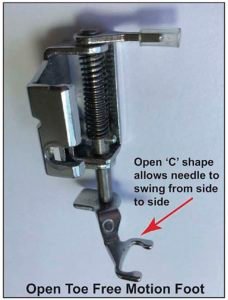
One essential item for doing free machine embroidery is the free motion foot.
Not all machines come with a free-motion foot amongst the standard fittings, so you may need to contact your sewing machine supplier to get one.
Fitting a free motion foot to your machine and dropping the feed dogs allows you to take control of stitch direction and how fast or slow the fabric moves under the needle. Most of us are taught to sew in straight lines and it can be challenging to break this habit.
Once to get the feel of taking control and moving sideways, up, down, angles, circles, squares, squiggles, as well as more formal free motion designs, a whole new world of possibilities opens up! All it takes is a little practice.
There are many types of free-motion foot. In my opinion, the easiest to start with is the Open Toe Free-Motion Foot.
When using the free motion foot, remember to lower the feed dogs and alter the stitch length setting on your machine to zero, or as close to zero as it will go.
[Note: Altering the stitch length is not always necessary. However, if you’re a beginner I highly recommend doing this.]
TOP TIP!
If you are a newcomer to free-motion stitching, head over to my free video tutorial at How to set up your machine for free-motion stitching to get started.
Choose the right needle
Choosing the best needle for the job can make a huge difference to your results. To some extent, it’s a matter of trial and error, to see what suits you best, but keep in mind that there is a vast range of specialty needles available, each with a specific purpose.
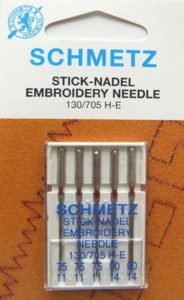
My favourite for free machine embroidery is a Machine Embroidery needle.
Occasionally I will use a Top-stitch needle, Quilting needle, or Metallic thread needle – determined by the work I’m doing.
Which brand?
Needle brands are also often a personal preference. However, it’s important to buy good quality needles. Anything else will lead to frustration!
My favourite brand of needle is Schmetz – great quality needles that won’t let you down.
The needle size you choose will vary according to what you are working on. Once again, your sewing machine manual should offer some guidelines about needles.
For most free motion work I find that needles ranging in size from 75/11 to 90/14 are the most appropriate.
Always make sure the needle is sharp. Thread sketching can dull the point of a needle very quickly, so always be sure you have a supply on hand. A ‘dull’ needle can quickly lead to tension problems and fraying thread.
2. Fabric choice makes a difference
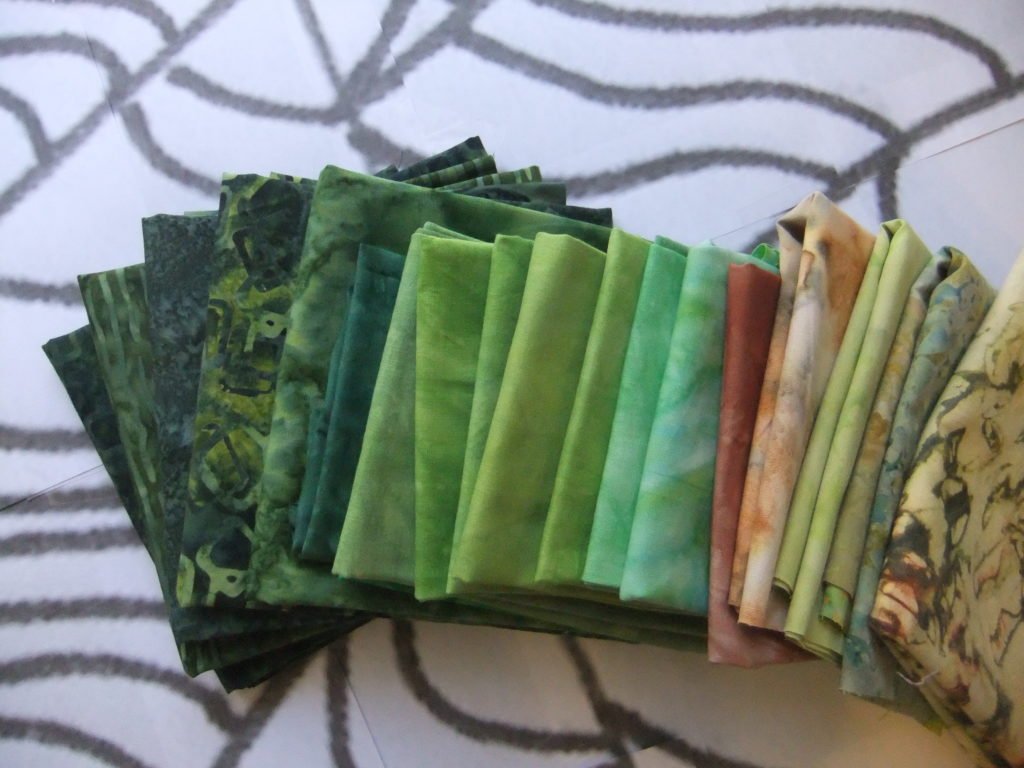
Choosing fabric
We all know that the fabrics we choose greatly influence not only the appearance of our work but also how easy (or not!) the stitching process is.
- For simplicity, opt for 100% cotton fabric.
- Are you seeking elegance? If so, then silk or shantung will add some glamour to your work.
- For texture, try fabrics like burlap, velvet, corduroy, or faux fur.
But what is the best (a.k.a. the easiest) fabric to use for free machine embroidery?
100% cotton fabric is the easiest to work with.
There are many ‘weights’ of cotton fabric appropriate for free machine embroidery. Once again, your choice will likely be determined by what you want to use your project for, once complete.
Often, you’ll find that regular, sturdy quilter’s cotton is a perfect choice. At other times, you may like to use something lighter.
Regardless of weight, try to choose fabric with a high thread count. I recommend a thread count of at least 200. This means that the fabric has quite a tight weave – the looser the weave, the less stable the fabric will be, and the more liable to puckering or distortion.
In many situations, you will also need to employ either a firm stabiliser or an embroidery hoop to prevent pull-up.
And don’t be afraid to use gorgeous fabrics, such as silk. If correctly stabilised, silk is also easy to stitch.
3. Embroidery thread: Choose wisely
Just as your choice of fabric influences the look of your piece, so does your choice of thread.
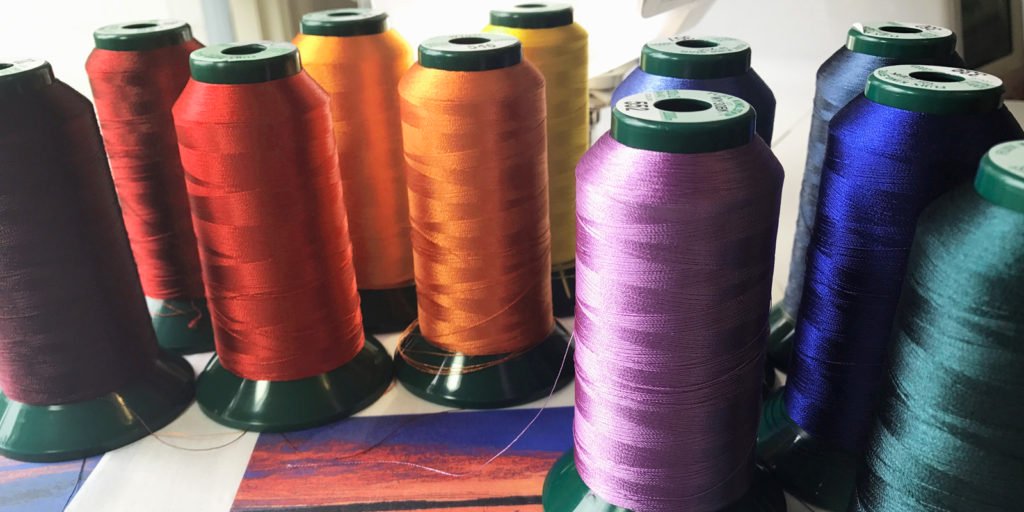
While it’s possible to use almost any type of thread for free machine embroidery, investing in a good-quality thread will result in consistent and fabulous results.
- Heavy gauge threads will fill areas faster and create more texture, while finer gauge threads are wonderful for areas that need dense shading or blending of colours.
- Shiny or glossy threads are wonderful for thread sketching. But if the glossy look is not your style, then go for a matte cotton thread.
- Variegated threads come in a huge range of colours. Wonderful effects can be achieved with variegated thread.
- Metallic threads add exciting highlights but can be challenging to use – be sure to practice with metallic thread on another quilt sandwich first.
Thread Weight
When doing free machine embroidery, the most convenient thread weight to use is 40-gauge machine embroidery thread. However, if your work is going to be very delicate, fine, or densely stitched, you may prefer to try a finer thread.
Top quality brands of thread include:
TOP TIP!
For a detailed review of machine embroidery threads, read this: Best Machine Embroidery Thread for Free Motion Stitching.
4. Stabilise your fabric for free machine embroidery!
If you want your free machine embroidery or thread painting to be trouble-free and look stunning, then ensure that the surface you are stitching on is stabilised before you begin.
Starting out with the right stabiliser will help you avoid problems as you stitch. But with so much choice, selecting the best stabiliser can seem overwhelming.
Fear not! Although there are stabilisers to suit every type of project, once you have found two or three stabilisation methods that work for you, there will be no need to fret about it any longer!
Choosing a stabiliser

Begin by giving some thought to how you intend using your completed project.
Is it a stand-alone picture, or an embroidered or thread painted picture on a larger quilt?
Is your design serving as an embellishment on a larger work, or an entire picture in itself?
Do you intend using batting as well?
The answer to these questions determines the type of stabiliser you will need to use.
Stabilisers vary from very light and filmy tear-away or cut-away stabilisers, to soluble stabilisers that wash away in water, to very heavy and stiff stabilisers that will secure even the densest of stitching.
And they are also available in fusible and non-fusible varieties, as well!
Of course, you always have the option of using a hoop, if you prefer to work that way.
A brief guide to choosing stabiliser:
Light or minimal thread sketching: Use a light fusible stabiliser, tear-away stabiliser or an embroidery hoop. If you’re using batting then you may not need any stabiliser at all!
Medium or large art quilt that will be free stitched all over: Use a medium weight stabiliser. Once again, there are times when just using batting is sufficient.
Stand-alone picture intended as wall art: These can be as stiff as necessary, so use a medium-to-heavy weight stabiliser.
Densely stitched thread paintings require a firm stabiliser. Alternatively, a tear-away stabiliser and hoop (very firmly secured) can be used.
Press and smooth out all your layers, so that there are no lumps or wrinkles (unless you want these included as a design feature!).
Pin, baste or fuse the layers securely so they don’t shift as you work. Taking the time to secure the sandwich will save you much frustration later.
Using an embroidery hoop
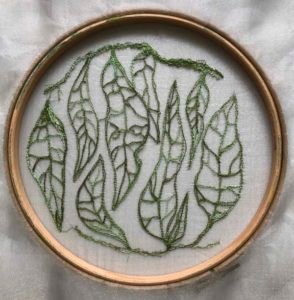
Embroidery hoops are a viable option for stabilising in many situations.
The most important factor to remember when securing your fabric in the hoop is to make sure the fabric is taut, and not distorted. And be sure to tighten the screws securely to prevent movement.
TOP TIP!
![Creative Thread Sketching [2nd Ed] - by Deborah Wirsu [ebook-paperback-hardback]](https://threadsketchinginaction.com/wp-content/uploads/2023/03/TSIA-2nd-ed-books-CTS-1024x683.jpg)
A handy reference book with everything you need to know to get started in thread sketching, thread painting and free machine embroidery.
All your questions answered!
Creative Thread Sketching: a beginner’s guide. [2nd Edition]
Available from Amazon or your favourite online bookseller.
5. Draw, paint, or print your design
If the mere thought of ‘drawing’ freehand with your sewing machine fills you with terror, you are not alone!
The good news is that you don’t have to work that way.
When working a free machine embroidery design, a majority of people will mark the intended design on the fabric before they begin.
For some people, this may be a lightly-sketched guide, while others may elect to print or trace their design onto the fabric.

If you elect to go down the painting or printing paths, then you will need either fabric paints or a printer in order to get your design onto the fabric.
But most often, you will find yourself using a quilt marking pen of some sort. Once again, there are many to choose from, ranging from a simple pencil (can be difficult to remove) to heat-erasable markers.
You need to be careful when choosing any fabric marking pen, as some don’t live up to the promises on the pack. Although some say they will completely ‘air erase’ or ‘wash out’, this is not always the case, so be sure to check on a piece of scrap fabric first.
Probably the safest product to use, in regard to its removability, are chalk quilt markers, as the chalk will brush off or wash out.
My preference (in most situations where I need to use a marker) is the Pilot FriXion Erasable Pen.
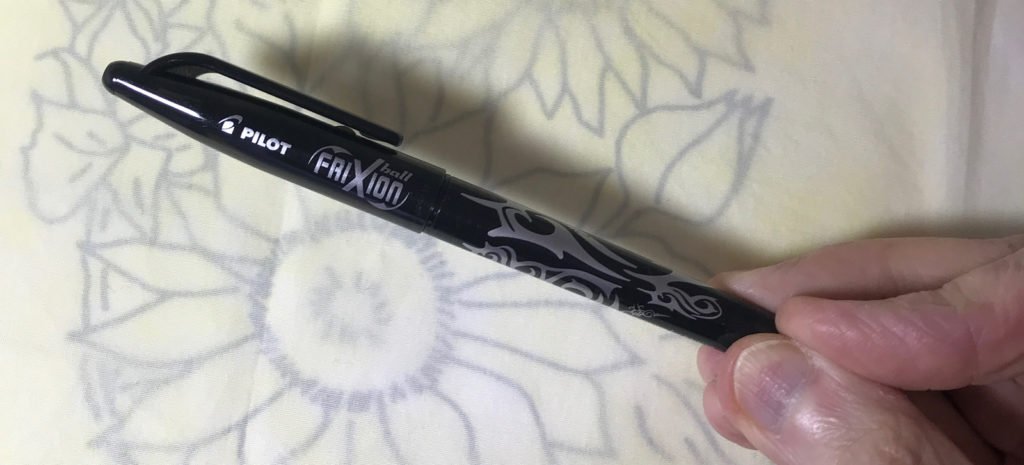
However, even with these, care needs to be taken.
Keep in mind that these pens were not designed to be used on fabric, yet thousands of quilters and embroiderers the world over have found them perfect for many of their needs.
Once you have drawn your design on the fabric, simply pressing it with a warm iron will erase the markings!
Nevertheless, I urge you to do a test run first. I have occasionally found that a very faint line is still visible on some fabrics, even after pressing and ‘removing’ the lines. However, if you plan to completely cover the lines with stitch then this should never be a problem.
6. Check your sewing machine tension
Everyone encounters problems with tension at some time in their stitching ‘career’.
The key to understanding tension and getting it ‘right’ lies in discovering what can cause tension problems, as well as how different weights of fabric or number of layers affect your stitching.
If your machine is well maintained and calibrated to factory settings, you should rarely experience any problems with tension.
Occasionally, when using different weight thread in the top and bobbin of the machine, small adjustments may be necessary to get the stitching very even on both sides of your work. As with all things, test it first!
If tension issues do arise, then there are some things to check before altering either the upper thread tension or the bobbin tension:
Are you using the same thread (or the same weight of thread) in the top and bobbin? If your machine is correctly maintained, problems should be rare.
If using different weight thread in the top and bobbin, then make sure both are good quality thread. Do a test-run first and make small adjustments to the upper thread tension until you’re satisfied.
Check that your needle is in good condition. A nicked or dull needle can play havoc with your tension.
Do you have a build-up of fluff or lint in the bobbin case?
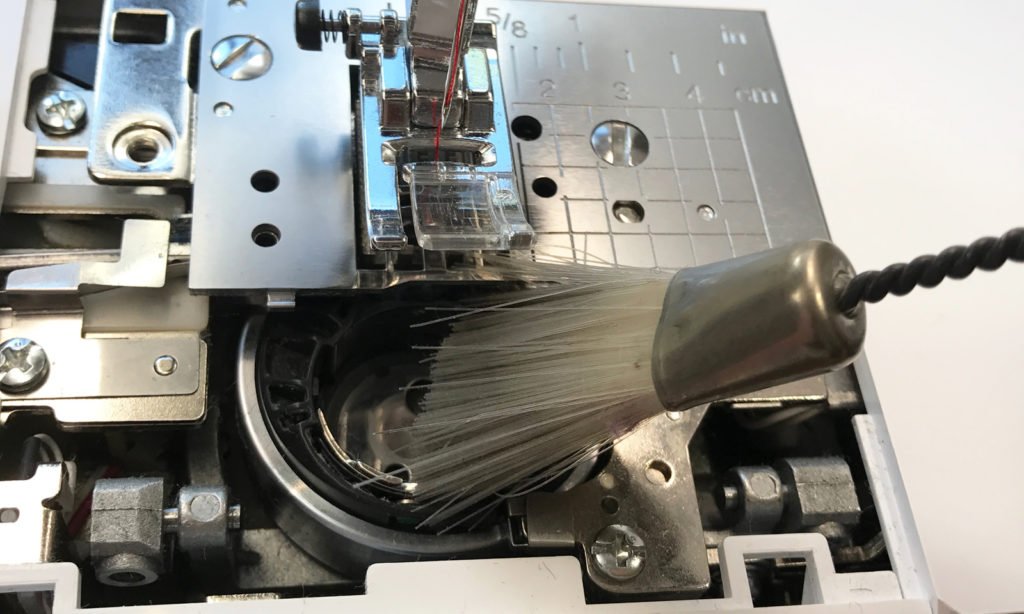
It’s amazing how a bit of lint will result in broken thread or poor tension.
Remove the stitching plate and use a small brush to clean out the entire bobbin case area. Magically, problems often disappear after taking this simple action.
7. Choose an appropriate stitch type
As a free machine embroiderer, there are two basic (but essential) stitches for your work, these being free motion straight stitch and free motion zigzag stitch.
Depending on your style and projects, you will find yourself using both of these stitches.
This little free machine embroidered design of a Superb Blue Wren is worked entirely in free motion straight stitch.


On the other hand, the Red Berries are worked entirely in free motion zigzag stitch.
It’s easy to see the different effect each of these stitches produces.
8. Stitch direction and regularity
Now, I know how easy it is to get frustrated trying to keep your stitching even. And there are certainly times when regular, even stitching is essential.
But keep in mind that, often, the length of your stitches really doesn’t matter very much, as long as you are achieving the effect you want.
Stop worrying about whether your stitches are too long or too short. There is a way to use every kind of stitch. And, of course, your stitching will improve with practice.
When starting out it can take a while to learn to coordinate your feet and your hands. The natural inclination when learning is to stitch more slowly if you find the stitch length is irregular, but this is often the wrong thing to do!
The trick is to speed up the machine (pressure on the foot pedal) – just a little – and slow down your hand movement.
By doing this, you’ll avoid skipped stitches (which tend to happen when stitching too slowly), poor tension (ditto).
The result will be more even curves, avoiding some of those ‘angular’ circles that can so easily occur, and more regular stitch length.
And don’t think that you need to use a stitch length regulator for creative free machine embroidery. Sure, they can be handy if you’re working more formal free motion quilting designs, but for creative free machine embroidery, a little irregular stitching adds interest and texture and can be made into a feature of your work.
Create interesting effects with free motion zigzag stitch
Did you know that wonderful effects can be achieved by stitching in random directions?
Often, there is no need to keep all your stitching aligned in neat rows.

With free motion stitching, you can use different stitch direction to create texture, realism and depth in your work.

- Think about whether you want to create a photo-realistic portrait, or a more Impressionist-style thread painting.
- Use short and long stitches.
- Change the direction.
- Change the colour.
- Layer and mix colours, just as you would when working with paint.
- Vary the size of your stitches, too. Different sizes lead to different results.
- Experiment!
- Break the rules!
9. Are you puckering up?
There is nothing more frustrating than preparing a beautiful background or surface on which to stitch, only to find that, as you stitch, the fabric draws up, puckers, bends, bubbles and buckles and leaves you with an ugly, lumpy and uneven surface.
So how can you avoid puckering:
- Before you begin, check that your work is thoroughly stabilised. Unless you’re working on a single layer quilt top, err on the side of more stabiliser rather than less.
- Select base fabrics that have a higher thread count. These are easier to work on and will ‘pull up’ less than lighter or sheer fabrics.
- Are you aiming to do a lot of dense thread painting or embroidery? If so, then use a finer thread, e.g. 40-, 50- or 60-gauge (and don’t forget to check that stabiliser!).
TOP TIP!
![Complete Guide to Stabilising [2nd Ed] - by Deborah Wirsu [paperback]](https://threadsketchinginaction.com/wp-content/uploads/2023/03/CGTS-pb.png)
Learn all about how to stabilise your project and prevent unsightly puckering and pull-up with this handy reference guide: Complete Guide to Stabilising: Your essential guide to stabilising fabric for thread sketching, thread painting, and free machine embroidery.
Available in ebook and paperback formats from Amazon or your favourite online bookseller.
10. The 3 P’s: Practise, Practise, Practise!
Go easy on yourself! If you’ve never done this before then it’s likely that your first attempts will be ‘interesting’! Learn to laugh. Learn from what goes ‘right’ and what I like to call ‘happy accidents’!
Think about how you can turn anything you consider ‘less than perfect’ into a great piece of art.
Yes, it can be done! How, I hear you ask?
Well – one of my favourite methods is simply to stitch over it all again! Add more colour, even more fabric. Create layers. And stitch it again.
Obviously, there comes a time when enough is enough, and I have my fair share of abandoned work!
The secret is to keep practising – keep exploring new horizons.
Learning any new skill or technique can take a little time, so remain patient. Have some quilt sandwiches or stabilised fabric nearby for practising.
Test out ideas, designs and styles. Test different fabrics and threads. Get used to stitching with a freestyle, relaxed hand motion.
But every time you sit down at your machine to try just one more thing, you’ll get a little more comfortable. It’s like learning to drive a car, or play the piano, or dance the tango.
It all takes practice!
FAQ
Can I use my domestic sewing machine for free machine embroidery?
In most cases, Yes! Just make sure you can lower the feed dogs and fit a free-motion foot to the machine.
Do I need a special free-motion foot to do machine embroidery?
As long as you have a basic, open-toe free-motion hopping foot, you’ll be fine. There are some ‘generic’ models available that will fit a range of sewing machine brands. Check your machine’s distributor website to find an appropriate foot model for your machine.
Do I need an embroidery hoop to do successful free machine embroidery?
The decision to use an embroidery hoop, or not, is totally up to you. Many people work both with and without a hoop, depending on what they are making. If you don’t use a hoop, you will almost certainly need some stabiliser to prevent the fabric from pulling out of shape as you stitch.
I find free-motion stitching a bit difficult. How can I overcome this?
Free-motion stitching can seem challenging at first, but it only takes a little regular practice to develop the ‘feel’ for being in control of where the fabric is going as you stitch. Don’t worry if your stitching is a bit ‘wonky’ at first – this happens to everyone! The more you practice, the easier it gets!
Where can I learn how to do successful free machine embroidery?
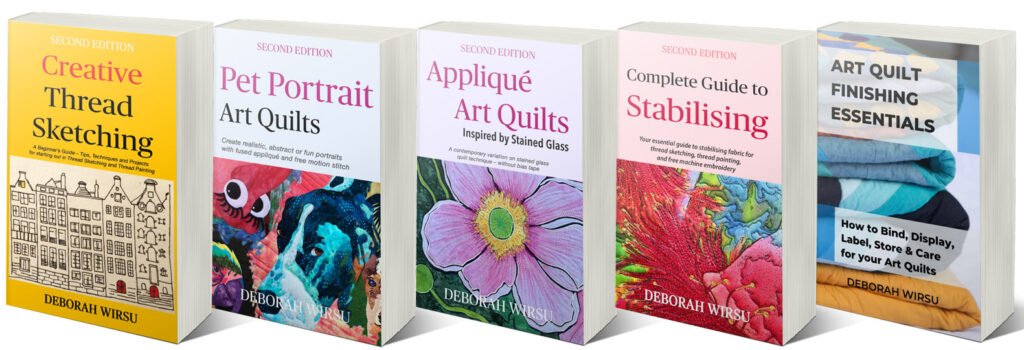
I offer a range of handy books available for purchase from Amazon or your favourite online bookseller:
Overview
Learning the art of successful free machine embroidery (including thread sketching and thread painting) is a hobby that you will never regret starting.
Sometimes taking that first step is all you need to get going, and this article gives you all the information and links you need to learn the basics.
If you’ve already tried free machine embroidery, then the suggestions here will help you resolve any problems you encounter along the way.
