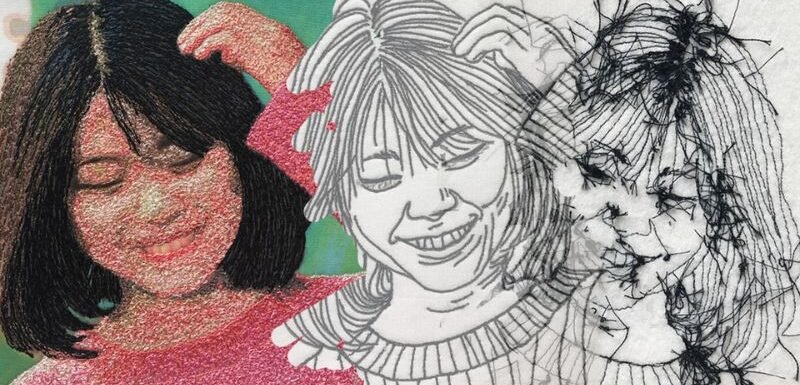
When you’re thread sketching and thread painting from photos, thinking ‘outside the box’ is a great way to get variety in your work. In this article, I explore creating Three Faces from One (photo).
- One photo interpreted 3 ways
- Face #1: Outline Thread Sketch
- Face #2: Thread Painting
- Face #3: 'Scrappy' Style
- Related posts
Affiliate Disclosure: Some of the links on this site are affiliate links. This means I may receive a small commission (at no further expense to you) if you click through and make a purchase. ThreadSketchingInAction.com is a participant in the Amazon Services LLC Associates Program, an affiliate advertising program designed to provide a means for sites to earn commission fees by advertising and linking to Amazon.com.
One photo interpreted 3 ways
Letting your mind and ideas roam free, unrestrained by convention, is a delightful way to create stitched art.
To get started on this type of project, choose a photo you like — it can be a portrait of a person, an animal, or even an everyday object like a vase of flowers or a chair.
Using your photo, make three (or more) variations of the picture. My design resulted in the following:
- An outline thread sketch
- A photo-realistic thread painting
- And a ‘scrappy’ style interpretation focusing on the back of the design
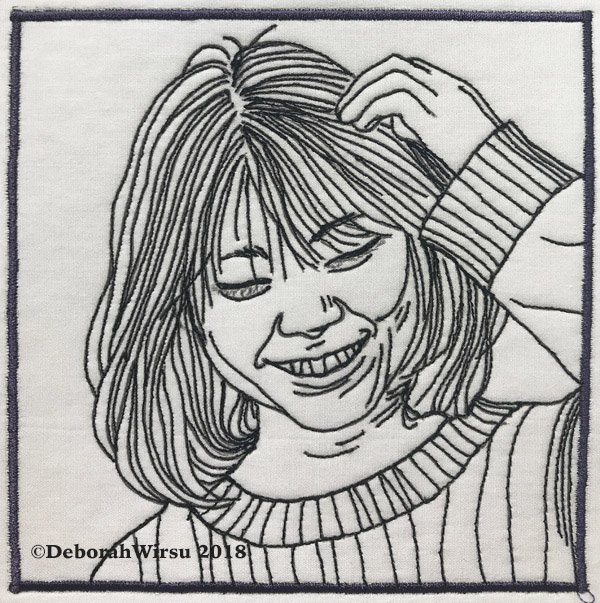
Face #1: Outline Thread Sketch

Working form the original photo, trace an outline onto paper, outlining the key elements of your picture.
Then transfer the tracing to your fabric. Using light-coloured fabric is easiest. Place the tracing underneath your fabric and use a lightbox and soft pencil or Pilot FriXion pen to copy the outline onto the fabric.
You’ll then use this tracing to stitch an outline.
My example is worked on plain, white cotton, using black rayon thread and free motion straight stitch.
This is a simple technique that anyone — even newcomers to free motion stitching — can do. The simplicity of the line and the fact that you have a tracing to follow, makes it easy to stay on course.
Minimal detail is included — just enough to display a clear reproduction. But of course, you can add as much (or little) detail as you like.
If you’re new to thread sketching, developing the control to keep the lines flowing evenly may take a little practice. But once you ‘let go’ of feeling the need to control the needle, the process will feel natural in no time.
New to thread sketching?
Creative Thread Sketching: A beginner’s guide (2nd ed)
If you want a detailed guide to thread sketching and thread painting, my book Creative Thread Sketching, is your one-stop resource for all the information you need to get started.
Face #2: Thread Painting

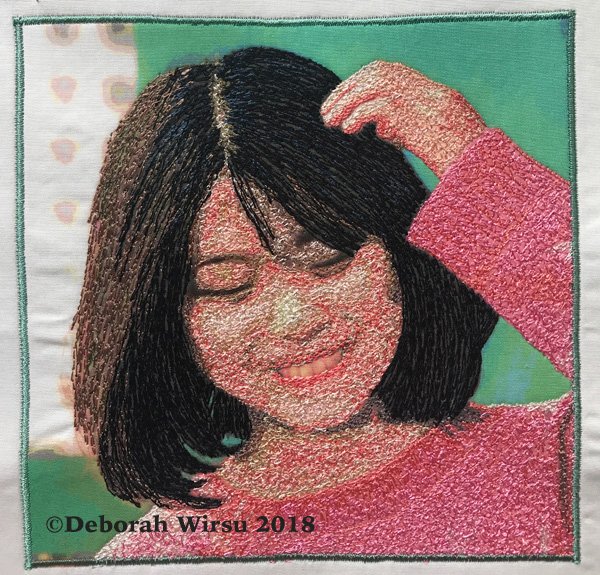
For the second face, I reverted to my original plan, which was to create a semi-realistic interpretation of the photo.
As I update this post (in 2023), I admit that this is not an example of my finest work! I remember being confronted with the problem of how to handle stitching the girl’s teeth.
Because this thread painting was quite small, I erred on the side of caution and left the teeth unstitched, being afraid that I would mess up the reasonable job I’d alread done(and the would have been the case).
If I were to re-work this design now, I would definitely stitch her teeth to make the picture complete.
Why am I disclosing my dissatisfaction with this design? ….to highlight the fact that every time you embark on a new project you learn something new. Your technique improves. You learn more about blending colours or handling difficult aspects of your project.
Using free motion zigzag stitch
This portrait has been worked entirely with free motion zigzag stitch – even the hair. I love FM zigzag stitch for the following reasons:
- Zigzag stitch gives a fullness to the line of stitching that I find harder to achieve with single lines of straight stitch.
- Because this portrait is quite small, I didn’t want to ‘overwork’ the image, which could potentially lead to a build-up of too much thread or even problems with pull-up or puckering.
- I really enjoy working with zigzag stitch 🙂
![Three Faces of One [detail] | thread sketching | thread painting | Deborah Wirsu | ThreadSketchingInAction.com](https://threadsketchinginaction.com/wp-content/uploads/2018/12/Three-Faces-of-0ne-thread-painting-detail2-Deborah-Wirsu-ThreadSketchingInAction-small-164x300.jpg)
![Three Faces of One [detail] | thread sketching | thread painting | Deborah Wirsu | ThreadSketchingInAction.com](https://threadsketchinginaction.com/wp-content/uploads/2018/12/Three-Faces-of-0ne-thread-painting-detail-Deborah-Wirsu-ThreadSketchingInAction-small-300x187.jpg)
Face #3: ‘Scrappy’ Style

Always be prepared to embrace ‘artistic licence’ when creating stitched textile art.
I must confess that this design was not intended to look the way it does!
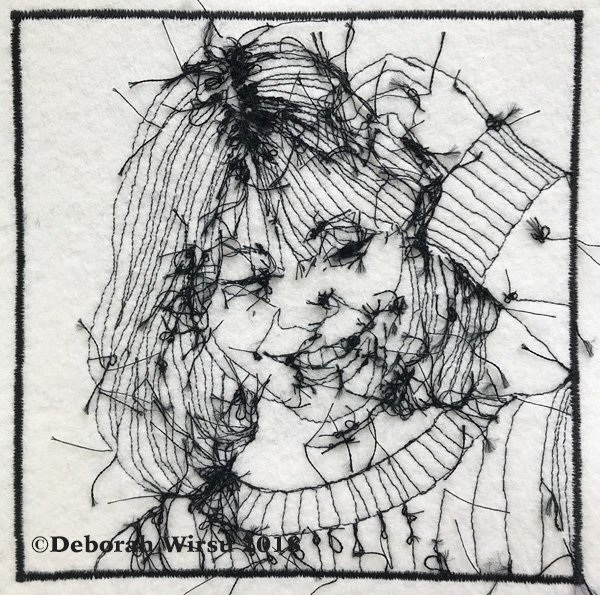
When I’d finished working the design — aiming for a scrappy stitching style — it didn’t really work. But when I turned it over and looked at the back, well, Violà!
It was exactly the scrappy appearance I’d been trying to create from the start.
So this is a technique that I continued employing in some of my work. Working from the front, but focusing on the back, has resulted in some exciting exploratory designs.
How to get this appearance
If you’re fortunate to have a sewing machine that will cut and secure the thread automatically, this scrappy look is easy to achieve. The little tags of thread left on the back of your work provide the perfect amount of ‘scrappiness’ .
If you don’t have an automatic thread cutter, then each time you stop stitching, turn your work over and snip off the threads, leaving the desired length.
Always remember that there are many occasions when the back of a project is just as interesting as the front. It has character!
So my advice is to experiment with creating thread sketches and thread paintings that focus on both the font and the back of your work.
You never know what masterpieces will be revealed!


I always look forward to your fantastic posts! That you are so passionate – not to mention exploratative! – in your work is totally inspiring?. Thank you so much for making a happy start to my day??
Hi Cath – I’m so pleased to have put a little extra cheer into your morning! And I do so appreciate your generous comments!
Thanks! That was really interesting!
Wonderful, Diane! Glad you enjoyed it 🙂
Wow! Who would have thought the back could look so interesting. My favourite is the semi-photo realistic, but must admit to loving the quirkiness of the scrappy style. It has so much more personality than the outline thread sketch. Thank you for another wonderful posting.
Yes, Bobbie – I’m with you in my favourite being the ‘realistic’ one (and that was what I originally set out to do), but there is something about No 3 that tickles me a bit!
Hi Deborah, I really loved the third interpretation and was so interested to hear how you had achieved that random rough sketch look. Very clever. keep up the good work and thank you for sharing what you do, love it! Peg
Thank you Peggy. Yes, it’s interesting how the unexpected can be so appealing!
Very new to thread sketching, and only yesterday I tried thiis. It was’t very good but for a first attempt not too bad. I made it far too small though.
Having now seen yours, I have something to aim for so will keep trying.
Like you I find No. 3 very appealing.
Hi Sandra – I’m glad you like No 3 – I do, too! I’m glad to hear you’re giving threa painting and sketching a go – I found I just needed to keep chipping away. Really tiny works can be challenging – try to find a ‘happy medium’ between large and small, as too large can be overwhelming at first.
What an unusual idea , I am so looking forward to having a go. I do love your work
Yes, do give it a go, Pauline! Thank you for your lovely comments.
Brilliant! I always find it difficult to get the features right to recognise the person, I’ll keep practicing!
Hi Carole – I, too, found features difficult at first (and I still don’t always get it right!) – we can all progress with practice. 🙂
Wow! They look fabulous. I have done some thread drawing, but nothing like that. I will have a go at sketch one, but am pretty rubbish when it comes to adding colour to things.
Hi Margeurite – glad you’re going to give the outline stitching a try. And don’t doubt your abilities in other areas – sometimes we (me included) just need a push in the right direction with a helpful tip or two.
Hmmmmm…I’m not a lover of the zig zag method, I have less control layering color and controlling curves. Having said thaaat…you noted having a knot/cut option. I’m thinking about the new Bernina series…not embroidery but the one with larger bobbin and cut option. I currently have a small Bernina with a Bobbin finger that I like because it pulls down the top thread a bit while thread painting which I would have to give up with the bigger bobbin machines…..what’s a girl to do?
HI Judy – choosing a machine is a big decision! You seem to be weighing up all the options according to your needs. Re the zigzag for thread painting – while it has become my preferred method, there are times when I use straight stitch, for the very reasons you suggest – control.
HI Deborah – at this stage in my ‘development’, I like the clean lines of the thread sketching. I’ve been practising & gaining confidence. Thank you for all the advice and help you give through your posts.
That’s great, Christine – I’m glad you’re enjoying the process.