When you’re constructing an art quilt – especially one that has many layers and/or many separate little pieces and is not fused in any way, how can you prevent bubbles and puckering from occurring on the surface when you begin to stitch?
The answer is really quite simple!
Careful preparation of the layers and surface before even thinking about stitching.
If you fail to thoroughly secure the layers and plan your order of stitching, you run the risk of an ugly bubble appearing in the middle of the quilt, or unsightly puckers on the edges.
Looking back through some of my previous work, searching for a project where I had photographed the steps, I found this one – Fascination 1.
![Fascination 1 [complete] - Deborah Wirsu](https://threadsketchinginaction.com/wp-content/uploads/2019/01/Fascination-1-Deborah-Wirsu-small.jpg)
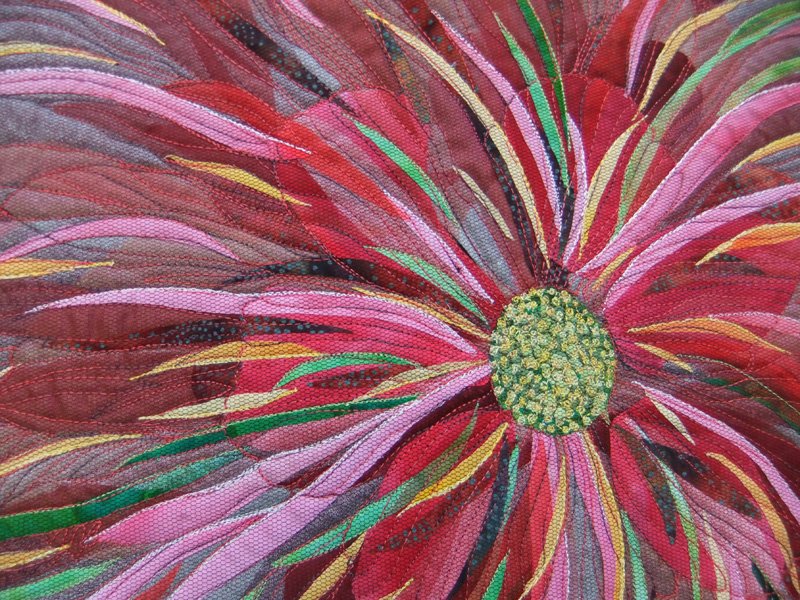
Made up of many layers, and quite a few loose pieces, this art quilt posed a potential challenge when it came to working the free motion stitching. It also incorporates batting, light stabilizer and backing fabric.
The stitching is comprised of straightforward (i.e. straight stitch) free motion stitching, including some quite small ‘meander’ stitch on the deep red background to the flower.
Gently curving lines of stitch have been carried over from the petals onto the outer border to create a sense of movement and flow.
So how was I able to work the stitching, trouble-free?
Create the layers

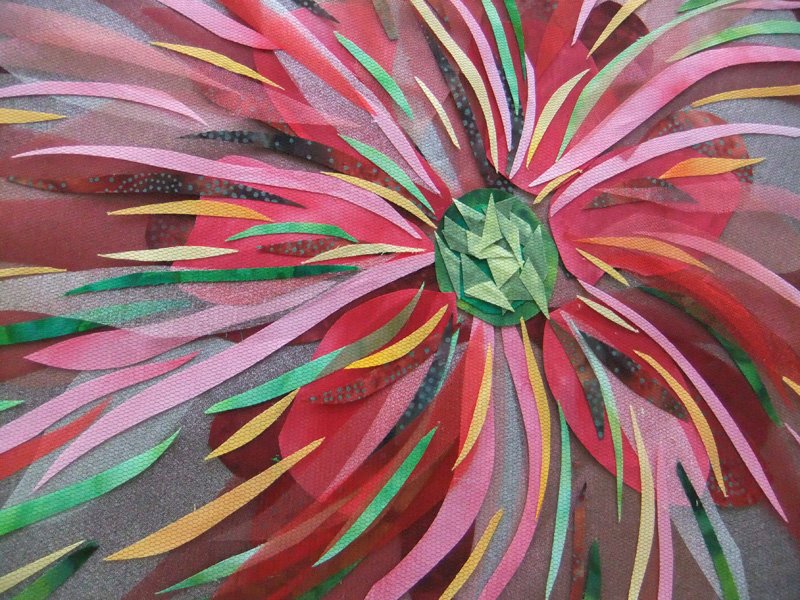
This image (above) shows the many small pieces that make up the top layer of fabric. It’s a little more difficult to see the layers below this, however I can tell you there were at least four layers, made up of hand-dyed fabrics, some commercial fabrics, and translucent sheers.
All these combine to build depth of colour and visual interest.
Secure the pieces

Because this design had so many small pieces, I opted to use tulle to create a ‘final’ top layer. The tulle covers the entire quilt, preventing any little ends from poking up, folding, or crushing as you stitch over them.
Tulle is not the only option for covering this type of project. It doesn’t always result in a satisfactory look, however in a project like this, with so many colours and shapes, the tulle visually disappeared. Perfect!
Some alternatives to using tulle are: Other sheer fabrics, organzas, etc; or even lightweight soluble stabilizer (on the proviso that you will be able to dunk your quilt in water later to dissolve the stabilizer!).
Pin securely!
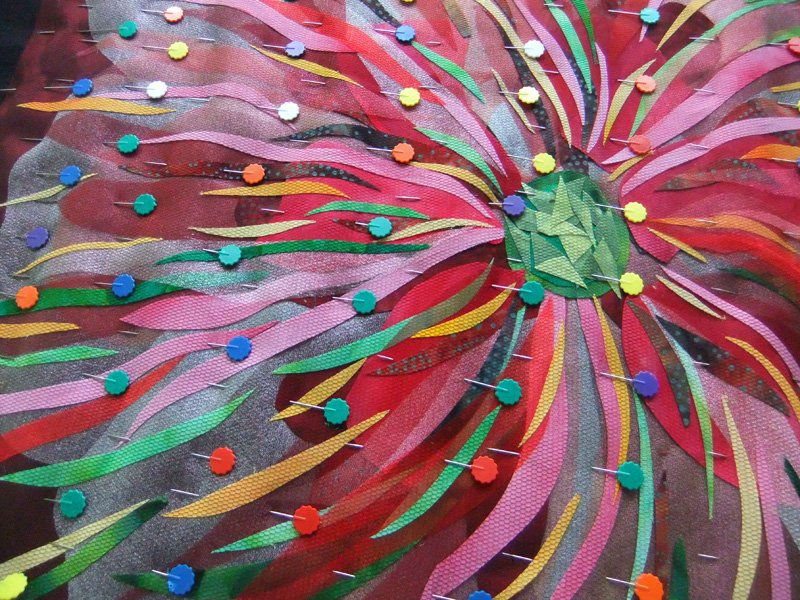
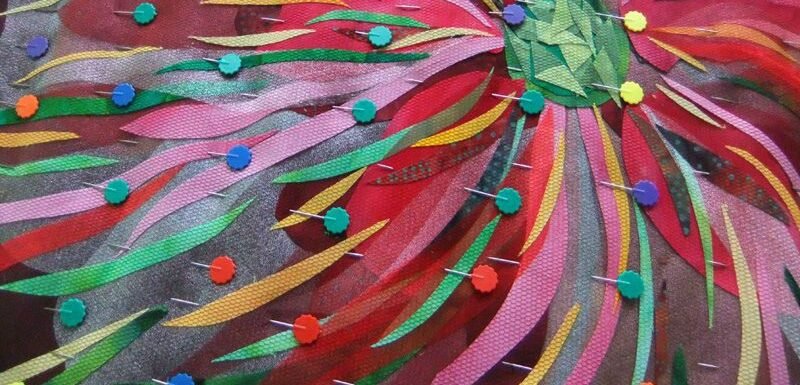
As you can see in the image above, this project is thoroughly pinned all over.
No fusing has been used at all, so the dense pinning is necessary to prevent any pieces moving. Alternatively, you could tack the pieces in position by hand. I usually find pinning works well, and takes less time!
Plan the stitching order

When working any piece like this, I generally recommend beginning more or less in the centre of the piece, and working outwards.
The only thing I left to the final step was the central stamen area, with the little knobbles of stitch. These were added after completing the other stitching as I wanted to be sure any stitch ends from the petals would be hidden underneath the stamens.
![Fascination 1 [complete] - Deborah Wirsu](https://threadsketchinginaction.com/wp-content/uploads/2019/01/Fascination-1-Deborah-Wirsu-small.jpg)
Doing thorough stabilization and securing preparation before beginning any stitching is the best way to prevent lumps, bumps, bubbles or puckering from occuring in a heavily-layered art quilt.

VERY helpful!! Thank you Deborah!
You’re welcome, Ginny. 🙂
A great tutorial, and I found this very helpful, as I thought the pieces of fabric had to be fused first. Thank you.
Hi Pam – I’m so pleased this helped you! Fusing is optional – I could have easily fused the lower layers, but fusing all the little pieces on the top would have been very fiddly! Also, too much fusing can result in the piece becoming too stiff, as well as the potential for thread shredding as you stitch.
Great pictorial and an interesting piece of art. Thank you
Thanks Bobbie – glad you enjoyed it! 🙂
Thank you! Is there a particular color of tulle you recommend that will not “shade” the overall color?
Hi Judy – I use either black or ash grey tulle, depending on the background colour. There are times when using tulle will shade your underlying work to detrimental effect, but when using a lot of pieces underneath and then a considerable amount of stitching, the shading effect is minimal.
Just wondering. What is size of this piece? It’s beautiful and inspiring.
HI Carolyn – it’s about 22″ x 22″ – not tiny/not enormous!
I love this technique – would like to do more applique type of art but always found it to be tedious. This allows me to have an applique effect without all the fuss. Great demo photos. Thank you!
That’s great Deborah! It’s nice to feel you can work freely and without restrictions.
Can you put/use to much stabiliser, when using a lot of stabiliser would you go for the heavier type – thank you for your e-mails- so helpful
HI Pat – yes! Although there are times when adding more than one or two layers of stabilizer is beneficial, care should be taken not to add too much. If you need a really firm or stiff surface, try to find one single heavier stabilizer. The problems with many layers is that they can either shift around as you stitch, or (and this is quite common with synthetic materials) is that thread may tend to shred as it moves constantly back and forth through the man-made materials – they become abrasive to each other.
Many thanks Deborah, this was very useful info and I love your quilt!
You’re welcome Josephine! I’m glad you found this useful. 🙂
This is great and useful information. Love your newsletter, Thanks
Thanks Carol – glad it was useful! 🙂