Are you frustrated with your thread sketching progress? Is your stitching wonky and uneven? Are your circles and curves pointy? If so, here is your quick guide to 5 steps to better thread sketching for beginners.
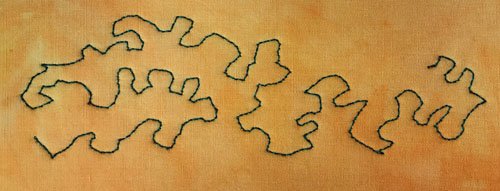
It’s not unusual for me to get emails from people asking about how long it takes to get over these early stages of wonky, pointy circles, irregular lines, and uneven stitching when starting out in thread sketching.
How long does it take?
Will I ever make it? Is it hopeless?
I well remember what it’s like to be a beginner, with my fabric slipping and sliding all over the place. And the stitching….well…need I say more? If you’ve experienced the frustration, you know what I mean!
So I’ve written a short article on helping to overcome these frustrations.
Steps to Better Thread Sketching for Beginners
I’m not sure if it will comfort you or not, but the solution usually revolves around four key elements:
- DESIRE — You’ve got this! You can do it!
- BELIEF —When those pesky doubts creep in, taking a positive view of the situation and really believing deep down that you can make something beautiful (and you can, I know it!), undoubtedly helps. It’s that whole ‘power of positivity’ thing.
- PRACTICE — Nothing great we learn or achieve ever happens overnight. I didn’t become proficient at thread sketching in a day, a week, or even a year….it’s something you just keep getting better at, the more you do it.
- DETERMINATION — Sometimes it takes effort to keep going when nothing seems to be going well. But, if you pick up the pieces, have a cup of tea (or something stronger, if you feel the need, and keep at it. You’ll be amazed at how quickly you progress.
My fist attempts at thread sketching were embarrassingly awful!
With a little internal fortitude and grit, you will get there!
5 Steps to Better Thread Sketching
Work through these basic exercises, all designed to help you gain control over the machine, rather than the other way around.
What you need
- Quilting fabric — 100% cotton quilting fabric. Cut several pieces approximately 10″ x 10″. Use plain fabric for the first exercises. For the final exercise, select a piece that has a clear design that will be easy to stitch around.
- Low loft batting and/or medium-weight stabiliser — cut the pieces 10″ x 10″.
- Backing fabric — Cut to the same size.
- Thread — 40-gauge machine embroidery thread. Use a colour that contrasts with your fabric to make it easier to see where you’re going.
- Sewing machine fitted with an open-toe free motion foot, and the feed dogs lowered.
- Pins and general sewing supplies.
Assemble several quilt sandwiches, consisting of backing fabric, low loft batting and/or medium-weight stabiliser, and your top fabric.
Secure the layers with pins to prevent the layers from shifting as you stitch.
The 5 Simple Exercises for Better Thread Sketching
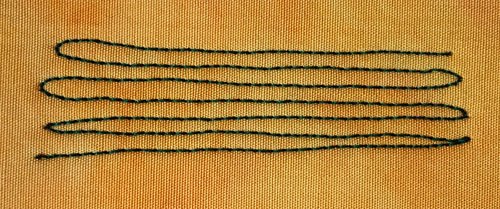
Exercise #1. Stitch back and forth in more or less straight lines.
Begin stitching straight(-ish) lines, curving around at the end and stitching back in the opposite direction. Keep the lines fairly close together, and don’t worry if the ends are all different shapes and curves—they will be!
This exercise is all about gaining control — not perfection!
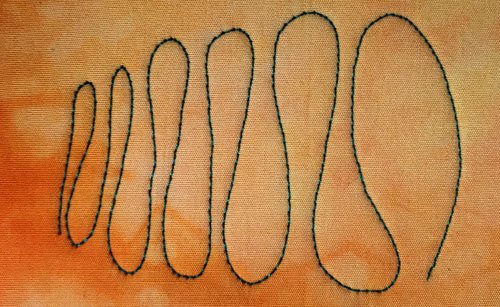
Exercise #2. Work some longer and wider lines, looping them around at the ends.
Now stitch large loops. Don’t worry if the loops are uneven—they will improve with practice. Just let the stitching go more or less where it pleases for now! Don’t try to stitch too fast.
An alternative is to stitch different sized circles or leaf shapes.
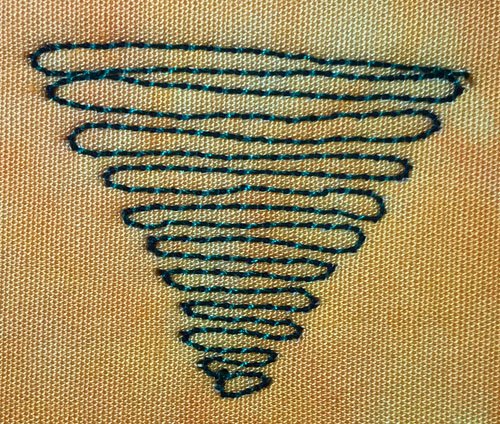
Exercise #3. Make the loops smaller and closer together.
Stitch more loops, but this time aim for more control. You should try to create a triangle shape.
Work at a moderate speed, making smaller loops at each end, and keeping the lines closer together. If it helps, turn the fabric at each end so that the stitching is always coming towards you rather than away from you—stitching ‘backward’ can be a bit tricky at first.
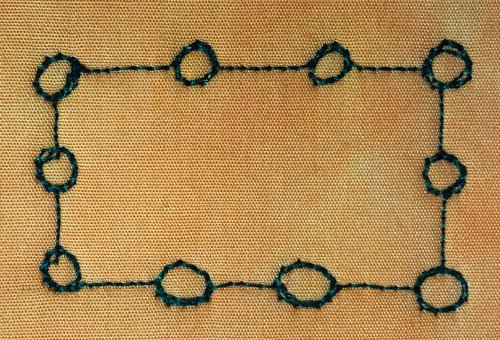
Exercise #4. Stitch a chain of lines and circles.
Stitch a small circle (around 1cm or 1/2″ diameter). Spin around each circle until you reach an exit point. Stitch a straight line, then progress into another circle. The circles will all be joined by a straight line. There’s no need to be fussy—this is practice!
A variation is to make different sized circles, linking them with wavy lines, instead.
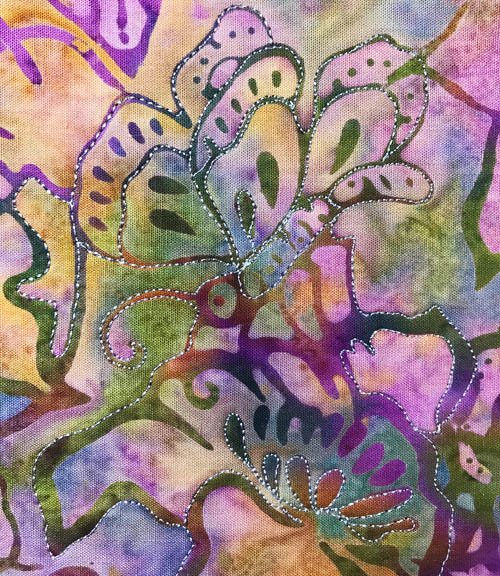
Exercise #5. Trace around some patterned fabric.
For the final exercise, choose a piece of fabric with a design that will be easy to stitch around. Commercial fabric with bold motifs, or patterned batik, (e.g. below), are great.
Stitch around the shapes, linking the stitching where necessary to avoid too much stopping and starting.
This is good practice for following pre-determined outlines.
Take your time
Don’t bite off too much, too soon!
When I started out, a blog post I read somewhere ‘helpfully’ suggested a ‘newbie’ begin by stitching their name in cursive.
I tried this (not having ever thread sketched or free motion stitched before).
Don’t try it!
I wish I’d kept that horrible little sample to show you, but I didn’t, and it would be very embarrassing!
Stick with simple lines, letting the stitching guide you at first. Gradually you will gain control over the direction and speed.
Once you’ve got that knack under your belt, you’ll be unstoppable!
Thanks for the great advice. You have simplified things to very do-able exercises.
Wonderful, Bobbie! I’m glad this has helped. It seems to have resonated with quite a number of people!
🙂 Deborah